This document contains steps for replacing the printhead in your HP printer.
Replacing the Printhead for HP Photosmart Wireless e-All-in-One Printer Series (B110)
Introduction
Ordering the printhead assembly
If you have a defective cartridge or printhead, it might be under warranty. To check the warranty on your ink or toner supplies, go to Printer and Page Yield Overview, and then review the limited warranty information for your supplies.
-
Go to HP Parts Store.If you are in Asia Pacific, the site directs you to a service center in your area.
-
Search for part number CN643A.
-
Follow the instructions to order the printhead assembly.
Replacing the printhead assembly
Follow these steps to replace the printhead assembly.
 Important: Do not remove the original printhead until you are ready to install the new printhead. Doing so might result in ink system failures. When you remove the original printhead, insert the new printhead and cartridges within five minutes.
Step one: Load paper
Follow these steps to load paper into the paper tray.
The following video demonstrates the steps for loading plain paper.

-
Lower the paper tray.
-
Pull out the tray extender, and then flip open the paper catch.
-
Tray extender
-
Paper catch
Figura : Tray extender and paper catch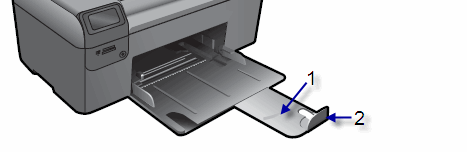
-
-
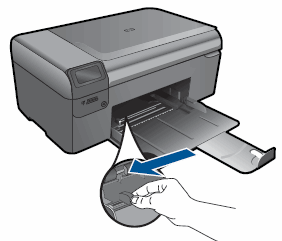
Slide the paper width guide to its outermost position.Figura : Slide out the paper width guide
-
Load a stack of plain paper into the paper tray, print side down. Slide the stack of paper forward until it stops.Figura : Load paper in the tray
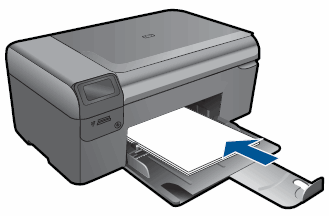
observação:
Make sure that all the paper in the stack is the same size and type and free from rips, dust, wrinkles, and curled or bent edges. -
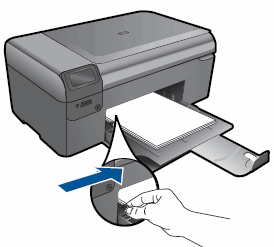
Slide the paper width guide inward until it stops at the edge of the paper.Figura : Slide the paper width guide inward
Step two: Replace the printhead
Follow these steps to replace the printhead.
cuidado:Do not remove the old cartridges until you have the replacement printhead available.
-
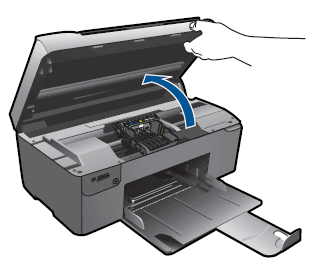
Open the cartridge access door. The carriage moves to the center of the printer. Wait until the carriage stops moving before proceeding.Figura : Open the cartridge access door
-
Press in the tab on the front of the cartridge to release it, and then pull it up and out to remove it from its slot.Figura : Remove the cartridge from its slot
-
Repeat this step to remove all of the old cartridges from their slots.
-
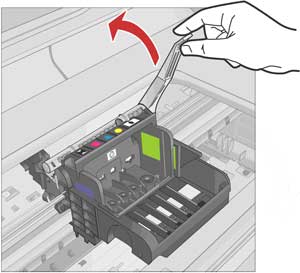
Lift the latch handle on the carriage until it stops.Figura : Lift the latch handle
-
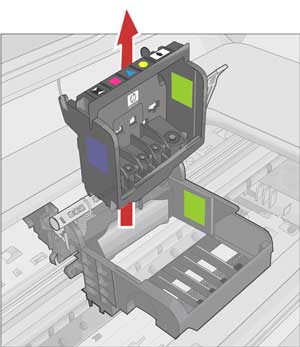
Lift the printhead straight up to remove it.Figura : Remove the printhead
-
Use the pre-moistened wipes that come with the printhead assembly to clean the electrical contacts inside the printer.Wipe from the top to the bottom of the electrical contacts, in one direction only. As the wipes become dirty, discard them, and then open new ones.
cuidado:
Do not wipe up and down or side to side, as doing so can damage the printer.Figura : Pre-moistened wipes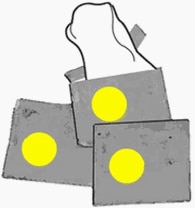 Figura : Clean the electrical contacts inside the printer
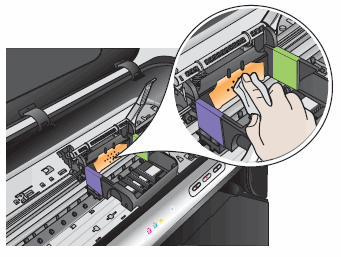
-
Remove the new printhead from its packaging.Figura : Remove the new printhead from its packaging

-
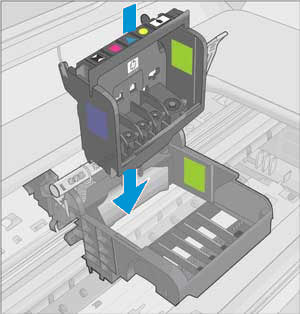
Hold the printhead upright, with the color-coded icons facing up.
-
Raise the latch handle, and then insert the new printhead. Press the printhead down lightly to make sure that it is properly seated.Figura : Insert the printhead
-
Carefully lower the latch handle before inserting the new cartridges.
observação:
Leaving the latch handle raised can result in incorrectly seated cartridges and printing issues. The latch must remain down to install the cartridges correctly.Figura : Lower the latch handle
-
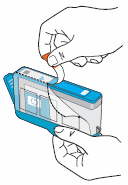
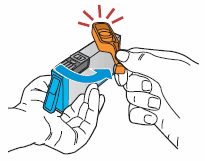
Remove the new cartridge from its packaging, and then pull the orange pull tab straight back to remove the plastic wrap.Figura : Remove the plastic wrap
-
Twist the orange cap counterclockwise to snap it off.Figura : Remove the orange cap
-
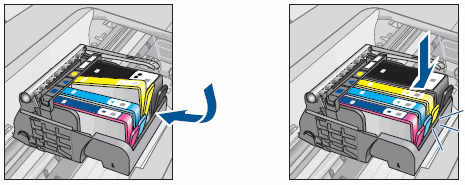
With the cartridge contacts facing the printhead, slide the cartridge into its slot by matching the colored icons on the cartridge with those on the printhead. Press down on the cartridge until it clicks into place.Figura : Slide the cartridge into its slot and then press down.
-
Repeat these steps for each cartridge.
-
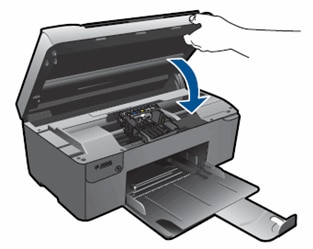
Close the cartridge access door. The carriage moves to the right side of the printer.Figura : Close the cartridge access door
-
Wait for the product to align the cartridges and print an alignment page. This process takes about 10 minutes.Figura : Example alignment page
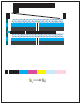
observação:
Mechanical noises during alignment are normal.
Step three: Return failed parts to HP
HP analyzes the failed parts to improve its printers in the future. If the new printhead assembly came with a prepaid mailing label and return instructions, follow these steps to return the failed parts to HP.
observação:HP does not ask that all failed parts be returned, so you might have a prepaid mailing label and return instructions. You can ignore these steps if you did not receive the return documents.
-
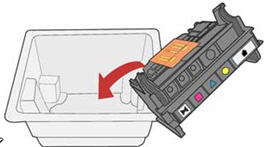
Put the old printhead assembly into the package that the new part came in.Figura : Put the failed printhead in the package
-
Peel off the lid sticker labeled ‘B’ and use it to seal the printhead assembly package.Figura : Peel off sticker B
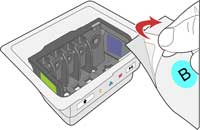 Figura : Seal the package with sticker B
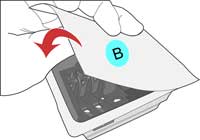
-
Use the orange caps from the new cartridges to cap the old cartridges.Figura : Cap the old cartridges

-
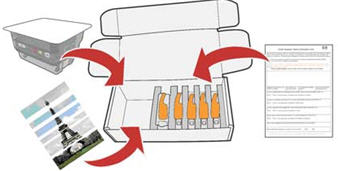
Put the old parts and the form that came with the new parts into the box the new parts came in. If possible, also include a print sample showing the issue with the old printhead.Figura : Put the old parts into the box
-
Close the box, apply the prepaid mailing label, and then put the package in the mail.Figura : Send the package back to HP
Digite um tópico para pesquisar em nossa biblioteca de conhecimento
Como podemos ajudar?

Precisa de ajuda?