The following information describes how to load paper in the high-capacity input tray, which is available as an accessory for all models. The two trays hold up to 4,000 sheets of 75 g/m2 (20 lb) paper.
HP PageWide Enterprise, HP PageWide Managed - Load paper in the 4,000-sheet high-capacity input (HCI) tray
Introduction
Load paper to the 4,000-sheet high-capacity input (HCI) tray
In addition to the instructions provided in this document, you can view the following video of how to load paper in the HCI trays:

How to Load Paper in the HCI Trays for the HP PageWide Enterprise MFP 765, 780, 785 Series
No audio. Learn how to load paper in the HCI Trays for the HP PageWide Enterprise mfp 765, 780/785 Series.
varning!Do not extend more than one paper tray at a time.Do not use paper tray as a step.Keep hands out of paper trays when closing.All trays must be closed when moving the printer.
-
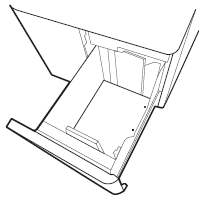
Open the right HCI tray.
obs!
Do not open this tray while it is in use.Figur : Open the right HCI tray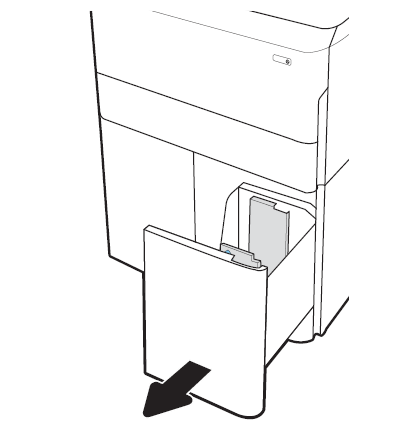
-
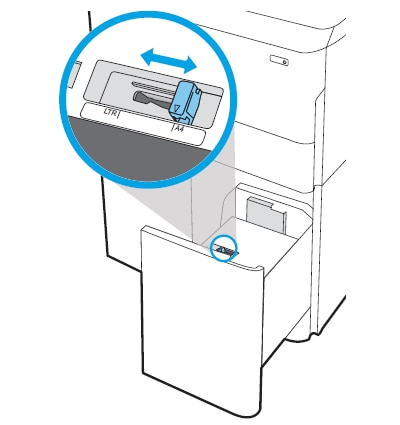
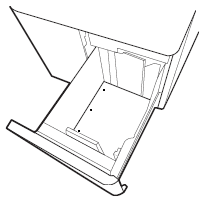
Adjust the paper guide to the size of paper being used in the tray.Figur : Adjust the paper guide
-
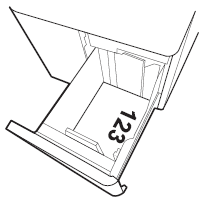
Load paper into the HCI tray. Check the paper to verify the guides lightly touch the stack, but do not bend it. For information about how to orient the paper, see the 4,000-sheet HCI paper tray orientation section below.
obs!
To prevent jams, do not overfill the tray. Be sure that the top of the stack is below the tray full indicator.obs!
If the tray is not adjusted correctly, an error message might appear during printing or the paper might jam.Figur : Load paper in the HCI tray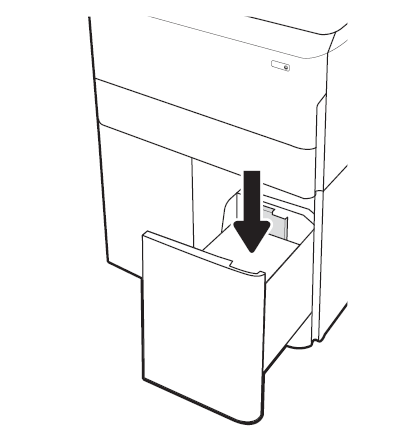
-
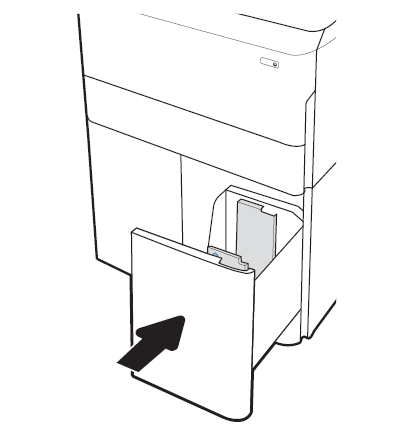
Close the HCI tray.Figur : Close the HCI tray
-
The tray configuration message displays on the printer control panel.
-
Select the OK button to accept the detected paper type and size, or select the Modify button to choose a different paper type or size.
-
Repeat these steps to load paper in the other HCI tray.
4,000-sheet HCI paper tray orientation
Position paper correctly in the HCI trays to ensure the best print quality.
|
Duplex mode
|
Paper size
|
How to load paper
|
|
1-sided printing
|
A4, Letter
|
Face-down
Top edge at the back of the tray

|
|
Automatic 2-sided printing or with Alternative Letterhead Mode enabled
|
A4, Letter
|
Face-up
Top edge at the back of the tray

|
|
Duplex mode
|
Paper size
|
How to load paper
|
|
1-sided printing
|
A4, Letter
|
Face-down
Top edge at the left side of the tray

|
|
Automatic 2-sided printing or with Alternative Letterhead Mode enabled
|
A4, Letter
|
Face-up
Top edge at the right side of the tray
|
|
Duplex mode
|
Paper size
|
How to load paper
|
|
1-sided printing
|
A4, Letter
|
Face-down
Holes at the left side of the tray
|
|
Automatic 2-sided printing or with Alternative Letterhead Mode enabled
|
A4, Letter
|
Face-up
Holes at the right side of the tray, with the top of the form to the right side
|
Use alternative letterhead mode
Use the Alternative Letterhead Mode feature to load letterhead or preprinted paper into the tray the same way for all jobs, whether printing to one side of the sheet of paper, or to both sides. When using this mode, load paper as for automatic duplex printing.
To use the feature, enable it by using the printer control-panel menus.
Enable Alternative Letterhead Mode by using the printer control-panel menus
Follow these steps to enable Alternative Letterhead Mode:
-
From the Home screen on the printer control panel, open the Settings menu.
-
Open the following menus:
-
Copy/Print or Print
-
Manage Trays
-
Alternative Letterhead Mode
-
-
Select On.
Ytterligare supportalternativ
Skriv in ett ämne för att söka i vårt kunskapsbibliotek
Vad kan vi hjälpa dig med?

Behöver du hjälp?