solution Contentsolution Content

Remove and Replace the Access Panel for OMEN by HP Obelisk 875-0xx, 870-xxx Desktop PCs

This document is for OMEN by HP Obelisk 875-0xx Desktop PC and OMEN by HP 870-xxx Desktop PC.
OMEN by HP Desktop PC
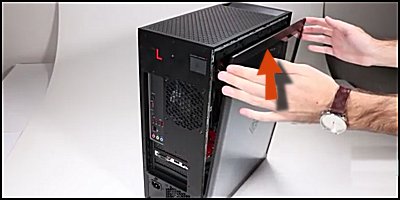
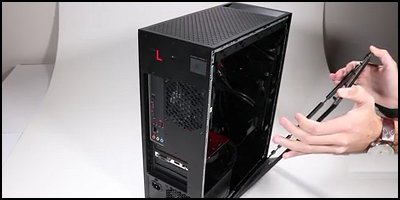
Замена панели доступа для настольных ПК OMEN by HP Obelisk 875-1000, Obelisk 875-0xx, 870-xxx
Узнайте, как снять и заменить панель доступа для настольных ПК OMEN by HP Obelisk 875-1000, Obelisk 875-0xx, 870-xxx.

Before you begin

  • Turn off the computer. Disconnect the Ethernet or modem cable. Disconnect the power cord.
  • Transfer the computer to a clear, flat, stable work surface over a non-carpeted floor.
  • HP strongly recommends the use of an anti-static wrist strap and a conductive foam pad when working on the computer.
  • Do not remove a component from its protective packaging until you are ready to install it.
  Предупреждение.
Before starting, power off the computer and wait for components to cool before starting these procedures.
  Внимание!
This product contains components that can be damaged by electrostatic discharge (ESD). To reduce the chance of ESD damage, work over a non-carpeted floor, use a static dissipative work surface (such as a conductive foam pad), and wear an ESD wrist strap connected to a grounded surface.
  Внимание!
Procedures in this document are provided by HP for qualified service agents and as a courtesy to its customers. Servicing internal components increases the risk of damaging the computer which might not be covered under warranty. Understand the risk and refer to the product's warranty before attempting to service the computer.

Removing the access panel

Remove the access panel.
Step 1
Press the internal access release button on the back of the unit to push out the top of the access panel.
Примечание.
The panel remains open without additional support.
Opening the side access panel
Step 2
Grasp the access panel on either side at the top, and then push it toward the chassis slightly...
Pushing the panel up toward the chassis
...and then lift the access panel up and away from the unit to remove it.
Lifting the access panel from the chassis

Replacing the access panel

Replace the access panel.
Step 1
Grasp the access panel on either side at the top, and then align the guide at the bottom of the panel with the bottom edge of the chassis, sitting the guide of panel onto the chassis.
Aligning the panel with the bottom of the chassis
Step 2
Push the panel toward the chassis until the metal tabs at the top of the panel click into position.
Pushing the panel back to chassis


Дополнительные способы связи со службой поддержки