HP printer not found by the HP Smart app or operating system
An HP printer is not found by the HP Smart app or the operating system. Make sure the software is up to date and the connection between your device and the printer is working.
Printer is not found or listed in the HP Smart app
Create or restore the connection to your HP printer by its connection setup type.
Wi-Fi connection setup
Check for network issues and review setup requirements if your wireless printer is not found by HP Smart.
Perform the following tasks in the order given. Return to HP Smart after each task to see if the issue is resolved.
-
Restart the printer and the computer or mobile device to clear possible error conditions.
-
Restore Wi-Fi setup mode.
-
Printers with a touchscreen control panel: On the control panel, open the Wireless
or Setup
menu, select Network Setup or Settings, and then select Restore Network Settings.
-
Printers without a touchscreen control panel: Use the control panel buttons to Restore Wi-Fi setup mode on your HP printer.
-
-
On your computer or mobile device, open the list of available networks.
-
If the network you are connected to is not yours, disconnect from the network and reconnect to your normal Wi-Fi network. Do not connect to the printer Wi-Fi signal DIRECT-xx-HP [your printer model name].
Note:A printer connection cannot be established over public or guest networks that allow guest logins used in schools, hotels, or coffee shops.
-
If the network status is not connected, connect to your network, and then check the status again. A check mark or connected status displays next to the network name when connected.
-
-
Enable additional connections on your computer or mobile device.
-
Turn on Wi-Fi (PCs only): Enable Wi-Fi even if the computer is connected to the network with Ethernet. If Wi-Fi does not turn on while using the wired connection, disconnect the Ethernet cable temporarily to enable Wi-Fi.
-
Turn on Bluetooth: HP Smart uses Bluetooth to detect the printer.
-
Enable location setting (mobile devices only): After installing HP Smart for iOS and Android, enable the location service in device settings to allow the app to use your location and Bluetooth.
-
-
Move the printer and the computer or mobile device within eight meters (26 feet) of the router or range extender, and then check the connection status.
-
Printer connection: If the wireless light or icon
-
Computer or mobile device connection: Check the network signal strength. If the wireless icon shows a weak signal status
, move closer to the router or range extender until a strong signal displays
. Walls, metal bookcases, and electronics that emit radio signals can weaken the wireless signal.
-
-
Reinstall HP Smart from your app store, and then add the printer again.
-
Open a website to confirm the internet service is working. If page load time is slow or intermittent, restart the router. If necessary, contact your internet service provider to check if the service is down.
Wired network connection setup
Check for network issues and review setup requirements if your wired network (Ethernet) printer is not found with HP Smart.
Perform the following tasks in the order given. Return to the app after each task to see if the issue is resolved.
-
Reconnect the cable to a different Ethernet or LAN port on the router, and then connect the other end to the printer Ethernet port
. Check the Ethernet port lights. The green light is steady and the orange activity light blinks when the connection is established.
Note:Some printers might not connect immediately. Wait for the Ethernet icon
or the Wi-Fi icon
and light to turn solid on the printer control panel.
-
Find your printer IP address.
-
HP Smart app: From the app home screen, click the image of your printer, and then click Network Information to find the IP address.
-
Printers with a touchscreen control panel: On the control panel, open the Wireless Summary or Network Settings menu to find the IP address.
-
Printers without a touchscreen control panel: On the control panel, press the Information button
to print an Information Report, and then find the IP address on the printout. Printing reports from the control panel can vary by printer model.
-
USB connection setup (Windows)
If your USB printer is not found by the HP Smart app, make sure Windows is up to date, check for USB connection issues, and then reinstall the app.
Note:
An HP+ or eligible printer cannot enroll in HP Smart Advance or Instant Ink using a USB connection. Use the HP Smart app to set up the printer over a Wi-Fi or Ethernet connection to access advanced features. For more information, go to HP printer setup (HP Smart app).
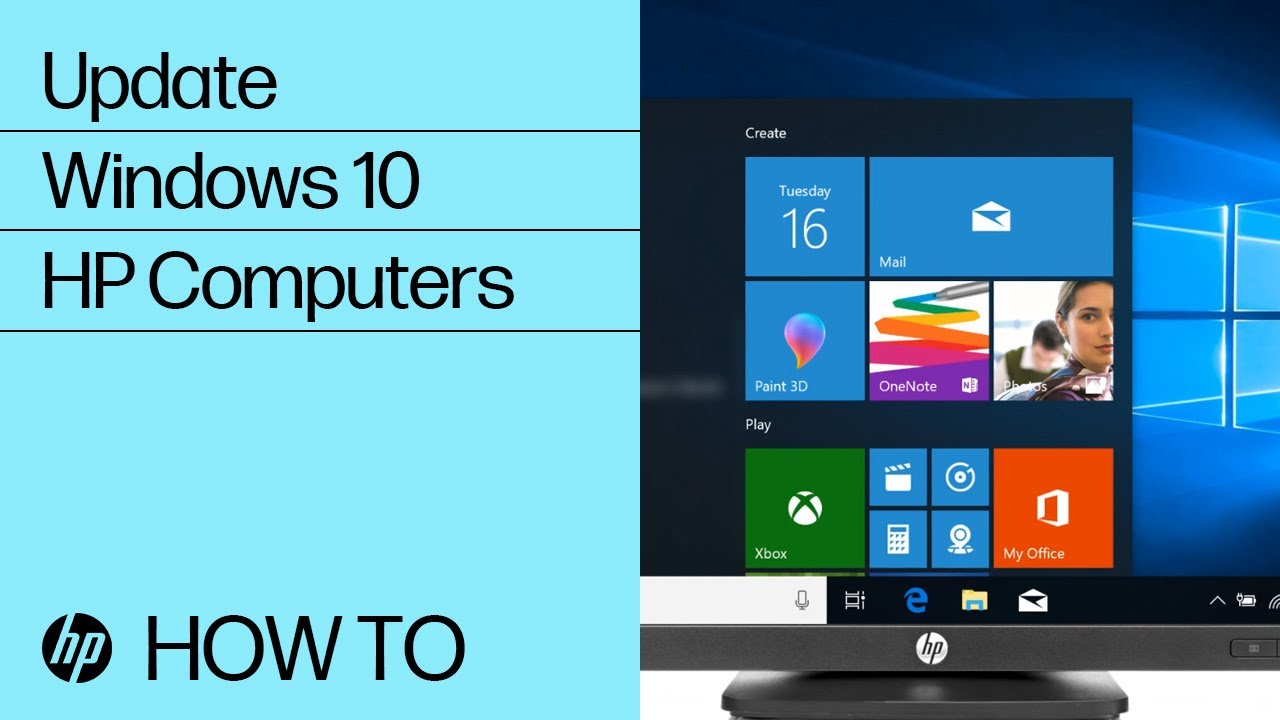
Check for Windows Updates
Install any new or optional Windows Updates.
-
Search Windows for and open Check for updates, and then click Check for updates if it does not automatically start.
-
If Windows finds any new updates, wait for the computer to automatically download and install them.
-
If Windows does not find any new updates, continue with these steps.
-
-
Search Windows for and open Optional Updates, select the optional updates you want to install, and then click Download & Install.
-
Restart your computer when prompted to finish installing the updates.
Check the USB connection (Windows)
If the USB printer is not found by HP Smart, check the USB cable for damage and its connection to the computer.
-
Search Windows for and open Devices & Printers, and then look for your printer name in the list of connected devices.
-
If the printer is not in the list, continue with these steps.
-
If the printer is in the list, open the HP Smart app, and then click Add printer or the Add icon
. Follow the prompts to set up a USB connection. If the issue persists, continue to the next step.
-
-
Open the HP Smart app, and then click Add printer or the Add icon
Reinstall the HP Smart app (Windows)
Uninstall the HP Smart app in Windows, and then reinstall the app and follow the instructions to set up a USB connection.
-
Disconnect any USB cables from the printer.
-
Search Windows for and open Add or remove programs.
-
Right-click HP Smart in the list, and then click Uninstall.
-
If a User Account Control message displays, click Yes.
-
Follow the instructions to complete the software removal, and then restart the computer.
-
Search Windows for and open Control Panel.
-
Click Devices and Printers, and then look for the name of the printer in the list.
-
If the printer name is listed, right-click the icon, and then select Remove Device or Uninstall device.
-
If the printer name is not listed, continue with these steps.
-
-
Go to HP Smart - Microsoft Store (in English), and then click Install.
-
Open the HP Smart app, and then click Add printer or the Add icon
-
Follow the prompts to set up a USB connection.
USB connection setup (macOS)
If the HP Smart app cannot find your USB-connected printer, make sure your macOS is up to date, check for USB connection issues, and then reinstall the app.
Note:
An HP+ or eligible printer cannot enroll in HP Smart Advance or Instant Ink using a USB connection. Use the HP Smart app to set up the printer over a Wi-Fi or Ethernet connection to access advanced features. For more information, go to HP printer setup (HP Smart app).
-
On your Mac, click the Spotlight icon
to search for and open Software Update.
-
If there are no updates, continue with these steps.
-
If there are updates, follow the prompts to update and restart the Mac. After the restart, open the HP Smart app. Click Add printer or the Add icon
-
-
On your Mac, click the Spotlight icon
-
Look for the name of your printer in the list of connected devices.
-
If the printer is not in the list, continue with these steps.
-
If the printer is in the list, open the HP Smart app. Click Add printer or the Add icon
-
-
Open the HP Smart app, click Add printer or the Add icon
-
If HP Smart app does not find your printer, continue with these steps.
-
If HP Smart app does find your printer, follow the prompts to complete the USB printer setup.
-
-
Uninstall the HP Smart app.
-
On your Mac, click the Spotlight icon
-
Click and drag HP Smart to the Trash icon in the Dock.
-
Right-click the Trash icon, and then click Empty Trash.
-
Restart the Mac to complete the uninstall.
-
-
Open the HP Smart app, and then click Add printer or the Add icon
Printer is not found or listed in Windows
Troubleshoot issues if your printer is not found on a Windows desktop or notebook PC.
Windows full feature driver (HP Easy Start)
What to do when HP Easy Start for Windows cannot find your printer.
Perform the following tasks in the order given. Return to HP Easy Start after each task to see if the issue is resolved.
-
Check for issues and review requirements for your connection type.
-
Wi-Fi printer setup
-
Move the printer within 8 m (26 ft) of the router or range extender, and then check the Wireless
-
Make sure the computer is connected to the correct network. If the wireless icon shows a weak signal
, move closer to the router or range extender until a strong signal displays
. Walls, metal bookcases, and electronics that emit radio signals can weaken the wireless signal.
Note:A printer connection cannot be established over public or guest networks that require a guest login or confirmation of use, such as networks used in schools, hotels, or coffee shops.
-
Disconnect any printer USB cables to prevent Wi-Fi setup issues.
-
Open a website to confirm the internet service is working. If page load time is slow or intermittent, restart the router. If necessary, contact your internet service provider to check if the service is down.
-
-
Wired network (Ethernet) printer setup
-
Disconnect the Ethernet cable from the router and the printer. Check the cable for damage, and then make sure that it is an Ethernet cable and not a phone cable. It should have eight visible wires on the connector.
-
Reconnect the cable to a different Ethernet or LAN port on the router, and then connect the other end to the printer Ethernet port
Note:Some printers might not connect immediately. Wait for the Ethernet icon
-
-
USB printer setup
-
Disconnect the USB cable from the computer and the printer, and then inspect the cable for damage. Replace the cable if necessary.
-
Do not use a cable that is longer than 3 m (9 ft 10 in).
-
Connect the printer USB cable directly into a USB port on the computer. Do not use a USB hub.
-
-
Windows built-in driver
Troubleshoot issues if your printer is not found while attempting to add a printer using a built-in driver.
These steps are for a printer setup through . The printer that I want isn't listed message might also display.
Perform the following tasks in the order given. Return to the setup after each task to see if the issue is resolved.
-
Check for issues and review requirements for your setup type.
Wi-Fi printer setup
-
Move the printer within eight meters (26 feet) of the router or range extender, and then check the connection status. If the wireless light
-
Make sure the computer is connected to the correct network. If the wireless icon shows a weak signal
Note:A printer connection cannot be established over public or guest networks that allow guest logins used in schools, hotels, or coffee shops.
-
Make sure the printer is not connected to a computer with a USB cable. A USB connection can block Wi-Fi setup.
-
Open a website to confirm the internet service is working. If page load time is slow or intermittent, restart the router. If necessary, contact your internet service provider to check if the service is down.
Wired network (Ethernet) printer setup
-
Disconnect the Ethernet cable from the router and the printer. Check the cable for damage, and then make sure that it is an Ethernet cable and not a phone cable. It should have eight visible wires on the connector.
-
Reconnect the cable to a different Ethernet or LAN port on the router, and then connect the other end to the printer Ethernet port
Note:Some printers might not connect immediately. Wait for the Ethernet icon
USB printer setup
-
Disconnect the USB cable from the computer and the printer, and then inspect the cable for damage. Replace the cable if necessary.
-
Do not use a cable that is longer than 3 m (9 ft 10 in).
-
Connect the printer USB cable directly into a USB port on the computer. Do not use a USB hub.
-
Printer is not found or available in macOS
Troubleshoot issues if your printer is not found or available in macOS.
macOS built-in driver
Troubleshoot issues if your printer is not found on your Mac. A No printers are available message might also display.
Perform the following tasks in the order given. Use the printer after each task to see if the issue is resolved.
-
Restart the printer and Mac to clear possible error conditions.
-
Check for issues and review requirements for your connection type.
-
Wi-Fi printer setup
-
Move the printer within 8 m (26 ft) of the router or range extender, and then check the Wireless
-
Make sure the computer is connected to the correct network. If the wireless icon shows a weak signal
Note:A printer connection cannot be established over public or guest networks that require a guest login or confirmation of use, such as networks used in schools, hotels, or coffee shops.
-
Disconnect any printer USB cables to prevent Wi-Fi setup issues.
-
Open a website to confirm the internet service is working. If page load time is slow or intermittent, restart the router. If necessary, contact your internet service provider to check if the service is down.
-
-
Wired network (Ethernet) printer setup
-
Disconnect the Ethernet cable from the router and the printer. Check the cable for damage, and then make sure that it is an Ethernet cable and not a phone cable. It should have eight visible wires on the connector.
-
Reconnect the cable to a different Ethernet or LAN port on the router, and then connect the other end to the printer Ethernet port
Note:Some printers might not connect immediately. Wait for the Ethernet icon
-
-
USB printer setup
-
Disconnect the USB cable from the computer and the printer, and then inspect the cable for damage. Replace the cable if necessary.
-
Do not use a cable that is longer than 3 m (9 ft 10 in).
-
Connect the printer USB cable directly into a USB port on the computer. Do not use a USB hub.
-
-
-
Check for software updates: Click the Spotlight icon
-
Make sure the printer firmware is up to date. Go to HP Software and Driver Downloads, search for your printer model, and then download any new firmware updates.
-
Reset the Mac printing system:
-
Click the Spotlight icon
-
Right-click or click-control the printer name, and then select to remove the printer and its settings.
-
-
Restart the printer, and then wait for the printer to reconnect to the Mac.
-
Click Add Printer, Scanner, or Fax or the Add button
macOS full feature driver (HP Easy Start)
Troubleshoot issues if your printer is not found in HP Easy Start.
Perform the following tasks in the order given. Use the printer after each task to see if the issue is resolved.
-
Check for issues and review requirements for your connection type.
-
Wi-Fi printer setup
-
Move the printer within 8 m (26 ft) of the router or range extender, and then check the Wireless
-
Make sure the computer is connected to the correct network. If the wireless icon shows a weak signal
Note:A printer connection cannot be established over public or guest networks that require a guest login or confirmation of use, such as networks used in schools, hotels, or coffee shops.
-
Disconnect any printer USB cables to prevent Wi-Fi setup issues.
-
Open a website to confirm the internet service is working. If page load time is slow or intermittent, restart the router. If necessary, contact your internet service provider to check if the service is down.
-
-
Wired network (Ethernet) printer setup
-
Disconnect the Ethernet cable from the router and the printer. Check the cable for damage, and then make sure that it is an Ethernet cable and not a phone cable. It should have eight visible wires on the connector.
-
Reconnect the cable to a different Ethernet or LAN port on the router, and then connect the other end to the printer Ethernet port
Note:Some printers might not connect immediately. Wait for the Ethernet icon
-
-
USB printer setup
-
Disconnect the USB cable from the computer and the printer, and then inspect the cable for damage. Replace the cable if necessary.
-
Do not use a cable that is longer than 3 m (9 ft 10 in).
-
Connect the printer USB cable directly into a USB port on the computer. Do not use a USB hub.
-
-
-
Reset the Mac printing system:
-
Right-click or click-control the printer name, and then select to remove the printer and its settings.
-
-
Click Add Printer, Scanner, or Fax or the Add button
-
Download and open HP Easy Start from 123.hp.com/setup, and then click Uninstall HP Software from the HP Easy Start drop-down menu.
Printer is not available in Android
Troubleshoot issues if your printer is not found on an Android mobile device.
A This printer isn't available right now message might also display.
Perform the following tasks in the order given. Try to complete the setup after each task to see if the issue is resolved.
-
Download and install the HP Print Service Plugin, open the item you want to print, and then select your printer to complete the setup.
-
Restart the printer and the mobile device to clear possible error conditions.
-
On your mobile device, open the list of available networks.
-
If the network you are connected to is not yours, disconnect from the network and reconnect to your normal Wi-Fi network. Do not connect to the printer Wi-Fi signal DIRECT-xx-HP [your printer model name].
Note:A printer connection cannot be established over public or guest networks that allow guest logins used in schools, hotels, or coffee shops.
-
If the network status is not connected, connect to your network, and then check the status again. A check mark or connected status displays next to the network name when connected.
-
-
Move the printer and the mobile device within eight meters (26 feet) of the router or range extender, and then check the connection status.
-
Printer connection: If the wireless light or icon
-
Mobile device connection: Check the network signal strength. If the wireless icon shows a weak signal status
, move closer to the router or range extender until a strong signal displays
. Walls, metal bookcases, and electronics that emit radio signals can weaken the wireless signal.
-
-
Place the printer within range of the Wi-Fi router signal, and then use the Wireless Setup Wizard or Wi-Fi Protected Setup (WPS) to the connect printer to the internet.
-
Printers with a touchscreen control panel: One the control panel, open the Setup, Network, or Wireless Settings menu, select Wireless Setup Wizard, and then follow the prompts to connect the printer.
-
Printers without a touchscreen control panel: Press and hold the Wi-Fi button
-
HP DeskJet 6000, 6400, ENVY 6000, 6400, and Tango printers: Press and hold the Wi-Fi
buttons on the back of the printer for 3 seconds until the Edge or Wireless light starts flashing. Within 2 minutes, press and hold the WPS button on your router until the connection process begins. The Edge or Wireless light is sold blue when it successfully connects to the internet.
-
-
From the System Apps list, select Print Spooler or , and then tap Clear Data or Force Stop.
Go to HP Printers - 'Printer isn't available' error (Android) for more detailed information.
Printer is not found in Apple iOS
Troubleshoot issues if your printer is not found on an iPhone or iPad.
A No AirPrint Printers Found message might also display.

Perform the following tasks in the order given. Try to complete the setup after each task to see if the issue is resolved.
-
Restart the printer and the mobile device to clear possible error conditions.
-
On your mobile device, open the list of available networks.
-
If the network you are connected to is not yours, disconnect from the network and reconnect to your normal Wi-Fi network. Do not connect to the printer Wi-Fi signal DIRECT-xx-HP [your printer model name].
Note:A printer connection cannot be established over public or guest networks that allow guest logins used in schools, hotels, or coffee shops.
-
If the network status is not connected, connect to your network, and then check the status again. A check mark or connected status displays next to the network name when connected.
-
-
Move the printer and the mobile device within eight meters (26 feet) of the router or range extender, and then check the connection status.
-
Printer connection: If the wireless light or icon
-
Mobile device connection: Check the network signal strength. If the wireless icon shows a weak signal status
-
-
Place the printer within range of the Wi-Fi router signal, and then use the Wireless Setup Wizard or Wi-Fi Protected Setup (WPS) to the connect printer to the internet.
-
Printers with a touchscreen control panel: One the control panel, open the Setup, Network, or Wireless Settings menu, select Wireless Setup Wizard, and then follow the prompts to connect the printer.
-
Printers without a touchscreen control panel: Press and hold the Wi-Fi button
-
HP DeskJet 6000, 6400, ENVY 6000, 6400, and Tango printers: Press and hold the Wi-Fi
-
-
Open the Advanced Settings (EWS) in the HP Smart app or type the printer IP address into a web browser address bar. In the Network settings, make sure the AirPrint status is On.
Printer is not found in ChromeOS
Troubleshoot issues if your printer is not found with a Chromebook using the built-in driver.
These steps are for a printer setup through in ChromeOS.
Perform the following tasks in the order given. Return to the setup after each task to see if the issue is resolved.
-
Check for issues and review requirements for your setup type.
Wi-Fi printer setup
-
Move the printer within eight meters (26 feet) of the router or range extender, and then check the connection status. If the wireless light
-
Make sure the computer is connected to the correct network. If the wireless icon shows a weak signal
Note:A printer connection cannot be established over public or guest networks that allow guest logins used in schools, hotels, or coffee shops.
-
Make sure the printer is not connected to a computer with a USB cable. A USB connection can block Wi-Fi setup.
-
Open a website to confirm the internet service is working. If page load time is slow or intermittent, restart the router. If necessary, contact your internet service provider to check if the service is down.
Wired network (Ethernet) printer setup
-
Disconnect the Ethernet cable from the router and the printer. Check the cable for damage, and then make sure that it is an Ethernet cable and not a phone cable. It should have eight visible wires on the connector.
-
Reconnect the cable to a different Ethernet or LAN port on the router, and then connect the other end to the printer Ethernet port
Note:Some printers might not connect immediately. Wait for the Ethernet icon
USB printer setup
-
Disconnect the USB cable from the computer and the printer, and then inspect the cable for damage. Replace the cable if necessary.
-
Do not use a cable that is longer than 3 m (9 ft 10 in).
-
Connect the printer USB cable directly into a USB port on the computer. Do not use a USB hub.
-
Enter a topic to search our knowledge library
What can we help you with?

Need Help?