To view a video demonstrating the procedure for removing the part click here to access the Services Media Library (www.hp.com/go/sml). Select Printers and Multifunction under the Product category, select HP Color LaserJet Printers under the Product family, and then select the printer model under the product series category.
Pickup roller replacement
caution:Failure to correctly complete this procedure might cause damage to the all-in-one.
-
Perform the following tasks before beginning this procedure:
-
Turn off the all-in-one and unplug the power cord from the electrical outlet.
-
Open the print-cartridge door and remove the print cartridge.
-
Remove the tray 2 cassette.
-
Lift the all-in-one off of tray 3, if that tray is installed.
-
-
Place the all-in-one on its back on the work surface, with the front facing up.
warning:
When you move the all-in-one into this position, the scanner cover can open suddenly and be damaged. You must support the scanner cover to keep it from opening.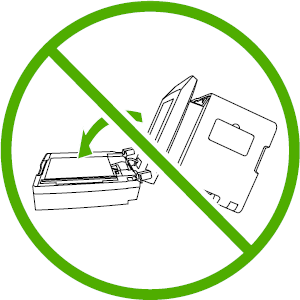
-
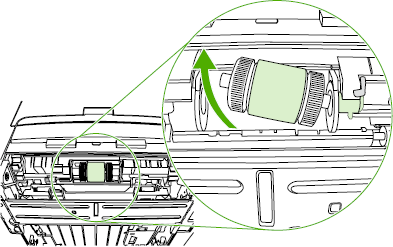
Reach into the area that you exposed when you removed tray 2. Pull the white tabs outward, and rotate the roller-retaining collars up.
note:
Push down on the green tab to release and lower the duplex assembly to expose more of the roller.
-
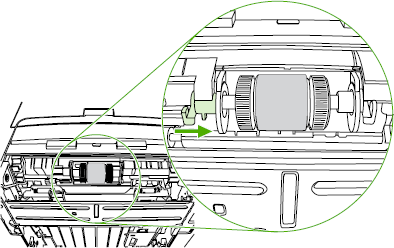
With the tab on the collar aligned with the slot in the plastic bracket, slide the collar to the right, and leave the collar in this position for the remainder of this procedure.

-
Remove the pickup roller.
-
Insert the left side of the replacement-pickup-roller shaft into the left slot (callout 1), and insert the right side shaft (the side with the notch) into the right slot (callout 2).

-
Rotate the roller shaft until the notch engages with the drive shaft and clicks into place.
-
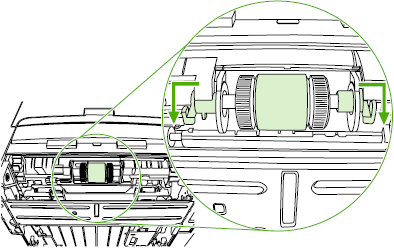
Place the left retaining collar over the end of the roller shaft, align the tab on the collar with the slot in the plastic bracket, and then slide the collar toward the pickup roller.
-
With the tab on the right collar aligned with the slot on the plastic bracket, slide the collar towards the pickup roller. Rotate the right and left retaining collars down into the locked position.
-
Push up on the duplex assembly until it locks into place. Place the all-in-one upright on the work surface with the top of the all-in-one facing up.
warning:
When you move the all-in-one into this position, the scanner cover can open suddenly and be damaged. You must support the scanner cover to keep it from opening.
-
Perform the following tasks after completing this procedure.
-
Replace the all-in-one on tray 3, if that tray was installed.
-
Replace the tray 2 cassette.
-
Open the print-cartridge door and install the print cartridge.
-
Plug the power cord into an electrical outlet, and turn on the all-in-one.
-
