The instructions given below outline one of the many ways to have good control over the printed colors that can be obtained from the printer.
note:Before beginning, ensure that the paper type has already been calibrated.
Application settings (HP-GL/2 and RTL driver)
-
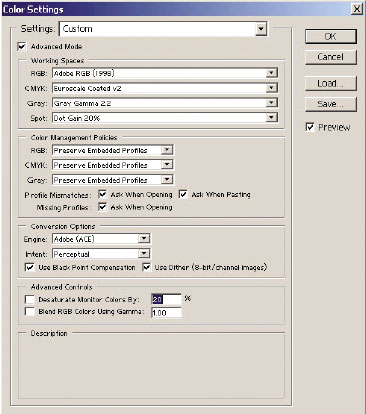
Open Adobe Photoshop and select Color Settings from the Edit menu.
-
Working spaces: The working space is the color space the user wants to use when manipulating the image. It is recommended to use the color space that comes with the image, if any. Otherwise, the recommended default settings are:
-
RGB: Adobe RGB 1998
-
CMYK: SWOP for the USA and Euroscale Coated v2 for the rest of the world
-
-
Color Management Policies: Select Preserve Embedded Profiles.
-
Rendering Intent: Rendering intent is one of the settings used when doing a color transformation. Some of the colors to be printed may not be reproducible by the printer. The rendering intent allows the user to select one of the four different ways of handling these colors.
-
Black Point Compensation: This option is recommended if the user has chosen the Relative Colorimetric rendering intent.
Figure : Color Settings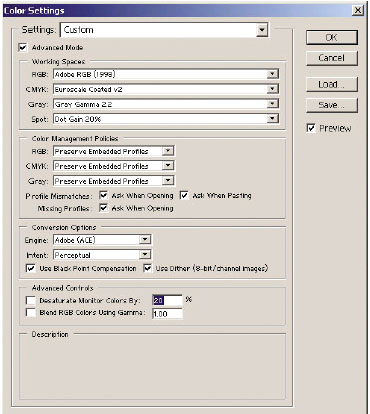
-
-
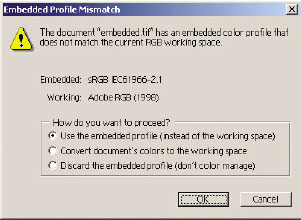
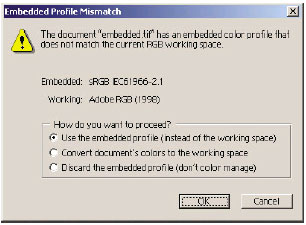
Open the image. Accept the embedded color profile if there is one:Figure : Selecting the Embedded Color Profile
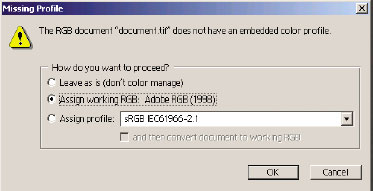
 Otherwise accept the default that Adobe Photoshop proposes:Figure : Accepting Adobe Photoshop's default profile
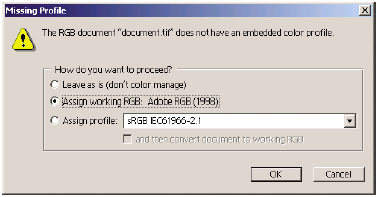
-
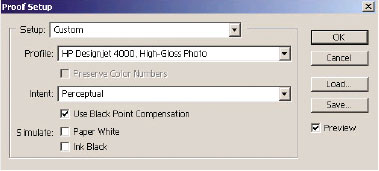
Once the color space in which to work has been defined, a soft proof can be made if desired. This means emulating on the screen how the image will look when printed. To do this, an ICC profile is required for the monitor.Select View then select Proof Setup and then Custom. Use the following information to select options in the Proof Setup window:
-
Profile: Choose the profile based on the printer model and paper type intended to be used.
-
Preserve Color Numbers: This checkbox tells the application how to simulate the document's appearance without converting colors from the Document Space to the Proof Profile Space. It simulates the color shifts that may occur when the document's color values are interpreted using the Proof Profile instead of the Document Profile. This option is not recommended.
-
Intent: This menu allows to choose a rendering intent for the conversion from document space to simulation space, letting the user preview the effects of different renderings.
-
Use Black Point Compensation: This option is recommended if the 'Relative Colorimetric' rendering intent has been chosen by the user.
-
Paper White: This checkbox emulates the whiteness of the paper on the monitor. The effect is the same as using the 'Absolute Colorimetric' rendering intent.
-
Ink Black: This checkbox turns off the black point compensation for the rendering from simulation to the monitor. So, if the simulation space black is lighter than the monitor black, the user will see the washed-out blacks on the monitor. This option is not recommended.
-
Preview: If this checkbox is enabled (recommended), the changes that the user makes in this window are reflected in the image immediately.
Figure : Proof Setup window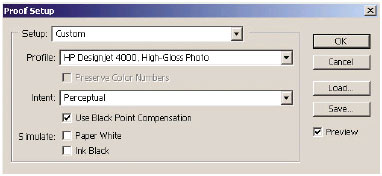
-
-
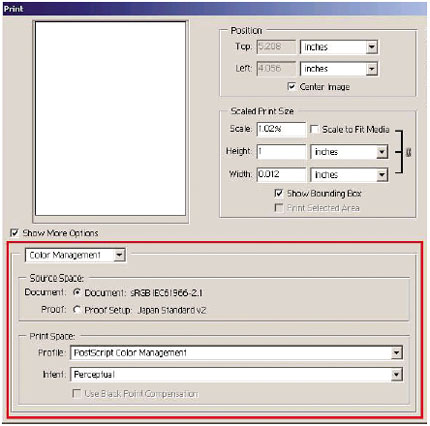
When ready to print the image, open the Print with Preview window from the File menu. In the Color Management tab, select the following:
-
Source Space: 'Document' (automatically assigned for the user).
-
Profile: Select the profile that is desired to be used. HP recommends using Adobe RGB. If neither Adobe RGB nor sRGB is selected, then choose the appropriate ICC profile for the paper loaded. Remember to select later on in the driver, the option 'Managed by Application.'
-
Intent: Set the rendering intent.
Figure : Selecting Source Space and Print Space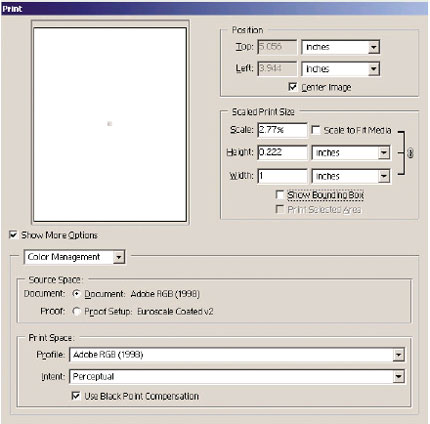
-
Driver settings (HP-GL/2 and RTL driver)
In the Paper/Quality tab (Microsoft Windows operating system) or Image Quality panel (Macintosh operating system), set Print Quality to Best.
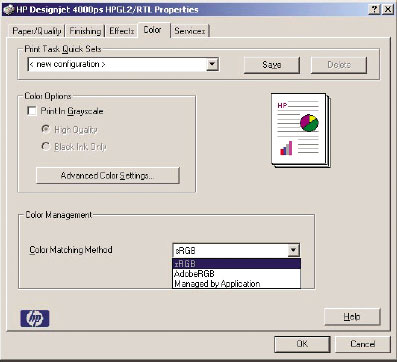
In the Color tab (Microsoft Windows operating system) or Color Options panel (Macintosh operating system), the following Color
Management options are available. Select the same option that was selected in the Print dialog box above (Print
Space section, Profile option).
-
sRGB: This is the default color space. The input RGB data are converted to CMYK using the printer's internal color maps, which depend on the paper type and print quality selected. These are the most versatile' color maps, producing saturated colors for CAD and Microsoft Office applications and also producing good results with photographic images.
-
AdobeRGB: Similar to sRGB, but using the AdobeRGB to CMYK internal color maps, which are designed for AdobeRGB input data having a bigger source gamut. Best suited for digital photography.
-
Managed by Application: The driver will not perform any color correction. This path can be used when building custom RGB printer profiles and applying them within the application (the application is responsible for applying the right color management by using the custom RGB printer profiles). In this case, ensure that the right media profile in the 'Print Space, Profile' option in the application print command, has been selected.
Figure : DJP 4000ps HPGL2/RTL Properties
Printer settings (HP-GL/2 and RTL driver)
Ensure that the paper type setting on the front panel corresponds to the paper that is intended to be used.