This document explains how to set up the physical parts of the product. Complete these steps before you install the product software on your computer.
HP Deskjet F4100 All-in-One Printer Series- Setting up the All-in-One (Hardware)
Introduction
This document includes the following steps to set up the product:
-
Unpack the All-in-One
-
Check the contents of the box
-
Connect the power cord and adapter
-
Turn on the power
-
Load plain paper
-
Install the cartridges
-
Align the cartridges
Setting up the All-in-One
Follow these steps in order. When you are finished, you can click the appropriate link at the end of this document if you need instructions to install the product software.
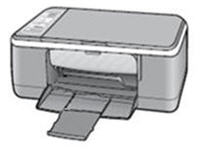
Step one: Unpack the All-in-One
-
Lower the paper tray and remove all packing material.Figura : Lower the paper tray
-
Lower thecartridge door and remove all packing material.Figura : Remove the packaging material

Step two: Check the contents of the box
The contents might vary by country/region. See the packaging for a list of items shipped in the box.
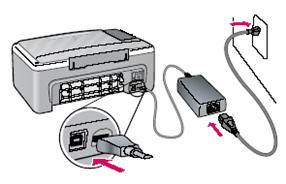
Step three: Connect the power cord and adapter
Connect the power cord and adapter.
Figura : Connect the power cord and adapter
Step four: Turn on the power
-
Press the On button (
 ).
Figura : Press the On button
).
Figura : Press the On button
-
Wait 30 seconds for the product to start up.
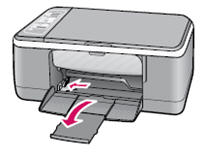
Step five: Load plain paper
-
Pull out the tray extender.Figura : Pull out the tray extender
-
Load plain white paper.Figura : Load plain white paper

Step six: Install the cartridges
-
Open the cartridge door. Make sure the carriage moves to the center. If it does not move to the center, turn the product off and then turn it on again.
nota:
The product must be turned on to insert cartridges.Figura : Open the cartridge door
-
Remove the tape from both cartridges.Figura : Remove the tape

atención:
Do not touch the copper-colored contacts or re-tape the cartridges.Figura : Copper-colored contacts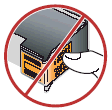
-
Hold the cartridges with the HP logo on top.
-
Insert the tri-color cartridge in the left cartridge slot and the black cartridge in the right cartridge slot.Figura : Carriage slots
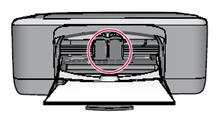 Figura : Insert the tri-color cartridge in the left slot
-
Make sure to push the cartridges in firmly until they snap into place.Figura : Push the cartridge in firmly
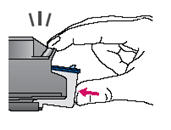 Figura : Tri-color cartridge and black cartridge correctly installed
-
Close the cartridge door.Figura : Close the cartridge door

Step seven: Align the cartridges
Make sure that paper is loaded in the tray, and then
wait a few minutes while the cartridge alignment page prints. After the alignment page prints, place it face-down
on the glass and close the lid.
Figura : Align the cartridges

Press the Scan button ( ) to complete the alignment.
Wait until the green On light stops blinking.
) to complete the alignment.
Wait until the green On light stops blinking.
) to complete the alignment.
Wait until the green On light stops blinking.
Ingrese un tema para buscar en nuestra biblioteca de conocimientos
¿Con qué podemos ayudarle?

¿Necesita ayuda?