-
Turn off the lamps at the printer’s control panel screen, and wait for the lamps to finish their cool down sequence.
advarsel:
Failure to allow the lamps to cool down properly will damage the lamps. If you disconnect the power cable from the back of the printer or disconnect the power cable from the lamp assembly before the cool down sequence has finished, you will damage the lamps. Do not disconnect the power cable until the printer’s control panel screen no longer reads “Cooling”.Figur : Press “Tools” to access lamp power off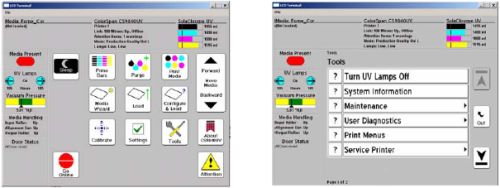
-
When the printer’s control panel screen no longer reads “Cooling” (it will change to “Off”), turn off the power to the printer.
-
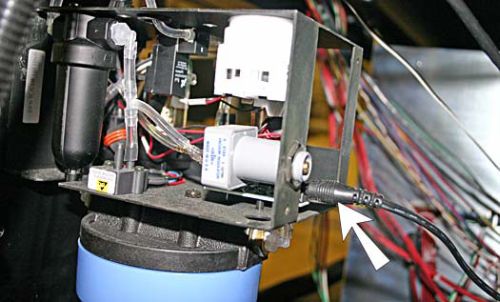
. Make sure that the auxiliary power supply for the vacuum/pressure assembly is providing power to the vacuum/pressure assembly.If the auxiliary power supply is not available, restore power to the printer as soon as it is safe. Failure to follow these instructions will result in ink seeping from the printheads during the repair due to lack of vacuum.Figur : Power supply for the vacuum/pressure assembly is properly attached
 If auxiliary power to the vacuum/pressure assembly is not available, and you must power down the printer for an extended time, you must plan for ink that will eventually seep from the printheads. Only ink that is currently in the printheads will leak. Placing the carriage assembly over the wipe station should be adequate to handle the seepage.
advarsel:
If you need to power down the printer to access areas of the printer where high voltage exists, keep in mind that turning off the power switch does not completely remove power from the printer. To be safe, unplug the main power cable to the printer before proceeding with service. Once the main power cable had been unplugged, allow 5 minutes to pass to allow any current to drain from the capacitors.Allow the printer to complete its shutdown procedure before disconnecting the power cord.
Printer Orientation

Figur : Key printer parts
Removing the Lamp Cassette
-
Power off the printer following the steps outlined in the section “Managing Power Off Scenarios.”
-
Open a window to access the carriage.
-
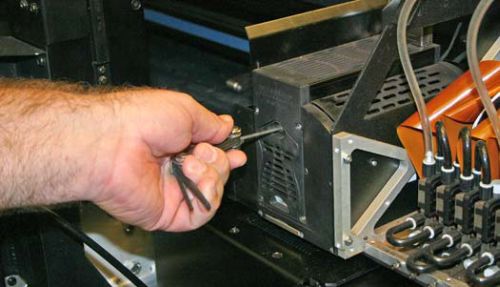
Using a 3 mm hex wrench, unscrew the hex screw that secures the lamp cassette into the lamp assembly.This screw does not completely release from the reflector assembly.Figur : Unscrew this screw until the cassette can be removed from the lamp assembly
-
Remove the cassette from the lamp.To remove the cassette from the lamp assembly, insert the hex wrench in the slot shown below. Tilt the hex wrench down, and pull the cassette out of the lamp assembly.Figur : The arrow indicates the direction to pull

-
Slide the cassette into the lamp.
-
Using the 3 mm hex wrench, tighten the hex screw at the top of the cassette.
