solution Contentsolution Content

Remove and Replace the Power Supply for OMEN by HP Obelisk 875-0xx, 870-xxx Desktop PCs

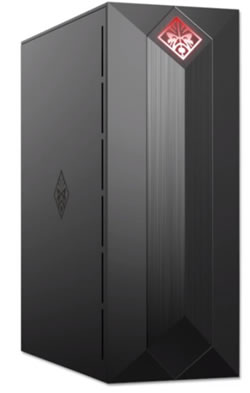
This document is for OMEN by HP Obelisk 875-0xx Desktop PC and OMEN by HP 870-xxx Desktop PC.
OMEN by HP Desktop PC
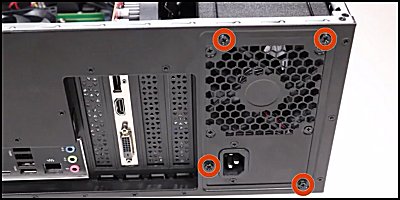
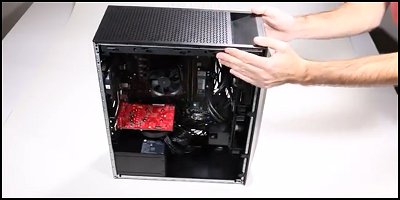
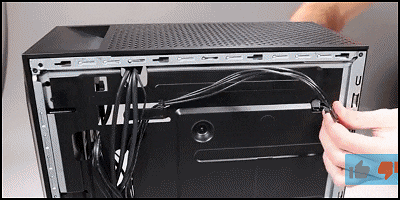
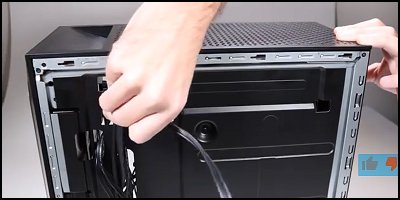
Comment remplacer le module d'alimentation des ordinateurs de bureau OMEN by HP Obelisk 875-1000, Obelisk 875-0xx, 870-xxx
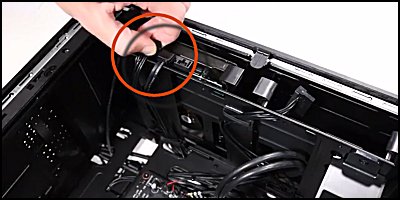
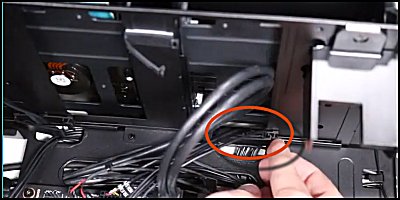
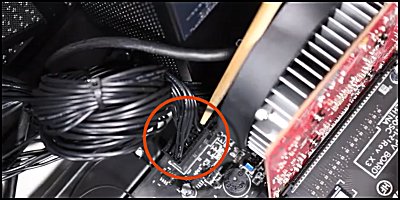
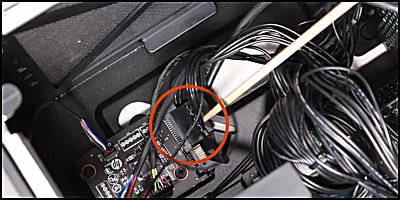
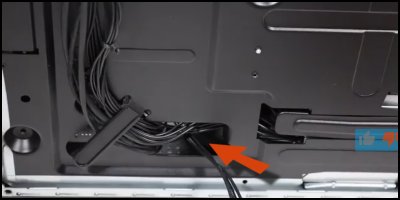
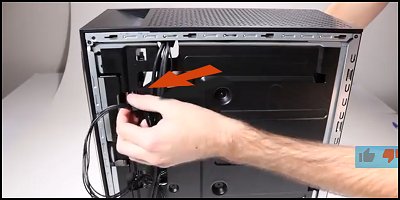
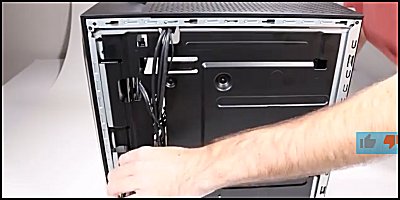
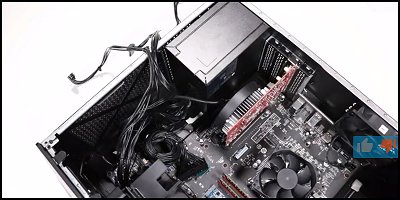
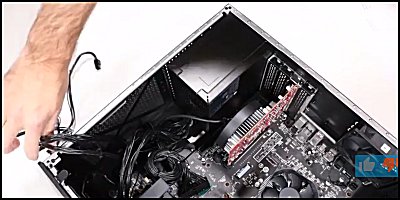
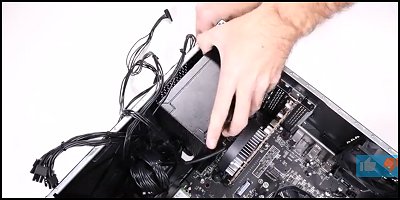
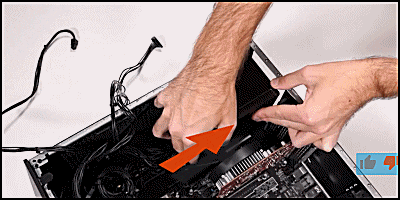
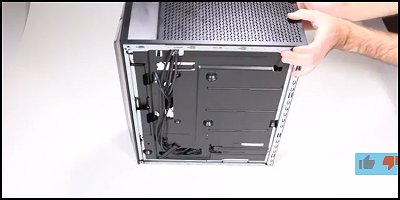
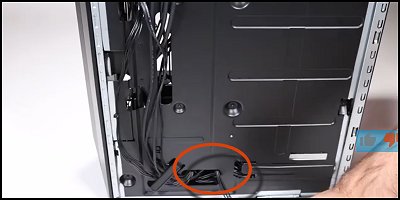
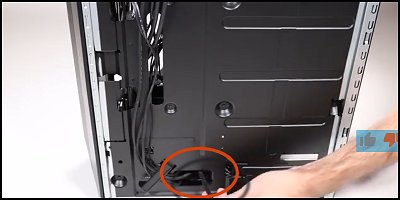
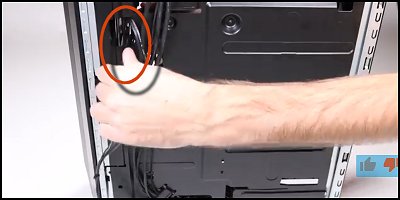
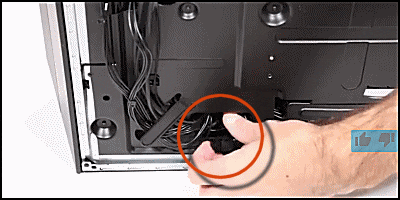
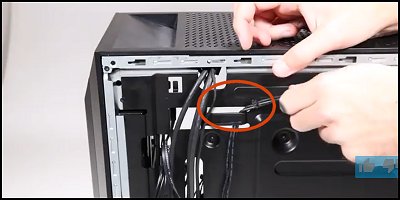
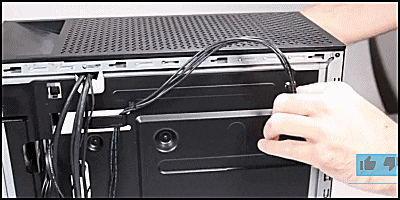
Découvrez comment remplacer ou retirer le module d'alimentation des ordinateurs de bureau OMEN by HP Obelisk 875-1000, Obelisk 875-0xx, 870-xxx.
Remarque :
The video and graphics in this article depict a specific configuration of the notebook. The same removal and replacement procedures apply to all configurations of the notebook.

Before you begin

  • Turn off the computer. Disconnect the Ethernet or modem cable. Disconnect the power cord.
  • Transfer the computer to a clear, flat, stable work surface over a non-carpeted floor.
  • HP strongly recommends the use of an anti-static wrist strap and a conductive foam pad when working on the computer.
  • Do not remove a component from its protective packaging until you are ready to install it.
  Avertissement :
Before starting, power off the computer and wait for components to cool before starting these procedures.
  Attention :
This product contains components that can be damaged by electrostatic discharge (ESD). To reduce the chance of ESD damage, work over a non-carpeted floor, use a static dissipative work surface (such as a conductive foam pad), and wear an ESD wrist strap connected to a grounded surface.
  Attention :
Procedures in this document are provided by HP for qualified service agents and as a courtesy to its customers. Servicing internal components increases the risk of damaging the computer which might not be covered under warranty. Understand the risk and refer to the product's warranty before attempting to service the computer.

Removing the power supply

Remove the power supply.
Step 1
First, remove the access panel.
For instructions on removing the access panel, go to How to Replace the Access Panel for OMEN by HP Obelisk 875-0xx, 870-xxx Desktop PCs.
Removing the access panel
Step 2
Remove the side panel.
For instructions on removing the access panel, go to How to Replace the Side Panel for OMEN by HP Obelisk 875-0xx, 870-xxx Desktop PCs.
Lifting the panel off the retaining tabs
Step 3
Lie the unit down on its side and disconnect the 4-pin power connector...
Disconnecting the 4- pin power connector
...and the SATA hard drive power connector.
Disconnecting the SATA hard drive power connector
Step 4
Detach the SATA hard drive power cables from the cable clips.
Detaching the cable from the clips
Step 5
Disconnect the 24-pin power connector from the motherboard.
Disconnecting the 24 pin power connector
Step 6
Disconnect the SATA power connector from the lighting control module.
The SATA power connector
Step 7
Remove the four P2 Philips-head screws that secure the power supply to the rear chassis.
Four screws on the rear chassis
Step 8
Stand the unit upright and position it so that you can easily access either side.
Standing the unit upright
Step 9
Thread the 4-pin power connector through the side chassis at the top.
Threading the power connector through the side chassis
Step 10
Detach it from the cable guide...
Detaching the power connector from the cable guides
... and then feed it through the access hole in the side chassis near the bottom of the unit.
Feeding the power connector through the access hole
Step 11
Thread the SATA power connector for the primary hard drive through its access hole in the side chassis at the base of the hard drive cage...
Threading the hard drive power cable through the access hole
... and feed it through the access hole at the bottom of the side chassis.
The SATA power connector for the secondary hard drive is removed the same way.
Feeding the cable through the access hole at the bottom of the side chassis
Step 12
Turn the unit so that the power supply is facing you...
The computer turned with the power supply facing the right direction
... and push aside any power cables that may obstruct access to the power supply release latch.
Pushing aside the power cables
Step 13
Push the power supply release latch on the side chassis and gently pull the power supply out of the chassis.
Releasing the latch and pulling the power supply
Step 14
Remove the power supply.
  Attention :
Before removing the power supply, make sure there are no other cables tangled with the power supply cables.
Removing the power supply

Replacing the power supply

Replace the power supply.
Step 1
Slide the power supply into its position on the bottom chassis.
Sliding the power supply into position
Step 2
Turn the unit so that you can easily access either side of the unit.
Computer positioned to access either side
Step 3
Thread the SATA power connector for the secondary hard drive out through the access hole of the side chassis...
Power connector through the access hole
... and then in through its access hole at the base of the drive cage.
Access hole at the base of the drive cage
Step 4
Thread the SATA power connector for the primary hard drive out through the access hole of the side chassis...
The power connector for the hard drive coming through the access hole
... and then in through its access hole at the base of the drive cage.
Power connector going in through the access hole at the base of the drive cage
Step 5
Thread the 4-pin power connector through the access hole at the bottom of the side chassis.
Threading the power connector through the access hole
Step 6
Lift the 4-pin power connector up to the cable guide and secure it and then...
Securing the connector cable in the cable guide
...guide it to the access hole near the top of the side chassis and pushing it through.
Guiding the cable into the access hole and pushing it through
Step 7
Replace the four P2 Philips-head screws that secure the power supply to the rear chassis.
The four screw locations
Step 8
Reconnect the 4-pin power connector...and the hard drive SATA power connector...
Reconnecting the 4-pin power connector
...and the hard drive SATA power connector.
Reconnecting the SATA power connector
Step 9
Reconnect the 24-pin power connector to the motherboard.
Reconnecting the 24-pin power connector
Step 10
Reconnect the SATA power connector to the lighting control module.
The SATA power connector  connected to the lighting control module
Step 11
Replace the side panel.
For instructions on replacing the access panel, go to How to Replace the Side Panel for OMEN by HP Obelisk 875-0xx, 870-xxx Desktop PCs.
Lifting the panel off the retaining tabs
Step 12
Replace the access panel.
For instructions on replacing the access panel, go to How to Replace the Access Panel for OMEN by HP Obelisk 875-0xx, 870-xxx Desktop PCs.
Removing the access panel