This document is for HP LaserJet Pro M102a, M102w, M104a, M104w, M203d, M203dn, M203dw, LaserJet Ultra M106w and M206dn printers.
HP LaserJet Pro, Ultra M102-M106, M203 Printers - Replacing Imaging Drum
The imaging drum helps to finalize the printing process by transferring the image or text to the paper. The imaging drum should be replaced for any of the following reasons:
-
The Attention light
 blinks, and an Imaging Drum Low or Imaging Drum Very Low message might display on the computer screen.
-
The imaging drum levels display as low or very low in the printer software.
-
Repeated defects appear on printouts at the following intervals:
-
26 mm (1 in)
-
94 mm (3.7 in)
-
HP LaserJet Pro M102, M104, M203 printers
To replace the imaging drum in HP LaserJet Pro M102, M104 (part number CF219A), and HP LaserJet Pro M203 (part number CF232A) printers, remove the toner cartridge, remove the imaging drum, install the new imaging drum, and then reinstall the toner cartridge.
-
Open the top cover.Figure : Opening the top cover

-
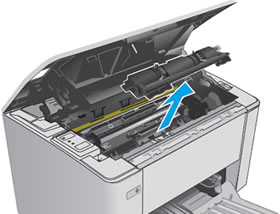
Grasp the toner cartridge handle, and then pull to remove the toner cartridge.Figure : Removing the toner cartridge

-
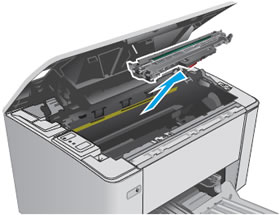
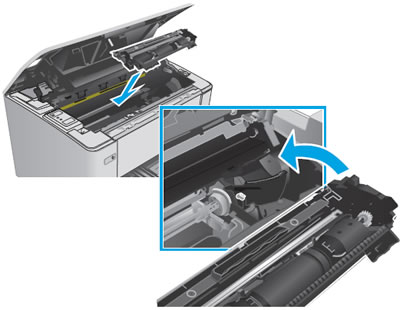
Remove the imaging drum.Figure : Removing the imaging drum
-
Recycle the old imaging drum.
-
Remove the new imaging drum from the package and protective bag.
-
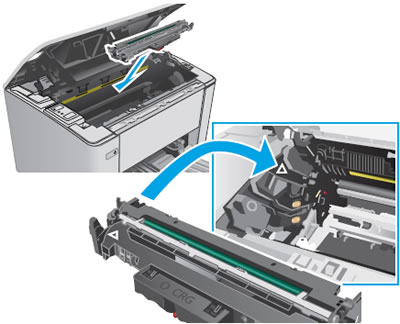
Align the new imaging drum with the tracks inside the printer, and then push the imaging drum until it snaps into place.Figure : Inserting the new imaging drum
-
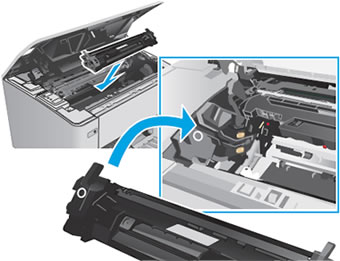
Align the toner cartridge with the tracks inside the printer, and then push the toner cartridge until it is firmly seated.Figure : Reinstalling the toner cartridge
-
Close the top cover.The new imaging drum is installed, and the printer is ready to print.
HP LaserJet Ultra M106, M206 printers
To replace the imaging drum (part number CF234A) in HP LaserJet Ultra M106 printers, remove the toner cartridge, remove the imaging drum, and then install the new imaging drum and toner cartridge assembly.
-
Open the top cover.Figure : Opening the top cover

-
Rotate the current toner cartridge toward the front of the printer to unlock it.
Remarque :
If the current toner cartridge is low or the print quality is unacceptable, remove the imaging drum and toner cartridge assembly, and then recycle it. The replacement imaging drum comes with a new, low-yield toner cartridge attached.Figure : Unlocking the toner cartridge
-
Remove the current toner cartridge from the printer, and store it in a cool, dry place for future use.Figure : Removing the toner cartridge
-
Remove the imaging drum, and then recycle it.
-
Remove the new imaging drum and toner cartridge assembly from the package and protective bag.
-
Align the new imaging drum and toner cartridge assembly with the tracks inside the printer, and then push the assembly until it snaps into place.Figure : Inserting the new imaging drum and toner cartridge assembly
-
Close the top cover.The new imaging drum and toner cartridge are installed, and the printer is ready to print.
Options d'assistance supplémentaires
Saisir une rubrique dans notre bibliothèque de connaissances
En quoi pouvons-nous vous aider ?

Besoin d'aide ?