solution Contentsolution Content

HP Color Laser 150 Printers - First Time Printer Setup

This document is for HP Color Laser 150a and 150nw printers.
To set up a printer for the first time, remove the printer from the box and all packing materials from the printer, load paper into the input tray, connect the power cable, and then download and install the printer software.
note:
If you are looking for the printer software, go to 123.hp.com.

Step 1: Remove the printer from the box

Remove the printer from the box and all tape, stickers, and packing materials from the printer.
  1. Remove the printer from the box, and then remove the tape from outside the printer.
  2. Open the toner cartridge access door, and then remove the packing material from inside the printer.
    Removing the packing material from inside the toner cartridge access area.
  3. Recycle the packing materials.

Step 2: Load paper into the input tray

Load plain U.S. letter or A4 paper in the input tray.
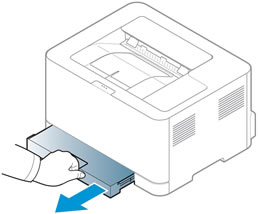
  1. Pull out the input tray.
    Pulling out the input tray.
  2. Remove the tape, and then raise the paper cover.
    Opening the paper cover.
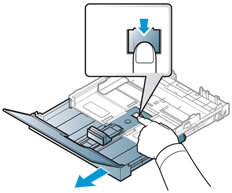
  3. To switch between U.S. Letter and A4-size paper or load legal-size paper, extend the input tray by pressing the latch, and then pulling out the front of the tray.
    Extending the input tray.
  4. Turn over the input tray, grasp the lever, and then rotate the lever clockwise for letter or counterclockwise for A4.
    Switching between U.S. Letter and A4-size paper.
  5. Turn the input tray right-side up, and then push in the extended tray until it snaps into place.
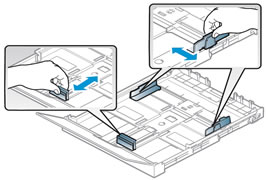
  6. Slide out the paper guides as far as possible.
    Sliding out the paper width guides to their outermost positions.
  7. Load paper into the tray print side up with the top edge towards the printer. To prevent paper jams, make sure the stack is below the paper fill guide.
    Loading paper.
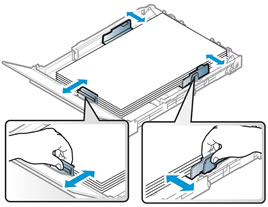
  8. Slide in the paper guides until they touch the edge of the stack of paper.
    Sliding the paper guides inward.
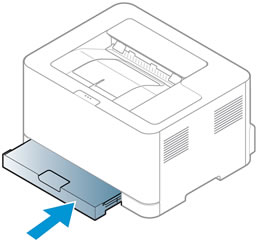
  9. Lower the paper cover, and then push in the input tray.
    Pushing in the input tray.
  10. Lift the output support to open it.
    Pulling out the output support.

Step 3: Connect the power cord

Plug the printer into an electrical outlet, and then turn on the printer.
note:
Do not connect a USB cable at this time. The connection to the computer is established during software installation.
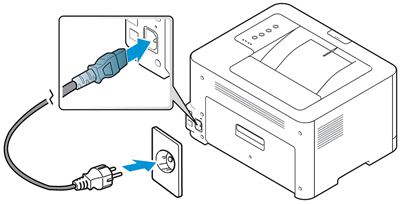
  1. Connect the power cord to the rear of the printer, then plug the other end of the power cord into an electrical outlet.
    Connecting the power cord
  2. If the printer does not turn on automatically, press the Power button.
  3. Wait until the printer is idle and silent before you continue.

Step 4: Install the printer software

Your HP printer hardware is now set up, and you can install the printing software. Do not attempt to connect the printer to a computer until instructed to do so during software installation.
Download the latest version of the printing software from 123.hp.com.