To add the printer, follow these steps.
-
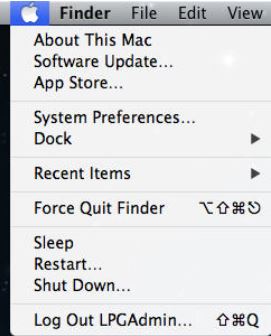
Click the Apple icon at the top left of the screen, and then select System Preferences.
Figure : Example of System Preferences
-
In System Preferences, click
Printers & Scanners
Figure : Example of clicking on Printers & Scanners

-
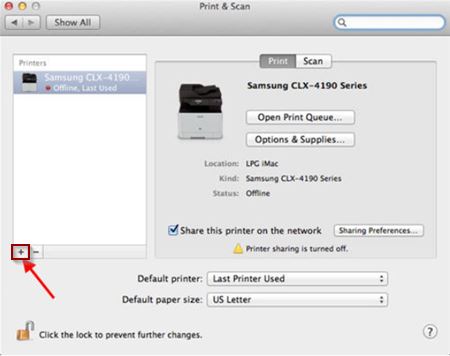
Click the Plus + sign below the list of printers.
Figure : Example of clicking on the plus sign
-
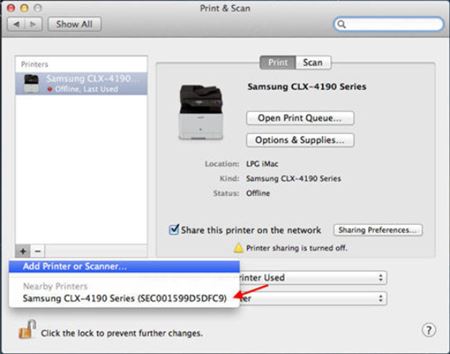
If the printer is connected currently to the Mac with a USB, ethernet, or wireless connection, it might display as an option. If not available, click the + sign to add printer.
Figure : Example of the Add Printer or Scanner
-
Select the printer in the list and click Add. If no printer displays, make sure the printer is connected to the network or with the USB cable.
note:
If connected to the network, the information displays as Bonjour in the Kind column.
Figure : Example shows Bonjour as Kind, and then clicking Add

-
The Mac searches for correct software to setup the printer.
Figure : Example of Mac searching for software

-
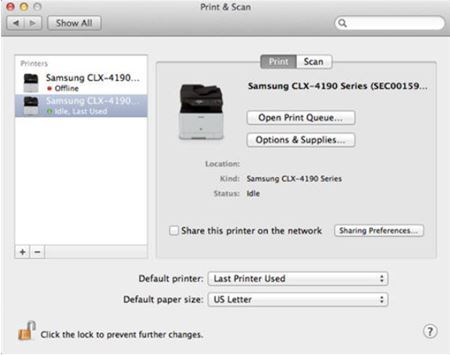
Once discovered, the printer displays in the list of option with a green light to represent its ready status.
Figure : Example of ready status with added printer
If the printer displays in the list, but you are unable to print, then print a configuration report from the printer. If the IP address shows 192.0.0.192, the wireless setup needs to be completed. Go to
support.hp.com, for assistance with wireless setup.
