To manually connect a network connected printer, follow the appropriate steps.
-
Connect the USB cable to the USB port on the printer, and then connect the other end to the Mac computer.
-
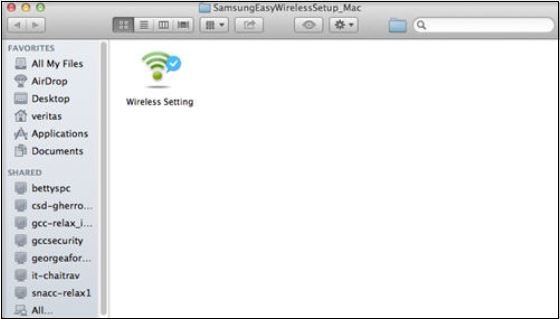
After the connections are complete, launch the wireless setup by running the Wireless Setting application.
note:
Figure : Example of the Easy Wireless Setup Wireless Setting
-
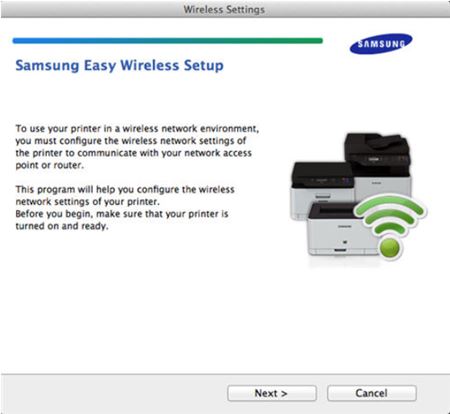
When the Samsung Easy Wireless Setup screen displays, Click Next, to start set up.
Figure : Example of the main Samsung Easy Wireless Setup, and clicking Next

-
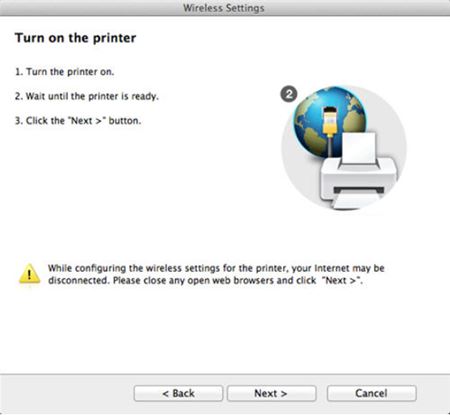
Make sure the printer is powered on and the USB is connected from the printer to the Mac computer.
Figure : Example reminder to turn on printer, and then clicking Next
-
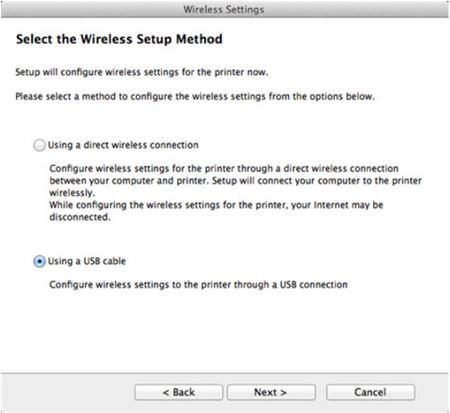
Select the wireless setup method. For initial setup with a printer not connected to the network, select Using a USB cable, and then click Next.
Figure : Example of selecting a wireless setup method
-
Temporarily connect the printer to the Mac computer if you have not done so already, and then click Next.
Figure : Example of temporarily connecting the devices using the USB cable
-
The Installation Wizard searches for any connected devices and retrieves the wireless information.
-
If the printer is not found, A Printer Not Found dialog displays. Check the USB connection between the printer and the Mac computer, and then click Next on the Printer Not Found dialog. Try a different USB cable if available.
-
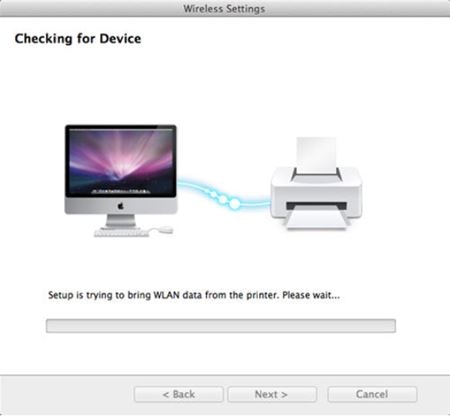
If the printer is still not found, the Printer Not Found dialog box reappears. verify that the printer is powered on and is ready to print, and then click Next on the Printers Not Found dialog.
Figure : Example of Checking the Device
-
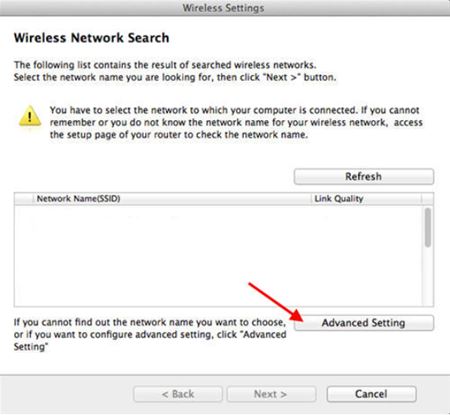
Click Advanced Settings.
Figure : Example of Wireless Network Search
-
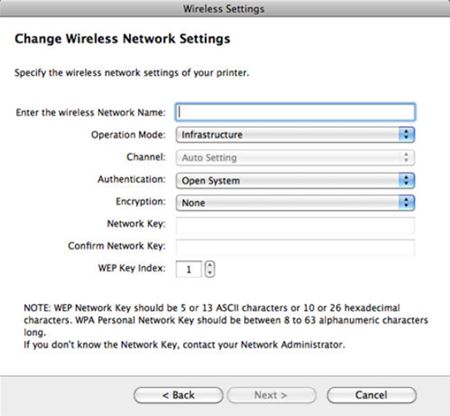
Complete the wireless network information, and then click Next.
Figure : Example of Changing Wireless Network Settings
note:
WEP Network Key should be 5 or 13 ASCII characters or 10 or 26 hexadecimal characters, and the WPA Personal Network Key should be between 8 to 63 alphanumeric characters long.
If you do not know the Network Key, contact your Network Administrator.
Figure : Example of grayed out Next

-
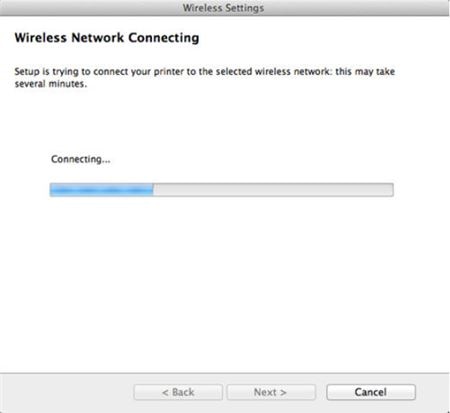
Wait for the printer to connect to the selected wireless network.
Figure : Example of Wireless Network Connecting
-
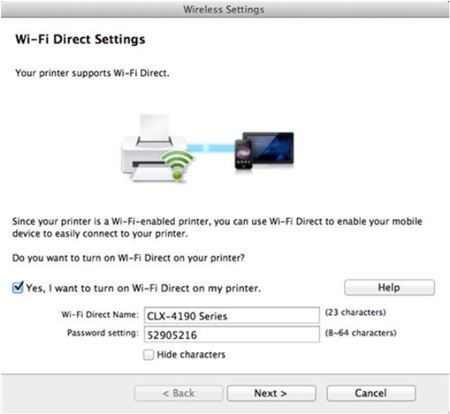
To enable Wi-Fi Direct, select the check box, write down the password, and then click Next.
Figure : Example of the Wi-Fi Direct Settings
-
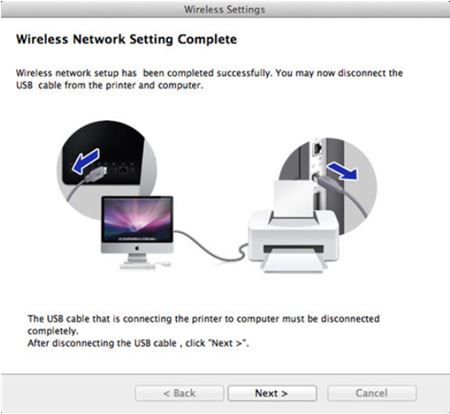
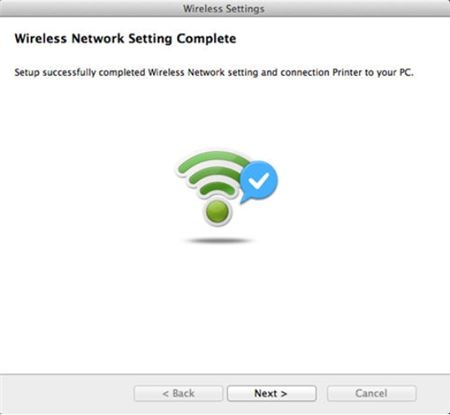
When the confirmation prompt displays indicating that the setup is complete, click Next.
Figure : Example of the Wireless Network Setting Complete
-
Use 'go to' when linking to a support document or location outside of the document. Use 'see' to refer to another section within the same document. To view the printer, open the Printers and Scanners in System Preferences.
Figure : Example of Printers and Scanners