This document provides the procedure to install the 3 x 550-sheet paper feeder with stand accessory for the following printers:
-
HP LaserJet Enterprise MFP M631
-
HP LaserJet Enterprise MFP M632
-
HP LaserJet Enterprise MFP M633
-
HP LaserJet Enterprise MFP M634
-
HP LaserJet Enterprise MFP M635
-
HP LaserJet Enterprise MFP M636
-
HP LaserJet Enterprise MFP M637
-
HP LaserJet Managed MFP E62555
-
HP LaserJet Managed MFP E62565
-
HP LaserJet Managed MFP E62575
-
HP LaserJet Managed MFP E62655
-
HP LaserJet Managed MFP E62665
-
HP LaserJet Managed MFP E62675
-
Take the 3 x 550-sheet paper feeder with stand accessory out of the box, and then remove the packaging material. Verify that the contents match this illustration:
note:
HP recommends recycling packing materials whenever possible.Figure : Contents of the box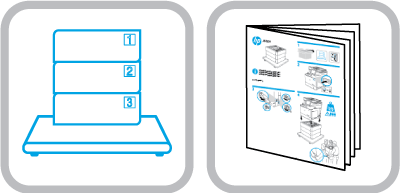
-
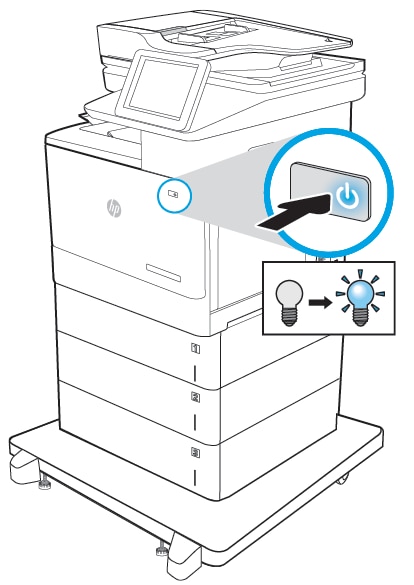
Press the Power button to turn OFF the printer.Figure : Turn off the printer

-
Disconnect the power cord and the USB cable or network cable.Figure : Disconnect the cables

-
Place the printer on the 3 x 550-sheet paper feeder accessory. Use the alignment pins on top of the tray to position the printer.
caution:
HP recommends that three people move the printer to place it on the paper feeder accessory.Figure : Place the printer on the paper feeder accessory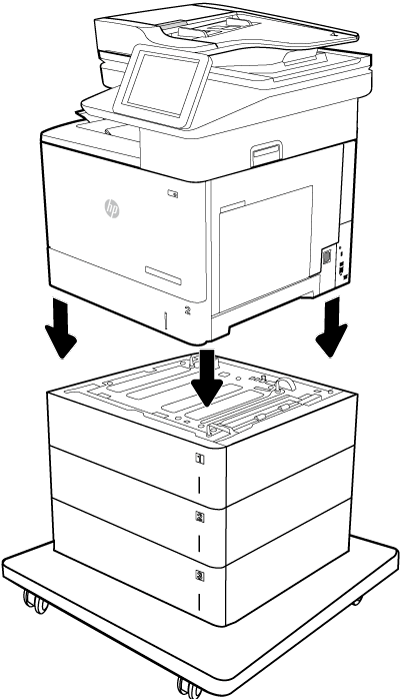
-
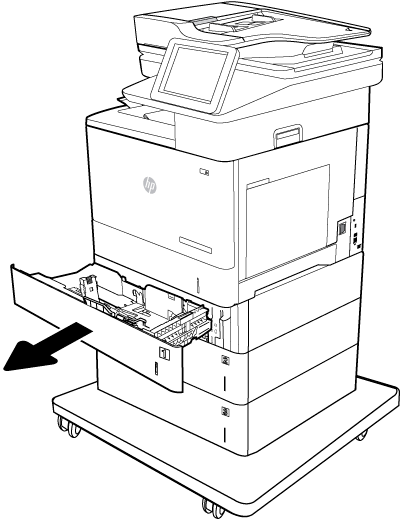
Open the top tray on the 3 x 550-sheet paper feeder accessory.Figure : Open the tray
-
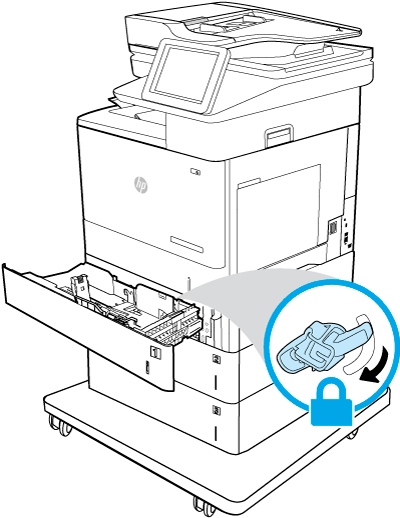
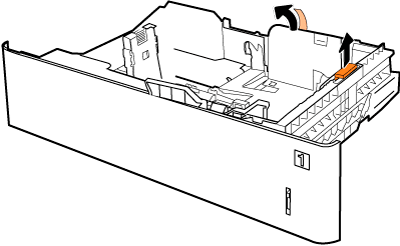
Turn the tray lock clockwise.Figure : Turn the tray lock clockwise
-
Remove the tape and shipping restraint from the tray.Figure : Remove the tape and shipping restraint
-
Adjust the paper-width and paper-length guides by squeezing the blue adjustment latches and sliding the guides to the size of paper being used.Figure : Adjust the paper guides

-
Load paper into the tray. Be sure that the top of the stack is below the tray-full indicator.Figure : Load paper in the tray

-
Remove the tray number cube from the back side of the tray face plate.Figure : Remove the tray number cube

-
Insert the tray number cube into its slot with the number one facing outward. The number one should show on the front right side of the tray.Figure : Insert the tray number cube with the number one facing outward

-
Close the tray.Figure : Close the tray

caution:
Do not extend more than one paper tray at a time.Do not use the paper trays as a step.Keep hands out of trays when closing.All trays must be closed when moving the printer. -
Rotate the wheels on the bottom of the stand so they face forward.Figure : Rotate the wheels

-
Install the wheel covers over the wheels.Figure : Install the wheel covers

-
Unscrew the stabilizing feet on the bottom of the printer stand so they rest on the floor and support the printer.
note:
The stabilizing feet should place enough pressure on the floor to prevent the printer from rolling.Figure : Unscrew the stabilizing feet to support the printer
-
Reconnect the power cord and the USB cable or network cable.Figure : Reconnect the cables

-
Press the Power button to turn on the printer.Figure : Turn on the printer
-
If you are attaching the accessory before installing the printer software, this procedure is not necessary. If you are attaching the accessory after installing the printer software, perform the following steps (that pertain to your operating system):
-
macOS: The list of installed options should automatically update during the first print job after installing the accessory.
-
Windows® 8.0, 8.1, and 10:
-
Open the Windows Start menu:
-
Windows® 8.0 and 8.1: Scroll to the bottom-left corner of the screen, and right-click the window that displays.
-
Windows® 10: Right-click the Windows icon in the lower-left corner of the desktop.
-
-
Click Control Panel. Under Hardware and Sound, select View devices and printers.
-
Right-click the name of the printer, and then select Printer Properties.
-
Click the Device Settings tab.
-
Click Update Now. Or, in the drop-down menu next to Automatic Configuration, select Update Now.
note:
Newer HP PCL-6 V4 drivers do not support Update Now. For these drivers, stop and restart the print spooler. Open a search box. In the search box, type services, and then press the Enter key. Right-click Print Spooler in the list of services, select Stop, and then right-click and select Start. Or, simply shut down and restart the computer. -
-
Windows® 7:
-
Make sure the printer is turned on and connected to the computer or network.
-
Open the Windows Start menu, and then click Devices and Printers.
-
Right-click the name of this printer, and select Printer Properties.
-
Click the Device Settings tab.
-
Click Update Now. Or, in the drop-down menu next to Automatic Configuration, select Update Now.
-
-
