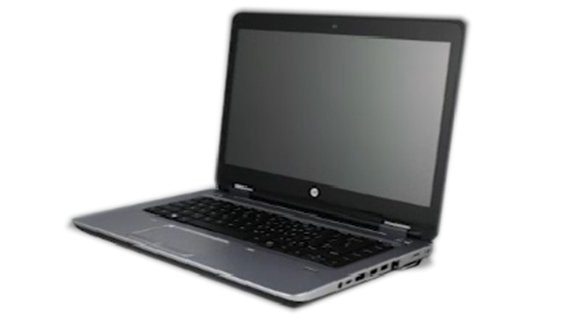
This document applies to HP ProBook 640 and 645 G2 notebooks.
warning:Make sure the computer is disconnected from power before starting. Before starting, power off the computer and wait for components to cool before starting these procedures.
caution:This product contains components that can be damaged by electrostatic discharge (ESD). To reduce the chance of ESD damage, work over a non-carpeted floor, use a static dissipative work surface (such as a conductive foam pad), and wear an ESD wrist strap connected to a grounded surface.
caution:Procedures in this document are provided by HP for qualified service agents and as a courtesy to its customers. Removing, replacing, and/or servicing internal components increases the risk of damaging the computer which might not be covered under warranty. Understand the risks and refer to the product's warranty before attempting to service the computer.
note:The video and graphics in this article depict a specific configuration of the notebook. These same removal and replacement procedures apply to all configurations of HP ProBook 640 and 645 G2 Notebooks.
|
Step 1
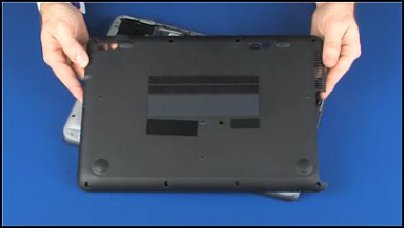
Remove the bottom cover.
For detailed instructions, see Remove and Replace the Bottom Cover on HP ProBook 640 and 645 G2 Notebooks.
|
|
|
Step 2
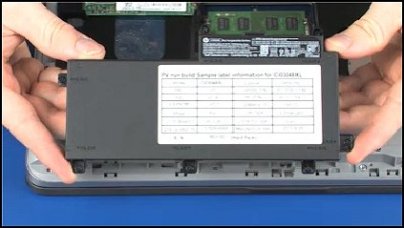
Remove the battery.
For detailed instructions, see Remove and Replace the Battery on HP ProBook 640 and 645 G2 Notebooks.
|
|
|
Step 3
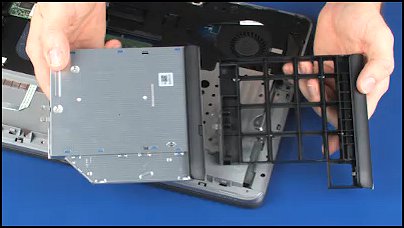
Remove the optical drive or optical drive dummy.
For detailed instructions, see Remove and Replace the Optical Drive on HP ProBook 640 and 645 G2 Notebooks.
|
|
|
Step 4
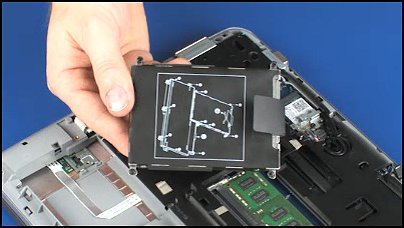
Remove the disk drive...
For detailed instructions, see Remove and Replace the Disk Drive on HP ProBook 640 and 645 G2 Notebooks.
|
|
|
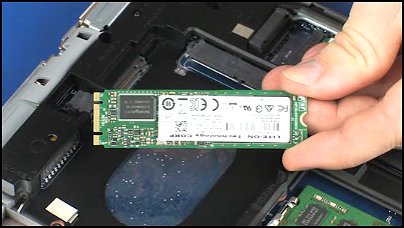
... or solid state drive.
For detailed instructions, see Remove and Replace the Solid State Drive on HP ProBook 640 and 645 G2 Notebooks.
|
|
|
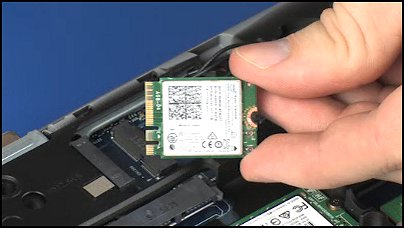
Step 5
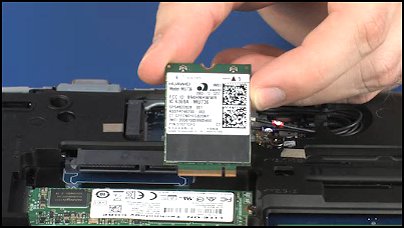
Remove the wireless WAN module.
For detailed instructions, see Remove and Replace the Wireless WAN Module on HP ProBook 640 and 645 G2 Notebooks.
|
|
|
Step 6
Remove the wireless LAN module.
For detailed instructions, see Remove and Replace the Wireless LAN Module on HP ProBook 640 and 645 G2 Notebooks.
|
|
|
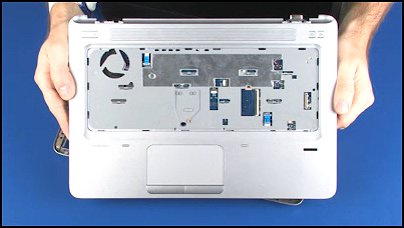
Step 7
Remove the top cover.
For detailed instructions, see Remove and Replace the Top Cover on HP ProBook 640 and 645 G2 Notebooks.
|
|
|
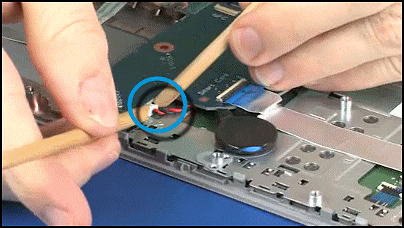
Step 8
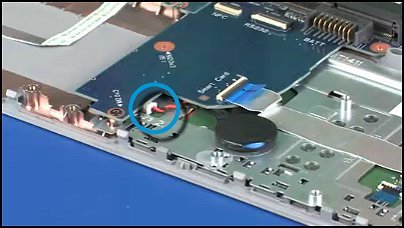
Disconnect the RTC battery cable from its connector on the system board.
|
|
|
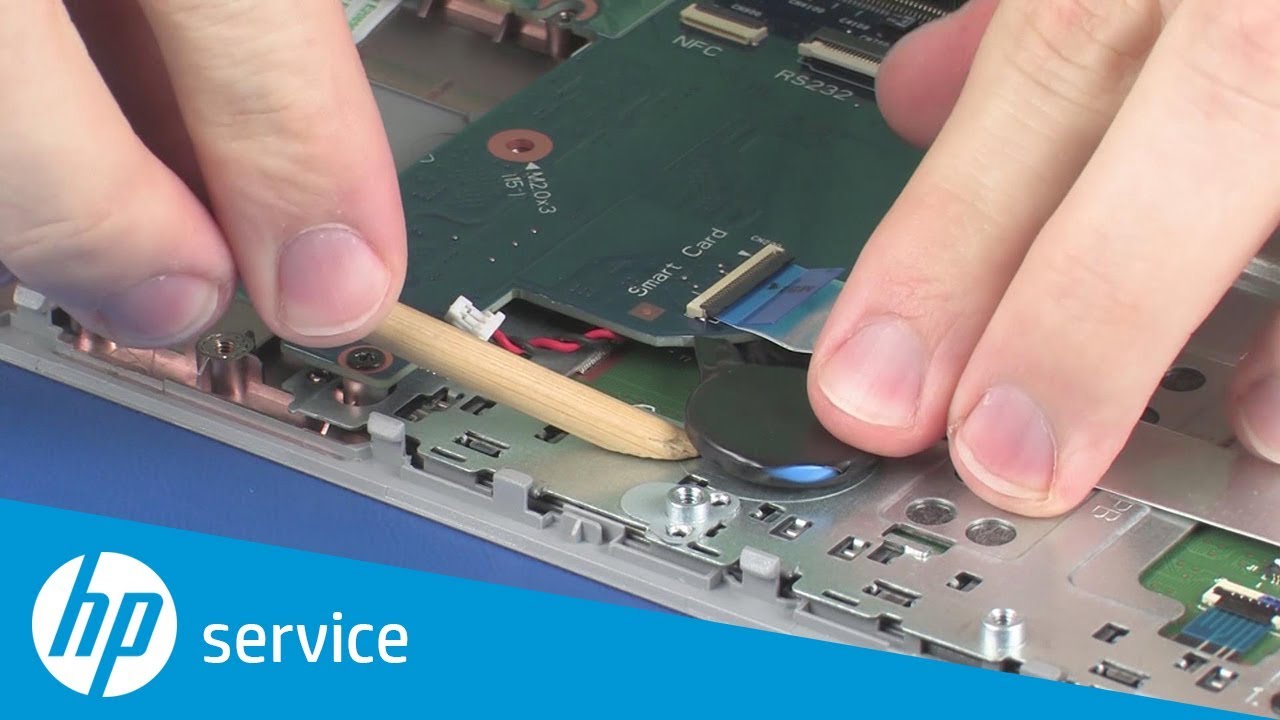
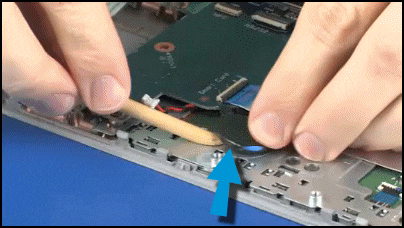
Step 9
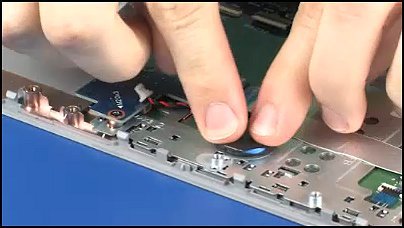
Using a non metallic flat bladed tool, gently pry the RTC battery off of the touchpad button bracket and remove it.
|
|
|
Step 1
Place the RTC battery into position on the touchpad button bracket and press down to adhere it into place.
|
|
|
Step 2
Connect the RTC battery cable into its connector on the system board.
|
|
|
Step 3
Replace the top cover.
For detailed instructions, see Remove and Replace the Top Cover on HP ProBook 640 and 645 G2 Notebooks.
|
|
|
Step 4
Replace the wireless LAN module.
For detailed instructions, see Remove and Replace the Wireless LAN Module on HP ProBook 640 and 645 G2 Notebooks.
|
|
|
Step 5
Replace the wireless WAN module.
For detailed instructions, see Remove and Replace the Wireless WAN Module on HP ProBook 640 and 645 G2 Notebooks.
|
|
|
Step 6
Depending on your particular notebook, replace either the solid state drive...
For detailed instructions, see Remove and Replace the Solid State Drive on HP ProBook 640 and 645 G2 Notebooks.
|
|
|
... or the hard disk drive.
For detailed instructions, see Remove and Replace the Disk Drive on HP ProBook 640 and 645 G2 Notebooks.
|
|
|
Step 7
Replace the optical drive or optical drive dummy.
For detailed instructions, see Remove and Replace the Optical Drive on HP ProBook 640 and 645 G2 Notebooks.
|
|
|
Step 8
Replace the battery.
For detailed instructions, see Remove and Replace the Battery on HP ProBook 640 and 645 G2 Notebooks.
|
|
|
Step 9
Replace the bottom cover.
For detailed instructions, see Remove and Replace the Bottom Cover on HP ProBook 640 and 645 G2 Notebooks.
|
|
