solution Contentsolution Content

HP OfficeJet Pro 7740 Printers - First Time Printer Setup

This document is for the HP OfficeJet Pro 7740 Wide Format All-in-One Printer.
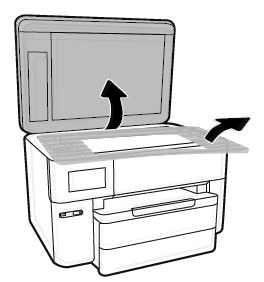
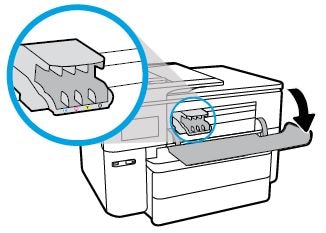
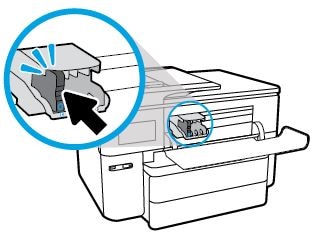
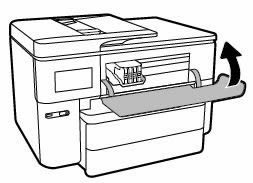
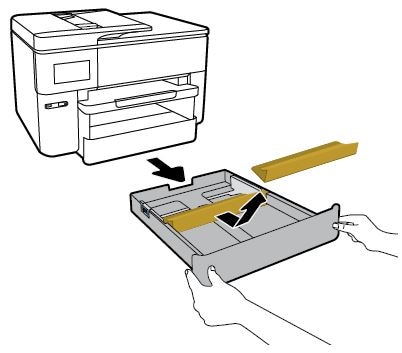
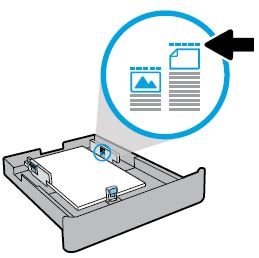
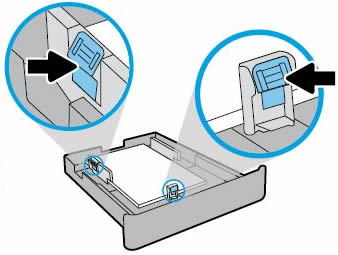
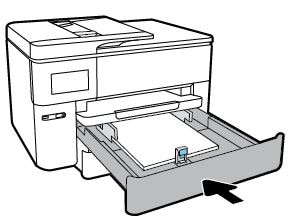
To set up a printer for the first time, remove the printer from the box, remove packing materials, connect the power cable, set control panel preferences, install the ink cartridges, and then load paper into the input tray.
note:
If you are looking for the printer software, go to 123.hp.com/ojp7740 to download the print driver.

Step 1: Remove the printer from the box

The contents might vary by country/region. See the packaging for a list of items shipped in the box.
Remove the printer from the box and all tape, stickers, and packing materials from the printer.
  1. Remove the printer from the box.
  2. Remove all tape and packing materials from the outside of the printer, and then remove the film from the printer control panel.
    Figure : Removing tape from the printer
    Removing tape from the printer
  3. Lift the scanner lid, remove the packing material from the scanner glass, and then close the scanner lid.
    Figure : Opening the scanner lid and removing packing material
    Opening the scanner lid and removing packing material

Step 2: Connect the power cord and set your preferences

Plug the printer into an electrical outlet, turn on the printer, and then set your preferences.
note:
Do not connect a USB cable at this time. The connection to the computer is established during software installation.
  1. Connect the power cord to the rear of the printer, and then plug the other end of the power cord into an electrical outlet.
    Figure : Connecting the power cord
    Connecting the power cord
  2. Turn on the printer.
  3. To set your preferences on the printer control panel, touch your preferred language and country/region, and then touch Yes to confirm your choices.
  4. Select the date and time, and then touch Yes to confirm.

Step 3: Install the ink cartridges

Install the HP Setup ink cartridges that came in the box with your printer.
  1. Open the ink cartridge access door.
    Figure : Opening the ink cartridge access door
    Opening the ink cartridge access door.
  2. Wait until the carriage is idle and silent before you proceed.
  3. Remove the plastic wrappers on the ink cartridges. Be careful to touch only the black plastic on the ink cartridge.
  4. Hold the ink cartridge by its sides with the color circle toward you, and then press the ink cartridge forward into its slot until it snaps into place.
    Figure : Inserting the ink cartridges
    Inserting the ink cartridges.
  5. Install the other ink cartridges.
  6. Close the ink cartridge access door.
    Figure : Closing the ink cartridge access door.
    Closing the ink cartridge access door.

Step 4: Load paper into the input trays

Remove packing materials from the paper trays, and then load plain U.S. letter or A4 paper in the input trays.
  1. Pull out Tray 1, and then remove the packing materials.
    Figure : Opening Tray 1, and then removing the packing material
    Opening the input tray
  2. Load plain white paper with the short edge forward and the print side down.
      caution:
    Do not load more paper than indicated on the paper fill guide, or paper jams might occur.
    Figure : Paper fill guide in the paper tray
    Paper fill guide in the input tray
  3. Push the stack into the tray until it stops.
  4. Slide in the paper guides in until they rest against the edges of the paper.
    Figure : Sliding in the paper width guides
    Sliding in the paper width guides
  5. Insert Tray 1 into the printer.
    Figure : Inserting Tray 1
    Reinserting the input tray
    The printer aligns the printhead, and then an alignment page automatically prints.
  6. Wait until the printer is idle and silent before you continue.
  7. Repeat these steps for Tray 2.
  8. Recycle all packing materials.
Your HP printer hardware is now set up, and you can install the printing software.

Step 5: Install the printer software

Download the latest version of the printing software from 123.hp.com/ojp7740, and then follow the on-screen instructions to install the software.