solution Contentsolution Content

HP DeskJet 3700 Printers - Replacing Ink Cartridges

This document is for the following HP printers:
HP DeskJet 3720 All-in-One Printer
HP DeskJet 3721 All-in-One Printer
HP DeskJet 3722 All-in-One Printer
HP DeskJet 3730 All-in-One Printer
HP DeskJet 3732 All-in-One Printer
HP DeskJet 3733 All-in-One Printer
HP DeskJet 3735 All-in-One Printer
HP DeskJet 3750 All-in-One Printer
HP DeskJet 3752 All-in-One Printer
HP DeskJet 3755 All-in-One Printer
HP DeskJet 3758 All-in-One Printer
HP DeskJet 3760 All-in-One Printer
HP DeskJet 3762 All-in-One Printer
HP DeskJet 3764 All-in-One Printer
HP DeskJet Ink Advantage 3775 All-in-One Printer
HP DeskJet Ink Advantage 3776 All-in-One Printer
HP DeskJet Ink Advantage 3778 All-in-One Printer
HP DeskJet Ink Advantage 3785 All-in-One Printer
HP DeskJet Ink Advantage 3786 All-in-One Printer
HP DeskJet Ink Advantage 3787 All-in-One Printer
HP DeskJet Ink Advantage 3788 All-in-One Printer
HP DeskJet Ink Advantage 3789 All-in-One Printer
HP DeskJet Ink Advantage 3790 All-in-One Printer
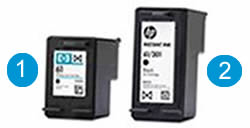
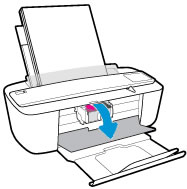
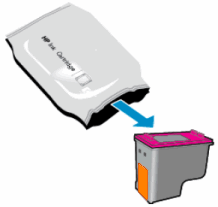
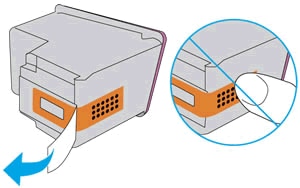
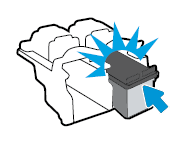
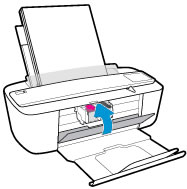
This document contains steps for replacing the ink cartridges.

Step 1: Replace the ink cartridges

Replace any low or empty ink cartridges.
note:
If you are enrolled in the HP Instant Ink program, you receive special HP Instant Ink cartridges. Some HP Instant Ink cartridges are larger than standard ink cartridges, but they fit in the carriage in the same way. HP Instant Ink is not available in all countries/regions or for all printer models. For more information, go to HP Instant Ink.
    HP Instant Ink and standard ink cartridges
  1. Standard ink cartridge
  2. HP Instant Ink cartridge
  1. Turn on the printer.
  2. Open the ink cartridge access door.
    Opening the ink cartridge access door
  3. Wait until the carriage stops moving before you continue.
  4. Gently press down on the ink cartridge to release it, and then pull the ink cartridge out of its slot.
    Removing the ink cartridge
  5. Remove the new ink cartridge from its package. Be careful to only touch the black plastic on the ink cartridge.
    Removing the ink cartridge from its package
  6. Remove the plastic tape from the ink cartridge.
      caution:
    Do not touch the copper-colored contacts or the ink nozzles. Do not replace the protective tape on the contacts. Handling these parts can result in clogs, ink failure, and bad electrical connections.
    Removing the plastic tape
  7. Hold the ink cartridge by its sides with the contacts toward the printer, insert the ink cartridge into its slot, and then gently push the ink cartridge until it snaps into place.
    note:
    Install the color ink cartridge on the left and the black ink cartridge on the right.
    Snapping the ink  cartridge into place
  8. Repeat these steps for the other ink cartridge, if necessary.
  9. Close the ink cartridge access door.
    Closing the ink cartridge access door

Step 2: Align the ink cartridges

For best print quality, align the ink cartridges.

Frequently asked questions (FAQs)

Refer to these frequently asked questions about replacing the ink cartridges.