This document provides the procedure to install the optional memory DIMM.
caution:Electrostatic sensitive (ESD) parts. Always touch the sheet metal on the product to provide a static ground before touching an ESD-sensitive part.
-
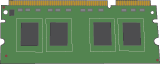
Remove the memory DIMM from the box. Verify that the contents of the box match this illustration.Figure : Memory DIMM
-
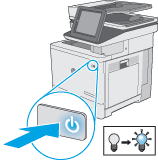
Press the power button to turn off the printer.Figure : Turn off the printer

-
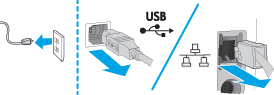
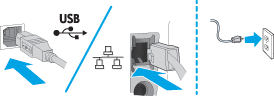
Disconnect the power cable from the outlet, and then disconnect any USB or network cables.Fax models only: Disconnect the phone cord for the fax.Figure : Unplug the printer
-
Loosen the two thumbscrews on the formatter cover.
note:
Use the edge of a coin to turn the thumbscrews.Figure : Loosen two thumbscrews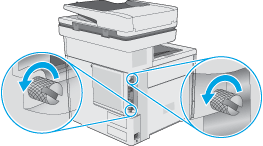
-
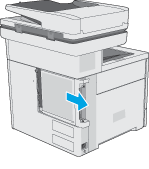
Slide the formatter cover toward the rear of the printer to remove it.
-
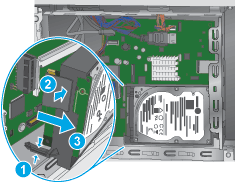
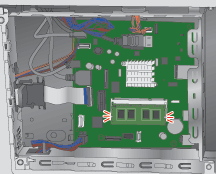
Pinch the retainer, and then release the locking connector (callout 1 and callout 2). Move the hard-disk drive (HDD) slightly away from the formatter (callout 3) to release it.Figure : Release the HDD
-
Rotate the connector end of the HDD out and away from the formatter (callout 1), and then slide it as shown (callout 2) to remove it.Figure : Remove the HDD
-
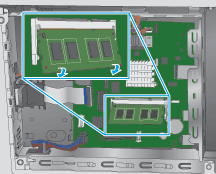
Insert the top edge of the DIMM into the holder.
note:
The DIMM can only be installed in one direction on the formatter.Figure : Insert the DIMM
-
Rotate the bottom edge of the DIMM toward the holder.Figure : Rotate the DIMM
-
Make sure that the two locking arms snap into place.Figure : Install the DIMM
-
Locate the slot in the sheet-metal where the HDD cradle mounting tab must be installed.
caution:
This portion of the sheet-metal is a knock-out plate. Do not push on it with sufficient force to detach it when installing the HDD.Figure : Locate the slot
-
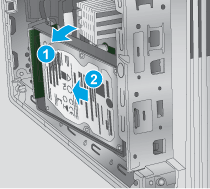
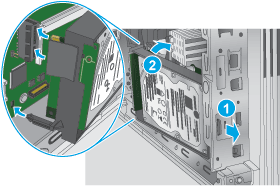
Insert the HDD cradle mounting tab in the slot in the sheet-metal (callout 1), and then rotate the connector end (callout 2) of the HDD toward the formatter.Figure : Insert the HDD
-
Make sure that the locking connector latches and that the standoff engages with the slot in the formatter (it might be necessary to pinch the retainer to engage it with the slot).Figure : Install the HDD

-
Slide the formatter cover onto the printer to install it.
note:
Make sure that the tabs on the formatter cover align with the slots provided in the printer.Figure : Replace the formatter cover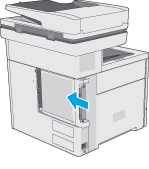
-
Tighten two thumbscrews.
note:
Use the edge of a coin to turn the thumbscrews.Figure : Replace two screws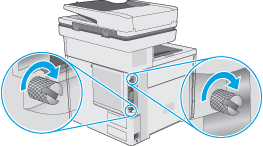
-
Connect the power cable from the outlet, and then disconnect any USB or network cables.Fax models only: Connect the phone cord for the fax.Figure : Plug in the printer
-
Press the power button to turn on the printer.Figure : Turn on the printer