solution Contentsolution Content

HP Printers - Only Part of a Wireless Print Job or Page Prints (Windows 8)

This document is for wireless HP inkjet printers manufactured after 2010.
When printing from a Windows 8 computer to a printer on your wireless network, the print job does not complete or a single page only partially prints. A printer offline message might also display.
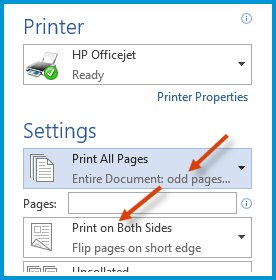
Try printing again after each step to see if conditions improve.

Step 1: Check page setup settings

If pages are missing or a portion of your printed page is missing when printing from one software application, such as Word or your Internet browser, then check the page setup settings.

Pages do not print / missing pages

Make sure that your page settings are set to print all pages and to print every page. Settings that cause some pages not to print are 'manual duplexing', 'print every other page', 'print odd pages', 'print on both sides', or similar settings. The names of the page setup settings are different depending on what software application you are using to print. If necessary, refer to the software application's help to learn how the print page settings are used.
Figure : Example of a page setup that prints only some of the pages in a print job

A portion of a page does not print

If part of your printed pages are missing, then make sure the paper type in your page settings matched the type of paper you are using. Also make sure that your margins are set correctly.

Step 2: Download and install Microsoft hotfix KB3000461

For wireless printers that are set up using a WSD port, Microsoft has released a hot fix to help prevent dropped data when processing larger print jobs.

Step 3: Disable SNMP in Printer Properties (network connection)

Disable SNMP in printer port properties.
  1. Search Windows for 'devices' and open Devices and Printers from the list of search results.
  2. Right-click the name of your printer, select Printer Properties, and then select the name of your printer.
  3. Click the Ports tab.
  4. Select the TCP/IP port being used and click Configure Port.
  5. Remove the checkmark from SNMP Status Enabled, and click OK.
  6. Try printing again. If problems persist, repeat these steps and re-enable SNMP.

Step 4: Create a manual connection

The connection to a printer on a network might suddenly change causing the connection to drop. This can happen when configuration changes occur from the DHCP service, the router assigns new IP addresses for security, or other reasons. To help prevent dropped connections, use the following steps to manually create a new connection to your printer. A manual connection is a more direct method of communicating to the printer over your network and is less likely to drop data and go offline.
note:
These steps require that your printer is already set up on your network. If your printer has never printed successfully over your network, then you must first make sure it has been set up on the network. This involves installing full feature printer software from HP or using the wireless setup wizard from the printer control panel. For more help, see the User Manual, search the HP website, or use the wireless setup wizard from the control panel if available.
  1. Print a network configuration report or Wireless Test Report page from your printer.
    • If your printer has a control panel with a display, print the report from the network settings or network setup menu.
    • If your printer does not have a display, print the report using the buttons on the printer control panel. For many HP printers, this is done by pressing and holding the cancel button or a combination of buttons on the control panel until a report prints. For more information on how to print a report for your printer model, see the User Guide or search the HP website for network configuration page and the model of your HP printer.
  2. On the report, find the IP Address, subnet mask, and Default Gateway for your active (connected) network connection type. If your report has separate numbers for IPv4 and IPv6, then use the numbers listed in the IPv4 section.
  3. From a computer connected to your network, find the URL for the embedded web server (EWS) on the report and enter the URL into your Internet browser. If the Web page appears blank, use a different Internet browser.
  4. Click the Network or Networking tab, and then open the section or page for your network type - wired or wireless.
  5. Click Suggest a Manual IP address if available and the Manual IP addresses are automatically filled in for you.
    If your page does not have a button to suggest a manual IP address, type the IP address, subnet mask, and default gateway using the numbers shown in the report. If possible, when entering the last number for IP address, type a number that is outside the normal operating DHCP range for your router. Consult your router documentation to find the DHCP range.
    Figure : Example of setting up a Manual IP configuration using an EWS
     Embedded Web Server on Network page with Manual IP selected
  6. Write down these new numbers on a piece of paper. You might need to use them later when adding a second printer device.
  7. Click Apply, and then wait until the changes are confirmed.
  8. Continue to the next step.

Step 5: Add a second printer device to Windows

After setting a manual IP address for the printer, add a second printer to Windows that matches this new IP address.
  caution:
After performing these steps, two printer icons for your printer model display in the Devices and Printers window. Do not attempt to remove the printer icon that was created when you first installed the printer software.
  caution:
If you could not set a manual IP address for your printer and the IP address changes in the future, delete the printer icon created using 'Add a printer' from Devices and Printers, and then re-add the printer. Re-adding the printer updates the print driver with the new printer IP address.
  1. Search Windows for control panel and open Control Panel from the list of search results.
  2. In Control Panel, click Devices and Printers, and then click Add Printer.
  3. Click Add a network, wireless or Bluetooth printer, and then wait for Windows to discover your printer.
    note:
    If the name of your printer does not appear in the window and you are using a wireless network, make sure the printer is turned with wireless enabled and a network cable is not connected to your printer.
    Figure : Example of the Add Printer screen.
    Example of the Add Printer screen.
  4. Click the name of your printer, and then click Next.
    If more than one printer is listed, select the name of your printer and make sure the name does not include an alphanumeric code such as 'HP647FEA'.
    The system automatically detects the right driver to use.
  5. Select Use the driver that is currently installed (recommended), and then click Next.
  6. If desired, change the name of your printer, and then click Next.
  7. Select Do not share this printer, and then click Next.
  8. Select Set as the default printer and then click Finish.
    note:
    The printer is now using a Windows class driver which provides basic printing. If you have previously installed HP full feature software, open the printer properties for the printer device that you created and select a non-class driver name that matches your printer from the Advanced properties tab. Doing so provides more printing features, such as custom paper sizes.
  9. Try printing again. If problems persist, continue to the next step.

Step 6: Install the latest full feature software

Go to the HP website to download the most current version of the full feature software for your printer. This ensures your printer has complete functionality.
note:
As an alternative, you can use the software disc if it supports the operating system installed on your computer.
  1. Turn on the printer.
  2. Disconnect the USB cable from the printer, if necessary. The software installation prompts you to connect the cable if needed.
  3. If a Let's identify your product to get started page displays, click Printer, type your printer model number, and then click Submit.
  4. If you need to change the operating system, click Change, select your version, and then click Change.
  5. Under the Driver heading, click Download for the full software package, or click Basic Drivers for other driver options.