This document is for the HP Photosmart 7510 and 7520 e-All-in-One Printer Series.
Replacing Cartridges for the HP Photosmart 7510 and 7520 e-All-in-One Printer Series
This document contains steps for replacing the cartridges.
Cartridges types
Consult the following table to identify the correct cartridges for your area.
|
Americas and Asia Pacific (excluding China, India, and Japan)
|
Western Europe
|
Africa, CIS, Japan, and Middle East
|
China and India
|
|
|
Ink cartridge
|
HP 564
|
HP 364
|
HP 178
|
HP 862
|
Purchase replacement cartridges and other supplies from the HP Store or local retailers.
Replace the cartridges
Follow these steps to replace and align the cartridges.
Video of replacing a cartridge
The following video demonstrates how to replace an ink cartridge.

Replacing a Cartridge - HP Photosmart 7510 e-All-in-One Printer (C311a)
Learn how to replace a cartridge for your HP printer. The steps apply to the HP Photosmart 7510 e-All-in-One Printer - C311a, C311b, and the HP Photosmart 7515 e-All-in-One Printer - C311a.
-
Turn on the printer, if it is not already on.
-
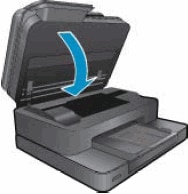
Open the ink cartridge access door.The carriage moves to the access area.
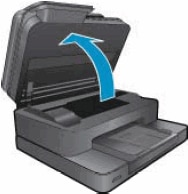
-
Wait until the carriage stops moving before you continue.
-
Press the tab on the front of the ink cartridge inward to release it, and then pull up on the ink cartridge to remove it from the slot.
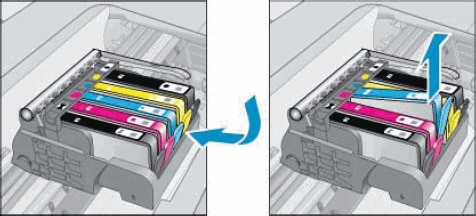
note:
Never turn off the printer when ink cartridges are missing. Make sure you replace any missing ink cartridges as soon as possible to avoid print quality issues and possible extra ink usage or damage to the ink system.caution:
Do not lift the latch to the side of the carriage to remove the ink cartridge. Doing so might result in incorrectly seated ink cartridges. -
Repeat the previous step until you have removed all of the ink cartridges from the printer.
-
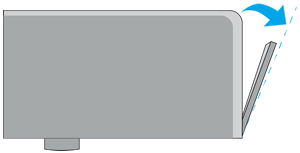
Remove an ink cartridge from its package, and then pull the orange pull-tab straight back.
caution:
Make sure you remove the orange pull-tab and plastic wrap completely before you remove the orange cap in the next step. Otherwise, ink might leak from the ink cartridge. When you remove the plastic wrap, the paper label on the top of the ink cartridge tears slightly, which is necessary to properly vent the cartridge.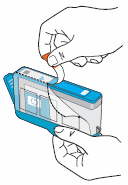
-
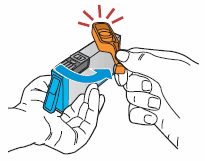
Twist the orange cap counter clockwise until it snaps off the new ink cartridge.
-
With the nozzle and contacts facing down, slide the ink cartridge into its slot. Press down on the cartridge until it snaps into place.
caution:
Do not lift the carriage latch handle to install the ink cartridges. Doing so can result in incorrectly seated ink cartridges and printing problems. The latch must remain down to install the ink cartridges correctly. Make sure the colored icon on the ink cartridge matches the colored icon on the slot.
-
If the ink cartridge does not snap into place, remove the ink cartridge from the carriage. Gently bend the tab away from the ink cartridge, and then reinsert the ink cartridge into the carriage.
caution:
Be careful not to bend the tab out more than 1.27 cm (0.5 in). Moving the tab too far might damage the ink cartridge or cause the tab to break off.-
Bend the tab away from the cartridge
-
Do not bend the tab more than 1.27 cm (0.5 in)
-
-
Repeat the previous steps until you have inserted all of the new ink cartridges into the printer.
-
Close the ink cartridge access door.
-
When you insert a new ink cartridge, the printer automatically prompts you to align the ink cartridges. Touch OK on the printer control panel to complete the alignment.
Enter a topic to search our knowledge library
What can we help you with?

Need Help?