How to download and Install Raster/PCL3GUI Driver on Windows 7 Operating System.
HP Designjet Ultra Low End (ULE) Printer Series - Microsoft Windows 7: Downloading and Installing Raster/PCL3GUI Driver
Information
Details
-
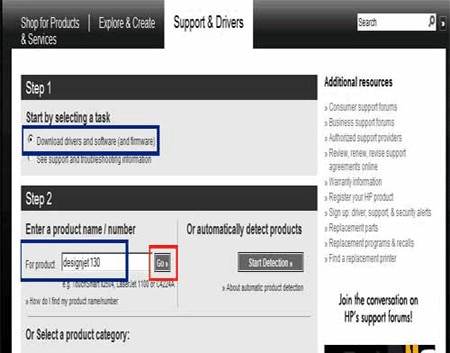
To download the latest driver, open web browser, type www.hp.com and click enter or GO. Click on Support and Drivers.Figure :

-
Select "Download drivers and software (and firmware)"In the "Enter the product name" box, enter full product name or number. For example for Designjet 130 you can type either Designjet 130 or c7791c.Figure :
-
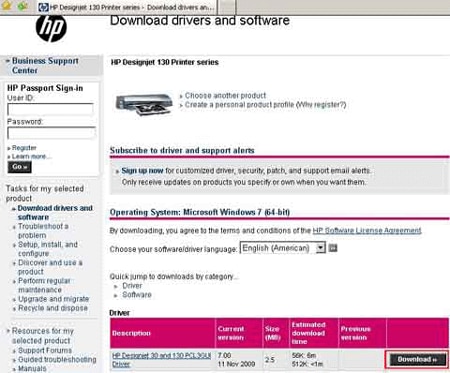
Select appropriate printer model based on the printer you have.Figure :

-
Click on the appropriate windows operating system based on the operating system installed on your computer.Figure :

-
Under driver, click on the download button for PCL3GUI or Raster or Office DriverFigure :
-
When prompted with three options (Run, Save, and Cancel), select the option Save.
note:
If you have pop up blocker or fire wall or antivirus or network security or internet security which blocks file downloads or popup, you will not get this option. With prior permission of your network or system administrator, kindly disable them.Figure :
-
Save the file to the computer preferably to the desktop folder for easier access during installation. To save the file to desktop, click on the left panel of save file window, click on desktop and click on save else manually navigate to desktop and click on save.
note:
If you do not get Desktop icon, click on Show Folders button on bottom left hand corner of the Save Dialogue Window.Figure :
-
When download is complete, click on Close. Now you should see the file that you have downloaded on the desktop of your computer.Figure :

note:
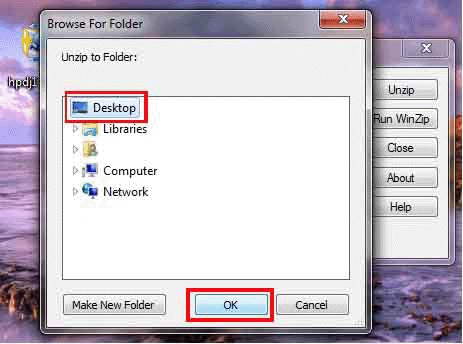
The file that has been downloaded will be in compressed format. To install the printer driver we need to uncompress the file.Double click on the file that has been downloaded and WinZip self extractor will open on the screen. Click on the browse button. -
Browse to Desktop and click on OK.Figure :
-
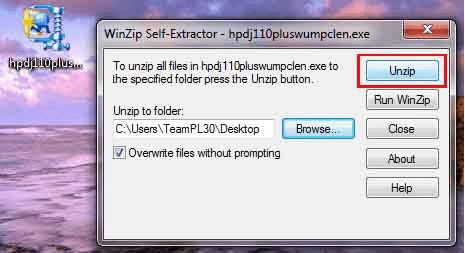
Now, click on UNZIP button.Figure :
-
You will get a message 17 File(s) unzipped successfully. Click on OK button. On the WinZip Self-Extractor window, click on the Close button.Figure :

note:
A new folder created will be created on the desktop and folder will have the same name as the name of the file downloaded from HP website. -
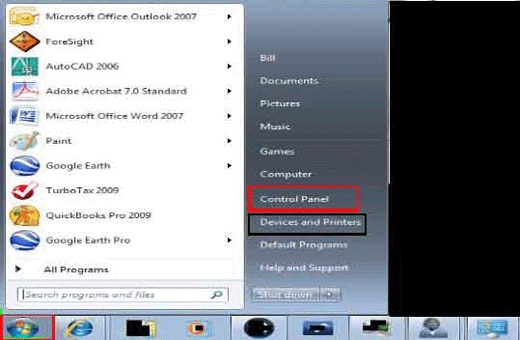
From the Start menu, click on Control Panel. Or if you see devices and printers option on start menu, you can click on that to access printers directly.Figure :
-
From the Control panel (If View by is set to "Category"), double-click on View Devices and printers found under Hardware and Sound.Figure :

-
From Control panel (If View by is set to "Small or Large Icons"), double click on Devices and printers.Figure :

-
In Devices and Printers, you will find all the printers installed on your computer. Click on the "Add a printer" button.Figure :

-
This will open Add Printer Wizard, Click Next button.When asked if the product is a local or network printer, click on appropriate connectivity, and then click the Next button.
note:
If you are installing alternate driver for your printer for example: Designjet 130 driver for Designjet 90 printer, disable "automatically detect and install my plug and play printer".Figure :
-
Click on the drop down button and select appropriate port to which the printer is connected to. [LPT for parallel cable or USB for USB cable and TCP/IP for network printer] and then click the Next button.Figure :

-
On select the manufacturer windows, Click on the "Have Disk" button. This will launch wizard screen.Figure :

-
Click on the Browse buttonFigure :

-
Navigate to the new folder that was created on the desktop and where the driver files are extracted to. To navigate to the new folder that was created on desktop, on the left panel of locate file window, click on desktop, click on the new folder and click on Open Button else manually navigate to New Folder and click on the Open button.Figure :

-
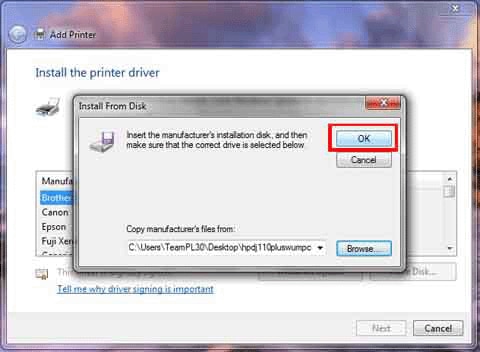
Double-click the .inf file that you find in that folder or highlight the .inf file listed and click on the Open button.Figure :

-
Click on OK.Figure :
-
From the list of printer, select the appropriate model of printer that you have and click on Next buttonFigure :

-
If prompted to choose between Keep existing driver or replace existing driver, select Replace Existing Driver option and click on the Next button.
-
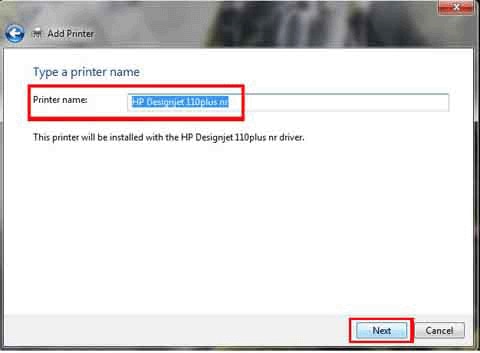
Provide a printer name or leave it to default printer name and Click on the Next button.Figure :
-
Based on your priority, you can choose to share the printer or not. If you want share the printer click on Share Name option else leave the option on Do Not Share the printer and click on the Next button.Figure :

-
Provide a printer name or leave it to default printer name and if you want the printer to be the default printer, check the box.Once the installation is complete to make sure the printer and driver are working, print the test page. Select Yes and click Next button.
note:
To print test page the printer should be powered on, Connected to your computer, paper should be loaded and printer should be ready print.Click on Finish button.Figure :
-
Once the installation is complete, if print test option was selected printer should print windows test page. In printer and faxes, the icon for Designjet printer just installed can be seen.Figure :

-
After the installation is complete, the file that was downloaded from HP website along with the folder can be deleted or it can be kept for future use.
Enter a topic to search our knowledge library
What can we help you with?

Need Help?