solution Contentsolution Content

HP Deskjet F300 Printers - A 'Paper Jam' Message Displays

This document is for HP Deskjet F325, F3335, F340, F370, F375, F378, F380, F388, F390, and F394 All-in-One printers.
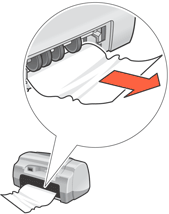
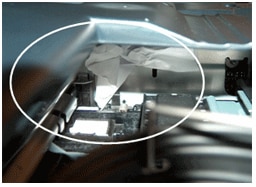
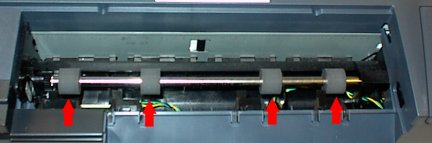
While printing, the printer stops feeding pages. A 'Paper Jam' message displays on the printer, and the printer stops printing.
Paper jams can be true or false. A false paper jam occurs when the error message displays, but no jammed paper is in the printer. The following solutions apply to both true and false paper jam errors.
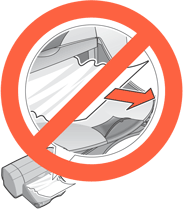
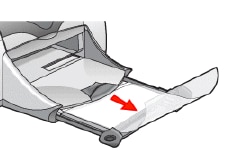
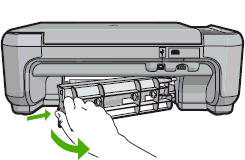
  caution:
Do not remove jammed paper from the front of the printer. If you can pull it from the rear of the printer or the tray, always try the rear first. Pulling paper from inside the front cover can cause mechanical damage to the printer.
Do not pull jammed paper from the front

Step 1: Look for jammed paper

Paper jams can occur in multiple areas of the printer. If you cannot find the paper jam in one area, continue to the next area until the jam is located.
If you have checked and removed any jammed paper from each printer area and the error persists, continue to the next step.

Step 2: Make sure the carriage can move freely

Make sure the carriage moves freely across the width of the printer.
  1. Press the Power button to turn on the printer.
  2. Open the ink cartridge access door.
    note:
    The carriage might try to move into the access area. If it does, allow the carriage to move to that position.
    Opening the ink cartridge access door
  3. Disconnect the power cord from the rear of the printer.
  4. Unplug the power cord from the power source or electrical outlet.
      caution:
    You must unplug the power cord to move the carriage by hand and reset the paper feed mechanism without the risk of electrical shock.
  5. Check for any paper or object that might prevent the carriage from moving.
    Example  of paper stuck in the ink cartridge access area
  6. Remove any paper or objects you find.
  7. Reach inside the printer, and then manually move the carriage.
    • If the carriage is stuck on the right side, move the carriage to the left side of the printer.
    • If the carriage is stuck on the left side, move the carriage to the right side of the printer.
    • If the carriage is stuck in the middle, move the carriage to the right.
  8. Remove any paper or obstructions you find.
    note:
    You might need to use a flashlight to illuminate some areas.
  9. Make sure the carriage can move freely across the width of the printer by gently pushing the carriage to the left, and then to the right.
  10. Close the cartridge access door.
    Closing the carriage access door
  11. Reconnect the power cord to the rear of the printer.
  12. Plug the power cord back into the power source or electrical outlet.
  13. Press the Power button to turn on the printer.
Try to print. If the error persists, continue to the next step.

Step 3: Clean the paper feed rollers

Dust, paper fiber, and other debris might accumulate on the paper feed rollers and cause paper jams and paper feed issues. Clean the rollers inside the printer, and then try to print again.
  1. Press the Power button to turn off the printer.
  2. Disconnect the power cord from the rear of the printer.
  3. Press in the tab on the left side of the rear access door, and then pull the door away from the printer to remove it.
    Removing the rear access door
  4. Lightly dampen a clean, lint-free cloth with bottled or distilled water, and then squeeze any excess liquid from the cloth.
  5. Press the cloth against the rollers and rotate them upwards with your fingers. Apply a moderate amount of pressure to remove any dust or dirt buildup.
    Cleaning the paper feed rollers
  6. Make sure the paper feed rollers on the rear access door are clean, free of paper bits, and rotate freely.
  7. Clean the surface and the rollers of the rear access door the same way you cleaned the large rollers inside the printer.
  8. Reattach the rear access door, gently pushing the door forward until it snaps into place. Make sure the rear access door seats correctly in the printer. An incorrectly positioned rear access door might cause more paper jams.
  9. Reconnect the power cord to the rear of the printer, and then press the Power button to turn on the printer.
Try to print. If the error persists, continue to the next step.

Step 4: Reset the printer

Sometimes a paper jam error persists even though there is no jammed paper (false paper jam). Reset the printer, which might clear a false paper jam error, and then try to print again.
  1. With the printer turned on, disconnect the power cord from the rear of the printer.
  2. Unplug the power cord from the wall outlet.
  3. Wait at least 15 seconds.
  4. Plug the power cord back into the wall outlet.
  5. Reconnect the power cord to the printer.
  6. Turn the printer on.
Try to print. If the error persists, continue to the next step.

Step 5: Service the printer

Service or replace your HP product if the issue persists after completing all the preceding steps.
Go to Contact HP Customer Support to schedule a product repair or replacement. If you are in Asia Pacific, you will be directed to a local service center in your area.
To confirm your warranty status, go to HP Product Warranty Check. Repair fees might apply for out-of-warranty products.