HP Designjet Printers - HP Standard TCP/IP Port is not a Port Choice
Issue:
The HP Standard TCP/IP port is not a choice when trying to create a new network port.
Solution
Create the HP Standard TCP/IP port using the CD shipped with the printer or by downloading from the web. Follow the appropriate instructions below:
note:While installing the driver, create the HP TCP IP port. If the option does not show up then the Standard TCP IP port can be selected. At the end of the installation if for any reason the port does not respond properly, then a new port can be created under the driver properties. Once the driver has been installed, the option for the HP TCP IP Port will show up.
Installing from CD-ROM
-
Close all programs currently running on the computer.
-
Insert the Software setup installation CD into the CD-ROM drive.
-
The installation should automatically start. If the install does not automatically start, follow the steps below:
-
Open Windows Explorer and click the CD-ROM drive.
-
Double-click IS_Setup.
-
The installation should now begin.
-
-
When the Select an Option window appears, click Create Network Port Only as shown in Figure 1 below.Figure : Selecting an Option window

-
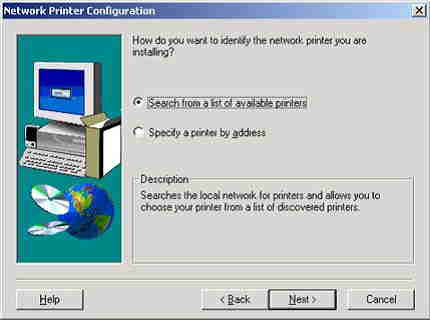
In the Network Printer Configuration window, choose the appropriate network printer by searching from a list of available printers or specifying the printer by its address, then click Next > (see Figure 2 below).Figure : Network Printer Configuration window
-
The Set Network Communication Mode window will now appear.
-
Ensure the communication mode is set to Windows TCP/IP (recommended), as shown in Figure 3 below.
note:
It is recommended to keep the checkmark in the Use default portname selection.Figure : Network Communication Mode setting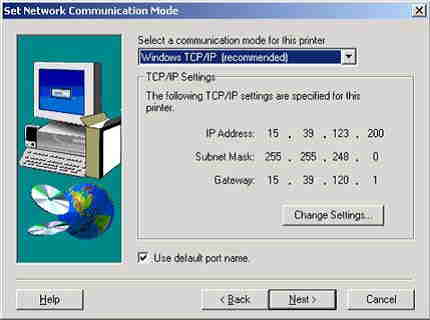
-
Click Next.
-
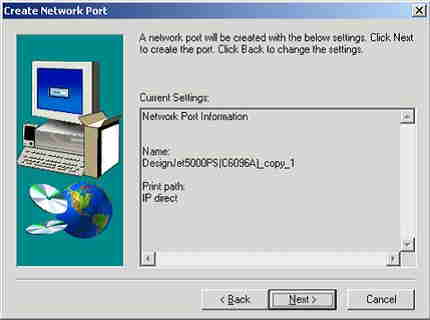
The Create New Port window will now appear, verify the information and click Next.Figure : Create Network Port current settings
-
The Select an Option screen with now appear, click Exit to end the installation or choose another option (for example, Install Printer) if necessary, see Figure 5 below.Figure : Other available options
-
The HP Standard TCP/IP port will now be available to use.
Downloading and installing HP Install Network Printer Wizard from the Web
-
Choose to download the file to the desktop.
-
Once download is complete, shut down all running programs.
-
Double-click the icon created on the desktop (for example ja256en).
-
The installation will now begin.
-
Click Next on the first screen.
-
Choose Yes to accept the license agreement.
-
Accept the default file destination by clicking Next (recommended).
-
Click Next in the program folder window (use default settings already chosen.)
-
In the next window click Finish.
-
Access the HP Install Network Printer Wizard from Start, Programs.
-
Click the HP Install Network Printer Wizard to start the installation.
-
Follow the installation instructions.
-
When the installation is complete, a new port (HP Standard TCP/IP Port) will be created.
-
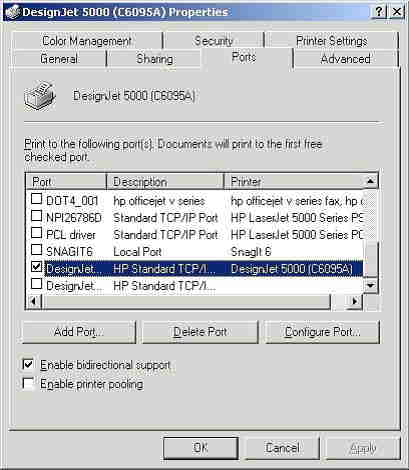
Access the Printer Properties for the applicable HP Designjet product.
-
Select the Ports tab and re-direct the printer communications through the HP Standard TCP/IP, then click Apply (Figure 6 below).Figure : Ports Properties window
-
If no driver has been installed, install the driver and select the HP Standard TCP/IP port during the installation.
Enter a topic to search our knowledge library
What can we help you with?

Need Help?