solution Contentsolution Content

HP Officejet Enterprise Color X555 and HP Officejet Enterprise Color MFP X585/X585 Flow - Improve print quality

If the product is having print-quality problems, try the following solutions in the order presented to resolve the issue.
note:
For further assistance in print-quality troubleshooting, go to hp.com/support/ojcolorX555 or hp.com/support/ojcolorMFPX585, and then click PQ Troubleshooting Tools.

Print from a different software program

Try printing from a different software program. If the page prints correctly, the problem is with the software program from which you were printing.

Check the paper-type setting for the print job

Check the paper type setting when printing from a software program and the printed pages have smears, fuzzy or dark print, curled paper, scattered dots of ink, or small areas of missing ink.

Check the paper type setting (Windows)

  1. From the software program, select the Print option.
  2. Select the product, and then click the Properties or Preferences button.
  3. Click the Paper/Quality tab.
  4. From the Paper Type drop-down list, click the More... option.
  5. Expand the list of Type is: options.
  6. Expand the category of paper types that best describes your paper.
  7. Select the option for the type of paper you are using, and click the OK button.
  8. Click the OK button to close the Document Properties dialog box. In the Print dialog box, click the OK button to print the job.

Check the paper type setting (Mac OS X)

  1. Click the File menu, and then click the Print option.
  2. In the Printer menu, select the product.
  3. By default, the print driver displays the Copies & Pages menu. Open the menus drop-down list, and then click the Finishing menu.
  4. Select a type from the Media Type drop-down list.
  5. Click the Print button.

Check ink cartridge status

Follow these steps to check the estimated life remaining in the ink cartridges if your printed pages have small unprinted areas, streaks, or bands.
  1. From the Home screen on the product control panel, scroll to and touch the Supplies button.
  2. The status of all supply items is listed on the screen.
  3. To print or view a report of the status of all supply items, including the genuine HP part number for reordering the supply, touch the Manage Supplies button. Touch the Supplies Status button, and then touch either the Print or View button.
  4. Check the percent of life remaining for the cartridges and if applicable, the status of other replaceable maintenance parts.
    Print quality problems can occur when using an ink cartridge that is at its estimated end of life. The supplies status page indicates when a supply level is very low. After an HP supply has reached the very low threshold, HP’s premium protection warranty on that supply has ended.
    The ink cartridge does not need to be replaced now unless the print quality is no longer acceptable. Consider having a replacement available to install when print quality is no longer acceptable.
    If you determine that you need to replace an ink cartridge or other replaceable maintenance parts, the supplies status page lists the genuine HP part numbers.
  5. Check to see if you are using a genuine HP cartridge.
    A genuine HP ink cartridge has the words “HP” or “Hewlett-Packard” on it, or has the HP logo on it. For more information on identifying HP cartridges go to www.hp.com/support. Select your country/region. Click Troubleshooting. Enter the product name, and then select Search.
    Hewlett-Packard cannot recommend the use of non-HP supplies, either new or remanufactured. Because they are not HP products, HP cannot influence their design or control their quality. If you are using a refilled or remanufactured ink cartridge and are not satisfied with the print quality, replace the cartridge with a genuine HP ink cartridge.

Clean the product

Print a cleaning page

Print a cleaning page to remove dust and excess debris from the paper path if you are having any of the following problems:
  • Specks of ink are on the printed pages.
  • Repeated marks occur on the printed pages.
Use the following procedure to print a cleaning page.
  1. From the Home screen on the product control panel, scroll to and touch the Device Maintenance button.
  2. Touch Calibration/Cleaning, and then touch Print Cleaning Page to print the page.
  3. The cleaning process can take several minutes. When it is finished, discard the printed page.

Clean the printhead

Clean the printhead to correct these print-quality problems:
  • Vertical white lines
  • Ragged or missing colors in vertical bands from top to bottom of the page
  • Wrong colors or color variation in bands from top to bottom of the page
  caution:
To avoid problems with dry ink or with ink mixing between printheads, always press the power button on the front of the product to turn off the product rather than disconnecting the power cord. Using the power button ensures that the printbar is capped and protected.
  1. From the Home screen on the product control panel, scroll to and touch the Device Maintenance button.
  2. Touch Calibration/Cleaning.
  3. Touch Clean Print head.

Resolve ink smears

Most problems with smeared ink are the result of using unsupported paper. To avoid ink smears, do not use LaserJet Glossy paper or coated paper developed for offset printing. With these types of paper, the ink cannot absorb into the paper.
note:
When using a highlighter on pages printed from this product, make a single pass with the highlighter to avoid smearing ink.
If smears do occur, use the following procedure to clean the product.
  1. From the Home screen on the product control panel, scroll to and touch the Device Maintenance button.
  2. Touch Calibration/Cleaning.
  3. Touch Resolve Ink Smear.

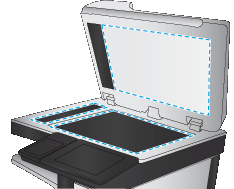
Check the scanner glass for dirt and smudges (MFP models only)

Over time, specks of debris might collect on the scanner glass and white plastic backing, which can affect performance. Use the following procedure to clean the scanner if the printed pages have streaks, unwanted lines, black dots, poor print quality, or unclear text.
  1. Press the power button to turn the product off, and then disconnect the power cable from the electrical outlet.
    Figure : Press the power button
  2. Open the scanner lid.
    Figure : Open the scanner
  3. Clean the scanner glass, the document feeder strips, and the white plastic backing with a soft cloth or sponge that has been moistened with nonabrasive glass cleaner.
    Figure : Clean the scanner
      caution:
    Do not use abrasives, acetone, benzene, ammonia, ethyl alcohol, or carbon tetrachloride on any part of the product; these can damage the product. Do not place liquids directly on the glass or platen. They might seep and damage the product.
    note:
    If you are having trouble with streaks on copies when you are using the document feeder, be sure to clean the small strip of glass on the left side of the scanner.
  4. Dry the glass and white plastic parts with a chamois or a cellulose sponge to prevent spotting.
  5. Connect the power cable to an outlet, and then press the power button to turn the product on.

Visually inspect the ink cartridge

  1. Remove the ink cartridge from the product, and verify that there is no debris in the cartridge path.
  2. Examine the metal connector of the ink cartridge.
      caution:
    Do not touch the metal connector on the edge of the cartridge. Fingerprints on the metal connector can cause print-quality problems.
    Figure : Do not touch the contact
  3. If you see any scratches, or other damage on the metal connector, replace the ink cartridge.
  4. If the metal connector does not appear to be damaged, push the cartridge gently back into its slot until it locks in place. Print a few pages to see if the problem has resolved.

Check paper and the printing environment

Step one: Use paper that meets HP specifications

Some print-quality problems arise from using paper that does not meet HP specifications.
  • Always use a paper type and weight that this product supports.
  • Use paper that is of good quality and free of cuts, nicks, tears, spots, loose particles, dust, wrinkles, voids, staples, and curled or bent edges.
  • Use paper that has not been previously printed on.
  • Use paper that does not contain metallic material, such as glitter.
  • Use paper that is not too rough. Using smoother paper generally results in better print quality.
  • Use paper that is designed for use in Inkjet printers. Do not use paper that is designed only for use in laser printers.
  • HP recommends using paper with ColorLok Technology for best results.
  • Use a heavier paper type, especially if you are using 60 g/m2 paper.

Step two: Check the environment

The environment can directly affect print quality and is a common cause for print-quality or paper-feeding issues. Try the following solutions:
  • Move the product away from drafty locations, such as open windows or doors, or air-conditioning vents.
  • Make sure the product is not exposed to temperatures or humidity outside of product specifications.
  • Do not place the product in a confined space, such as a cabinet.
  • Place the product on a sturdy, level surface.
  • Remove anything that is blocking the vents on the product. The product requires good air flow on all sides, including the top.
  • Protect the product from airborne debris, dust, steam, grease, or other elements that can leave residue inside the product.

Step three: Set the individual tray alignment

Follow these steps when text or images are not centered or aligned correctly on the printed page when printing from specific trays.
  1. From the Home screen on the product control panel, scroll to and touch the Administration button.
  2. Open the following menus:
    • General Settings
    • Print Quality
    • Image Registration
  3. Select the tray that you want to adjust.
  4. Touch the Print Test Page button, and then follow the instructions on the printed pages.
  5. Touch the Print Test Page button to verify the results, and then make further adjustments if necessary.
  6. When you are satisfied with the results, touch the Save button to save the new settings.

Calibrate the product to align the colors

Calibration is a product function that optimizes print quality.
Follow these steps to resolve print print-quality problems such as misaligned color, colored shadows, blurry graphics, or other print-quality issues.
  1. From the Home screen on the product control panel, scroll to and touch the Device Maintenance button.
  2. Open the following menus:
    Calibration/Cleaning > Print head cleaning
  3. Touch the Continue button to start the calibration process.
  4. Wait for 20 minutes and try printing a page to verify print quality.
  5. If the print quality issue persists, from the Home screen on the product control panel, scroll to and touch the Device Maintenance button.
  6. Open the following menus:
    Calibration/Cleaning > Advance Calibration Support
  7. Touch the Continue button and select Color Density Calibration.
  8. Touch the Continue button to start the calibration process.
    A Calibrating message will display on the product control panel. The calibration process takes a few minutes to complete. Do not turn the product off until the calibration process has finished.
  9. Print again to verify the print quality issue is resolved.

Check other print job settings

When printing from a software program, follow these steps to try to resolve the issue by adjusting other print-driver settings.

Adjust color settings (Windows)

Follow these steps if colors on the printed page to not match colors on the computer screen, or if the colors on the printed page are not satisfactory.
Change the color theme
  1. From the software program, select the Print option.
  2. Select the product, and then click the Properties or Preferences button.
  3. Click the Color tab.
  4. Select the HP EasyColor check box to clear it.
  5. Select a color theme from the Color Themes drop-down list.
    • Default (sRGB): This theme sets the product to print RGB data in raw device mode. When using this theme, manage color in the software program or in the operating system for correct rendering.
    • Vivid (sRGB): The product increases the color saturation in the midtones. Use this theme when printing business graphics.
    • Photo (sRGB): The product interprets RGB color as if it were printed as a photograph using a digital mini lab. The product renders deeper, more saturated colors differently than with the Default (sRBG) theme. Use this theme when printing photos.
    • Photo (Adobe RGB 1998): Use this theme with printing digital photos that use the AdobeRGB color space rather than sRGB. Turn off color management in the software program when using this theme.
    • None: No color theme is used.
    • Custom Profile: Select this option to use a custom input profile to accurately control color output (for example, to emulate a specific HP Color LaserJet product). Download custom profiles from www.hp.com.
  6. Click the OK button to close the Document Properties dialog box. In the Print dialog box, click the OK button to print the job.
Change the color options
  1. From the software program, select the Print option.
  2. Select the product, and then click the Properties or Preferences button.
  3. Click the Color tab.
  4. Select the HP EasyColor check box to clear it.
  5. Click the Automatic or Manual setting.
    • Automatic setting: Select this setting for most color print jobs
    • Manual setting: Select this setting to adjust the color settings independently from other settings. Click the Settings button to open the manual color-adjusment window.
      note:
      Changing color settings manually can impact output. HP recommends that only color graphics experts change these settings.
  6. Click the Print in Grayscale option to print a color document in black and shades of gray. Use this option to print color documents for photocopying or faxing.
  7. Click the OK button to close the Document Properties dialog box. In the Print dialog box, click the OK button to print the job.

Try a different print driver

You might need to use a different print driver when printing from a software program and the printed pages have unexpected lines in graphics, missing text, missing graphics, incorrect formatting, or substituted fonts.
Download any of the following drivers from the HP support Web site for this product.
HP PCL 6 driver
  • Provided as the default driver on the product CD. This driver is automatically installed unless you select a different one.
  • Recommended for all Windows environments
  • Provides the overall best speed, print quality, and product-feature support for most users
  • Developed to align with the Windows Graphic Device Interface (GDI) for the best speed in Windows environments
  • Might not be fully compatible with third-party and custom software programs that are based on PCL 5
HP UPD PS driver
  • Recommended for printing with Adobe® software programs or with other highly graphics-intensive software programs
  • Provides support for printing from postscript emulation needs, or for postscript flash font support
HP UPD PCL 5
  • Recommended for general office printing in Windows environments
  • Compatible with previous PCL versions and older HP LaserJet products
  • The best choice for printing from third-party or custom software programs
  • The best choice when operating with mixed environments, which require the product to be set to PCL 5 (UNIX, Linux, mainframe)
  • Designed for use in corporate Windows environments to provide a single driver for use with multiple product models
  • Preferred when printing to multiple product models from a mobile Windows computer
HP UPD PCL 6
  • Recommended for printing in all Windows environments
  • Provides the overall best speed, print quality, and printer feature support for most users
  • Developed to align with Windows Graphic Device Interface (GDI) for best speed in Windows environments
  • Might not be fully compatible with third-party and custom software programs that are based on PCL 5