If the product does not print at all, try the following solutions:
-
Make sure the product is turned on and that the control panel indicates it is ready:
-
If the control panel does not indicate the product is ready, turn the product off and then on again.
-
If the control panel indicates the product is ready, try sending the job again.
-
-
If the control panel indicates the product has an error, resolve the error and then try to print a test page from the control panel. If the test page prints, there may be a communication problem between the product and the computer you are trying to print from.
note:
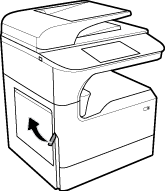
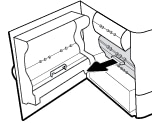
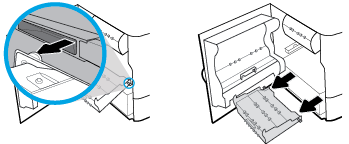
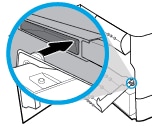
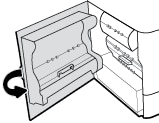
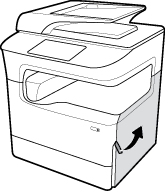
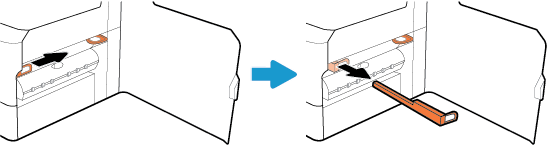
If an error message about the left duplexer (or service fluid container) appears, see Reinstall or replace the left duplexer.If an error message about the printhead wiper restraints appears, see Remove the printhead wiper restraints. -
Make sure the cables are all connected correctly. If the product is connected to a network, check the following items:
-
Check the light next to the network connection on the product. If the network is active, the light is green.
-
Make sure that you are using a network cable and not a phone cord to connect to the network.
-
Make sure the network router, hub, or switch is turned on and that it is working correctly.
-
-
Install the HP software from www.support.hp.com. Using generic printer drivers can cause delays clearing jobs from the print queue.
-
From the list of printers on your computer, right-click the name of this product, click Properties, and open the Ports tab:
-
If you are using a network cable to connect to the network, make sure the printer name listed on the Ports tab corresponds to the product name on the product configuration page.
-
If you are using a USB cable and are connecting to a wireless network, make sure the box is checked next to Virtual printer port for USB.
-
-
If you are using a personal firewall system on the computer, it might be blocking communication with the product. Try temporarily disabling the firewall to see if it is the source of the problem.
-
If your computer or the product is connected to a wireless network, low signal quality or interference might be delaying print jobs.