This document contains instructions to install the printer.
caution:Do not plug-in or turn on the printer until directed to do so.
caution:Do not plug-in or turn on the printer until directed to do so.


note:Retain the screws for the imaging unit installation. These are required for installing the imaging unit.


caution:Leave the front and right doors open until all installation steps are complete.


note:Do not expose the imaging unit to light for more than a few minutes.
caution:Do not touch the exposed drum-roller surface.

caution:Once the plug is removed, the imaging unit must remain level. If the imaging unit is tipped, contents might spill out.

caution:Do not touch the exposed drum roller surface on the imaging unit.

note:If the imaging unit binds or does not slide easily into its slot, verify that the right door is fully open, realign the imaging unit, and then insert it again.


caution:Make sure the connector is fully seated in the socket.


note:Keep the orange plug in place. It is required for toner cartridge replacement.


note:This tab MUST be removed before inserting the cartridge into the printer.


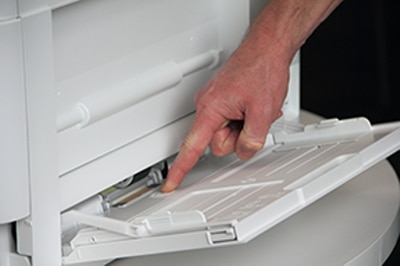
note:The green width-guide moves by pinching each side, then moving it back and forth as needed.

note:The green length-guide moves by pinching the green button (as shown), then moving it back and forth as needed.

note:Pushing down on the lift-plate is necessary when loading paper into an empty tray.

note:Paper/media must sit against the right edge of tray, under the roller. Verify that the media length and size are correct.
caution:Do not overfill paper in the tray. Overfilling the tray can result in paper jams.


caution:Do not overfill paper in the tray. Overfilling the tray can result in paper jams.

caution:ALWAYS plug the power cord into the printer BEFORE plugging the cord into an electrical outlet.


