solution Contentsolution Content

HP Color LaserJet Flow MFP M880 and HP Color LaserJet M855 - Install or replace the high capacity input feeder

Introduction

This document provides the procedures to install or replace the high capacity input (HCI) feeder for the HP Color LaserJet Enterprise M855 and HP Color LaserJet Enterprise Flow MFP M880.
note:
To see a short video demonstrating this procedure, click here.
Before you begin
  • Use the table below to identify the correct kit part number for your product, and then go to www.hp.com/buy/parts to order the kit.
    HCI Kit Part Number
    C1N64A
    HCI kit with instruction guide
Required tools
  • No special tools are required to install this kit.
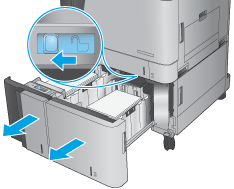
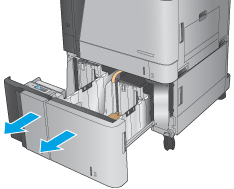
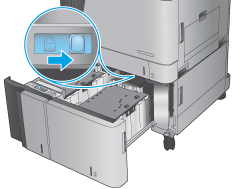
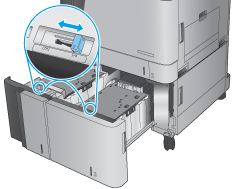
Replacing an installed HCI
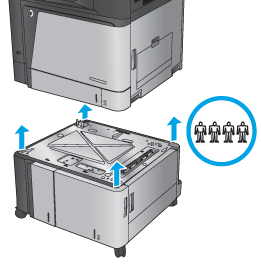
Installing an optional HCI

Step 1 - Remove the HCI

  1. Do the following:
    1. Turn off the product.
    2. Disconnect the power cord.
        warning:
      To avoid damage to the product, turn the product off, wait five seconds, and then remove the power cord before attempting to service the product.
    3. Disconnect all cables attached to the product.
    4. If installed, disconnect the output accessory interface cable, and completely remove the accessory from the product.
  2. Open Tray 4 and Tray 5, and then slide the blue lever to the left to unlock the HCI from the product.
    Figure : Open the trays and unlock HCI
  3. Close Tray 4 and Tray 5.
    Figure : Close the trays
  4. Lift the product up and off of the HCI.
    The product is heavy. HP recommends that four people lift the product to remove it.
    • M855
      85.2 kg (187.8 lb)
    • M880
      113.9kg (250.2 lb)
    Figure : Remove the product from the HCI

Step 2 - Unpack the Optional or Replacement HCI

Unpack the HCI from the packaging.
Remove all of the shipping tape from outside the accessory. Do not remove the piece of tape above the trays, but position it towards the front of the trays so that it is not covered when the product is reinstalled.
Figure : Remove the shipping tape
note:
HP recommends responsible disposal of the defective HCI.

Step 3 - Install the Optional or Replacement HCI

  1. Place the product on the HCI.
    The product is heavy. HP recommends that four people lift the product.
    • M855
      85.2 kg (187.8 lb)
    • M880
      113.9kg (250.2 lb)
    Figure : Place the product on the HCI
  2. Open Tray 4 and Tray 5.
    Figure : Open the trays
  3. Remove the tape and packing materials from inside the trays.
    Figure : Remove packaging from trays
  4. Slide the blue lever to the right to lock the HCI to the product.
    Figure : Lock the HCI
  5. Slide the blue paper-selector lever to the left to select letter-size paper, or to the right to select A4-size paper.
    Figure : Select the paper size
  6. Load paper in the trays, and then close the trays.
    Figure : Load paper and close the trays
  7. Do the following:
    1. Plug in the power cord.
    2. Turn on the product.

Parts Return

note:
HP recommends responsible disposal of the defective HCI.