solution Contentsolution Content

HP Designjet 30, 130, and 90 Printer Series - Software RIP Installation for Windows

Introduction

The HP Designjet 30, 130 or 90 series software RIP must be installed to enable printing from your application software.
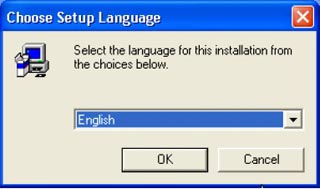
This document describes how to install the HP Software RIP on a computer running the Windows operating system.
Each of the HP Software RIP's are delivered on one CD, containing:
  • The HP Software RIP - the software RIP processes Postscript files to convert them to PCL3GUI, which is the language that the printer uses.
  • The System Maintenance utility - this application helps you diagnose any problems you may encounter with your printer.
  • The Adobe PS driver - this driver converts the output of any application to Postscript.
If installation information is required for RIP installation for Macintosh (OS X, OS 9), click here to access the the Macintosh RIP installation document at http://www.hp.com/cposupport/printers/support_doc/c00102681.html.

Operating system requirements

Supported operating systems:
  • Microsoft Windows: ME, NT 4, 2000, and XP
note:
The HP Designjet 90 is not supported in windows NT 4.0.

Found new hardware (plug & play)

If you are using Windows Me, Windows 2000, or Windows XP, you may see a message telling you that new hardware has been found and prompting you for a new driver before the installation of the Software RIP.
This occurs because these versions of Windows have a "plug & play" facility that detects when a new device has been connected to your computer.
To avoid repeated interruptions by this message, install the Windows driver if available in the printer’s CD. Otherwise, follow the procedure below:
  1. In the Welcome dialog box of the Found New Hardware window, check the Install from a list or specific location (Advanced) check box.
  2. Search for the driver on the CD-ROM.
    If you cannot find the driver using the automatic selection, you will find it in the following location:
    • For Windows Me - <cd-rom-drive>\UsbWinMe\hp designjet 30 130
    • For Windows 2000 and XP - <cd-rom-drive>\install\NonCompressed \hp designjet <version>\English \OutputDrivers\HP Designjet <version>\PNP2000, where <version> is 30 or 130.
    note:
    Files for the HP Designjet 90 are very similar and can be found following the same folder structure.
  3. Select the correct driver. Use the following setup file whether you have the 30, 130, or 90 printer:
    • for Windows Me: (i.e. hpl130.inf)
    • for Windows 2000/XP: (i.e. oemsetup.inf)
  4. Finish the installation as described below.

Uninstalling a previous version first

The software RIP will check whether a previous version has been already been installed. It will also check whether a software RIP for another HP Designjet (such as the 10ps, 20ps, or 120 series) has already been installed. If a previous version is detected, a message appears during installation.
  • If a previous version of the RIP for a different printer model has been installed, you should first uninstall that version.
  • If you have a previous version for the same printer model, there is no need to uninstall it.
If you cancel the installation and want to uninstall the old software RIP, proceed as follows:
  1. Make sure the software RIP is not running (File, Exit).
  2. Go to Add/Remove Programs (Start, Settings, Control Panel, Add/Remove Programs).
  3. Remove the following:
    • HP Designjet 20ps or 120 series software RIP
    • Hot Folder 3
    • HP Designjet System Maintenance utility
    note:
    The following steps are also applicable for any Windows client installations. Make sure you complete them for your Windows clients.
  4. Go to Printers (Start, Settings, Printers) and delete any printer associated with a previous version of the software RIP. Select it and click the Delete button.
  5. Restart the computer.

Installing the software RIP

Use the following procedure to install the HP Software RIP for Windows:
  caution:
With some versions of Windows you may need administrator rights to carry out this procedure. Refer to the Administrator privileges section to see if doing so is necessary.
note:
If you have a previous version of the HP Designjet software RIP installed, it will be replaced by the version you are installing.
  1. Insert the HP Software RIP in your computer's CD-ROM drive.
    note:
    If the CD does not run automatically, navigate to the CD and double-click the autorun.exe icon.
    The installation program displays several setup preparation status bars and prompts you to select the required setup language from the Choose Setup Language dialog box.
  2. Select the required language from the drop-down menu of the Choose Setup Language dialog box, and press OK to continue installation or Cancel to exit the installation.
    Figure : Language select dialog box
    The software RIP Welcome dialog box is displayed. This dialog box provides important information about installing the software as well as the legal implications of its use.
    Figure : Welcome dialog box
  3. Press Next to continue or Cancel to exit the installation.
    The software RIP license agreement dialog box is displayed.
  4. Press Yes to continue if you accept the agreement, Back to return to the previous window, or No to exit the installation.
    You are prompted to select the type of installation: server or client.
    Figure : Installation type dialog box
  5. Select Server to continue (for a client installation, see the sectionAdding a Windows printer client to a Windows printer server).
    The Checking RIP Requirements dialog box is displayed. This dialog box provides information about the minimum resources necessary to install the software RIP and what resources have actually been detected on your computer.
    These resources are:
    • Operating system installed
    • Memory available
    • Hard disk space available
  6. If your computer meets the minimum requirements, press Next to continue or Cancel to exit the installation.
    note:
    If your computer does not meet the minimum memory or hard disk requirements, you will have to cancel the installation and update your computer hardware to match the minimum requirements before continuing with the installation.
  7. Press Next to continue the installation.
    The Choose Destination Location dialog box is displayed to allow you to select the folder to install the software RIP.
    Figure : Choose Destination Location dialog box
    The default folder for the HP Designjet 30 software RIP is the following:
    • <Your_HD>:\Program files\ hp designjet 30 RIP.
    The default folder for the HP Designjet 130 series software RIP is the following:
    • <Your_HD>:\Program files\ hp designjet 130 RIP.
    The default folder for the HP Designjet 90 series software RIP is the following:
    • <Your_HD>:\Program files\ hp designjet 90 RIP.
  8. Press Next to accept the default folder or Browse... to select or create a different folder.
    The Select Program Folder dialog box is displayed to allow you to specify where to add program icons.
  9. Press Next to continue the installation.
    The current settings for the installation are displayed to allow you to check that they are correct before the files are copied to your computer.
  10. Press Install to continue the installation.
    The installation files are copied to the installation folder and various status bars display the progress of the installation.
    A dialog box instructs you to restart the computer.
    Figure : Restarting windows dialog box

Configuring the software RIP on a printer server

Once you have restarted your computer and responded to the registration dialog box, the software RIP starts and displays two windows: the Next Steps window, which you can leave on the screen for reference, and the Add Setup window.
Use the following procedure to configure the HP Software RIP when the Add Setup window is displayed and prompts you to continue the setup.
Figure : Add setup dialog box
  1. Press Next to continue or Cancel to exit the configuration.
    The second Add Setup window prompts you to enter a setup name for your printer and to choose which port of your computer it is connected to.
    Figure : Printer name and port dialog box
  2. If required, enter the setup name for the printer. By default, the name is "hp designjet 30, hp designjet 130, or hp designjet 90".
  3. Select the port that is used to connect the printer to your computer.
    note:
    If your computer is equipped with a USB port but it does not appear in the port selection menu, refer to the Cannot see USB port when setting up computer section of this document.
    note:
    If you are using the TCP/IP port you will need to configure your network card. Refer to the Using a network card section.
  4. Press Finish to complete the configuration.
    You will be prompted to install the Adobe Postscript driver, or the built-in Postscript driver if you are using Windows 2000 or XP.
    Under Windows 2000 and XP, a built-in Postscript driver is provided as standard, but you will need to add a Postscript printer. If necessary, use the normal Windows procedure to add a printer, and configure it using the PPD and port specified in steps 8 and 9.
    For other versions of Windows, follow the steps below.
      caution:
    In the dialog asking whether to install a Postscript printer driver, if you press Cancel and you have no Postscript driver and printer installed on your computer, you will not be able to print from applications.
  5. Press OK to install the correct Adobe version of the Postscript driver for your operating system, or Cancel to skip the installation.
    note:
    If you already have the same or a later version of the Adobe Postscript driver installed on your computer, press Cancel to skip the installation.
  6. Follow the Adobe Postscript driver installation instructions to install the driver.
  7. When asked to select a local or network printer, select local.
  8. If the PPD file for your printer is not selected automatically, browse to the following directory for HP Designjet 30 series printers:
    • <cd-rom drive>:\install\PPDFolder\<inst_lang> \246_HPDJ30\HPDJ30.PPD
      Browse to the following directory for HP Designjet 130 series printers:
      • <cd-rom drive>:\install\PPDFolder\<inst_lang> \241_HPDJ130\HPDJ130.PPD
    note:
    The designjet 90 will have similar file names, located in the same folder structure.
  9. The default port for HP Designjet 30 series printers is:
    • <Your_HD>:\Program Files\hp designjet 30 RIP\Jobs\Hewlett-Packard\<PrinterType>
      where <PrinterType> is HPDJ30. If this port is not available, select any port.
    The default port for HP Designjet 130 series printers is:
    • <Your_HD>:\Program Files\hp designjet 130 RIP\Jobs\Hewlett-Packard\<PrinterType>
      where <PrinterType> is HPDJ130. If this port is not available, select any port.
    The default port for HP Designjet 90 series printers is:
    • <Your_HD>:\Program Files\hp designjet 90 RIP\Jobs\Hewlett-Packard\<PrinterType>
      where <PrinterType> is HPDJ90. If this port is not available, select any port.
  10. When asked whether you want to share the printer, select yes.
  11. Do not try to print a test page: it will not print correctly at this stage.

Printing from a Windows application on a printer server or client

You will find your HP Designjet 30 or 130 series printer among the list of available printers on your system. Any application can use it to print, just as for any other printer (for example, by selecting Print in the File menu).

Adding a Windows printer client to a Windows printer server

To use clients with your Windows server you must share the Software RIP. The way you share it depends on the operating system of the computer you are using as your server.
Enable the specified service listed in the following table for the operating system of your server. For full details about enabling the required services and protocols, refer to the Microsoft documentation or the online help for your operating system.
Windows server OS
Windows service required
Windows Me
File and Printer Sharing for Microsoft Network
Windows NT Workstation
note:
Not supported with HP Designjet 90 series.
File and Printer Sharing for Microsoft Network (installed by default)
Windows NT Server
note:
Not supported with HP Designjet 90 series.
Windows 2000 Professional
Windows 2000 Server
Windows XP Workstation
Windows XP Server
Use the following procedure to install the client software:
note:
If you are running Windows 2000 or XP, do not forget to also install the Adobe Postscript driver included on the RIP installation CD.
  1. Insert the HP Software RIP in your computer's CD-ROM drive.
    note:
    If the CD does not run automatically, navigate to the CD and double-click the autorun.exe icon.
    The installation program displays several setup preparation status bars and prompts you to select the required setup language from the Choose Setup Language dialog box.
  2. Select the required language from the drop-down menu of the Choose Setup Language dialog box, and press OK to continue installation or Cancel to exit the installation.
    Figure : Language select dialog box
    The software RIP Welcome dialog box is displayed. This dialog box provides important information about installing the software as well as the legal implications of its use.
    Figure : Welcome dialog box
  3. Press Next to continue or Cancel to exit the installation.
    The software RIP license agreement dialog box is displayed.
  4. Press Yes to continue if you accept the agreement, Back to return to the previous window, or No to exit the installation.
    You are prompted to select the type of installation: server or client.
    Figure : Installation type dialog box
  5. Press Client to continue or Cancel to exit the installation.
  6. Follow the Adobe Postscript driver installation instructions to install the driver, selecting the appropriate HP Designjet 30, 130, or 90 series network printer and its PPD file: \\<server_name>\hp designjet 30 RIP, \\<server_name>\hp designjet 130 RIP, or \\<server_name>\hp designjet 90 RIP.
    If the PPD is not selected automatically during the installation, browse to the following directory:
    • for HP Designjet 30 series printers - <cd-rom drive>:\install\PPDFolder\<inst_lang> \246_HPDJ30\HPDJ30.PPD
    • for HP Designjet 130 series printers - <cd-rom drive>:\install\PPDFolder\<inst_lang> \241_HPDJ130\HPDJ130.PPD
    • for HP Designjet 90 series printers - <cd-rom drive>:\install\PPDFolder\<inst_lang> \2??_HPDJ90\HPDJ90.PPD

Using a network card

If you are using a TCP/IP connection between your computer and the printer, you will need to configure your HP Jetdirect network card. You must obtain specific network information from your HP Designjet printer. Therefore, before executing the HP Jetdirect network card configuration software, perform the following procedure to print out the required information.

Obtaining network information from your printer

Print the Printer Configuration pages.
  1. Turn on the printer.
  2. Load the printer with several sheets of paper.
  3. Press and hold down the Power key on the printer’s front panel.
      Figure : Front panel key's
    1. Power key
    2. Continue key
  4. Press the Continue key four times (while holding down the Power key).
    The printer will print out three configuration pages, including the network information you need.
    You can now use this information with the network card software to configure the network card.

Common RIP installation problems

This section details common problems you could encounter during the installation of the HP Software RIP.

Cannot find PPD while installing a printer client

If during the Add Printer procedure on a client machine you are unable to find the PPD on the server, you can take it from the following location:
  • For Mac OS and the Designjet 30 - <CD-drive>:/PPDFolder/<inst-language>/246_HPDJ30
  • For Mac OS and the Designjet 130 - <CD-drive>:/PPDFolder/<inst-language>/241_HPDJ130
  • For Windows and the Designjet 30 - <CD-drive>/install/PPDFolder/<inst-language>/ 246_HPDJ30
  • For Windows and the Designjet 130 - <CD-drive>/install/PPDFolder/<inst-language>/ 241_HPDJ130
note:
Files for the HP Designjet 90 are very similar and can be found following the same folder structure.

Accessing the hot folder

General
The hot folder provides another method of submitting print jobs to the Software RIP. The hot folder is a physical "watched" folder that the software RIP constantly monitors for new jobs. Therefore, if you drag-and-drop a job into the hot folder, the software RIP will add it to its queue to process and send to the printer.
The hot folder is intended for workgroup configurations and for customers using print files or non-PostScript files (such as TIFF, EPS, and JPEG for Mac OS and Windows or BMP for Windows only).
The default hot folder location for HP Designjet 30 series printers is:
  • C:\Program Files\hp designjet 30 RIP\Jobs\Hewlett-Packard\HPDJ30
The default hot folder location for HP Designjet 130 series printers is:
  • C:\Program Files\hp designjet 130 RIP\Jobs\Hewlett-Packard\HPDJ130
  • C:\Program Files\hp designjet 90 RIP\Jobs\Hewlett-Packard\HPDJ90
Workgroup configurations
If you have the printer connected to a server, you can share its hot folder and allow clients to drag and drop files into it.

Administrator privileges

You must have administrator privileges to install the HP Software RIP under Windows XP, Windows 2000 server, Windows NT 4.0 server, or Mac OS X. Otherwise, the software will not install properly and will not run.

Cannot see USB port when setting up computer

USB port not supported by Windows NT - Windows NT does not support USB ports.
USB port not supported by Windows Me - Windows Me does not come with USB support. To be able to use your printer with a USB cable, you have to activate the USB port. To do this, execute the following utility on the Software RIP Installation CD:
  • <CD-drive>:\UsbWinMe\hp designjet 30 90 130\hplcin02.exe
Other reasons - The printer is not connected to the USB port of your computer.

CD does not run automatically

If the CD does not run automatically when you insert it, open the software RIP CD and double-click the Installer icon for Mac OS or on Autorun.exe for Windows.

Checking software RIP to printer communication

Once you have installed the software RIP, if you want to verify the connection between the software RIP and the printer you can go to Setup, Test Print. This will print a simple sample page to verify communications. If you have problems, make sure the port used (for Windows: USB, Parallel, or TCP/IP; for Apple Mac OS: Appletalk or TCP/IP) is set correctly.

Connecting the Adobe PS driver to the wrong port

To print from applications, you need the Adobe PS driver. The Adobe PS driver produces the Postscript data that the Software RIP needs to print.
A common mistake is to select the USB, Parallel, or TCP/IP printer port when installing the Adobe PS driver. In this case, you will send Postscript data directly to the printer, but the printer does not understand Postscript data. That is why it needs a software RIP to translate the Postscript data to the PCL3GUI language that it does understand.
Therefore, when installing the Adobe PS driver, the port that must be selected is the software RIP’s hot folder. By default:
  • Windows Stand alone - C:\Program Files\hp designjet 30 RIP\Jobs\Hewlett-Packard\HPDJ30, C:\Program Files\hp designjet 130 RIP\Jobs\Hewlett-Packard\HPDJ130, or C:\Program Files\hp designjet 90 RIP\Jobs\Hewlett-Packard\HPDJ90.
  • Mac OS Stand alone - Select in the Chooser, HPDJ30 <computer_name>, HPDJ130 <computer_name>, or HPDJ90 <computer_name>.

Windows XP sets up a wrong default printer

When you follow the process to remove the "Found new hardware issue", you are in fact adding a dummy driver in the system. In Windows XP, this dummy driver will be set up as the default printer. You need to change the default printer to the Adobe PS driver associated with your printer.

Windows 2000 and XP Adobe Postscript drivers

The Windows 2000 and XP Adobe Postscript drivers must be installed using Add Printer in Windows Stand alone installation.
To print from applications, you need the Adobe PS driver. The Adobe PS driver produces the Postscript data that the HP Designjet 30 and 130 series software RIP needs to print.
If you have already installed the software RIP and you are just missing the Adobe PS driver, you may install it as a regular printer. Use the following procedure:
  1. Go to Add Printer and, when you are asked to choose the printer model, click the Browse or Have Disk button.
  2. Go to the HP Software RIP CD.
  3. Go to the INF folder, and select your operating system.

Microsoft certification warning

If the Microsoft Certification warning appears, click Continue to proceed with the installation. HP has tested that it will not produce any instability in the system.