solution Contentsolution Content

HP Deskjet 900c Series Printers - Printing on Different Types of Paper

Introduction

This document explains how to use the HP Deskjet 930c, 950c, 960c, 970c, 980c, or 990c series printer to print on various paper types.
note:
Because this document contains instructions, you might want to print it out as a reference.

Envelopes

Required materials

The HP Deskjet printer can print on most types of envelopes. However, avoid the following types of envelopes, because they can damage the printer:
  • Shiny or embossed envelopes
  • Envelopes that have clasps or windows (for these types of envelopes, use labels instead of printing on the envelope)
  • Envelopes that have thick, irregular, or curled edges, or areas that are wrinkled, torn, or otherwise damaged

Instructions

The HP Deskjet 930c, 950c, 960c, 970c, 980c, or 990c series printer provides two methods for printing envelopes.
  • Printing a single envelope: Use the single-envelope slot and leave the paper in the IN tray.
  • Printing a stack of envelopes: Use the IN tray.
    note:
    If the software program includes an envelope-printing feature, follow those instructions instead of the procedure that is provided here.

Printing a single envelope

Perform the following procedure to print on a single envelope.
  1. Open the HP Print Settings dialog box.
    1. Click File, and then click Print.
    2. Click Properties.
    3. If the dialog box does not appear, click Setup or Options.
      -OR-
    1. If a Print option is not in the File menu, click Printer Setup or Print Setup.
    2. Click Setup or Options.
  2. In the HP Print Settings dialog box, click the Setup tab, and then select an envelope size in the Paper Size box.
  3. Slide the envelope into the single-envelope slot (with the flap side up and to the left) until it stops.
    Figure : Sliding the envelope into the single-envelope slot
  4. Print the envelope.
After the printing is completed, change the Paper Size option on the Setup tab of the HP Print Settings dialog box to the paper size that you want to print on next.

Printing a stack of envelopes

Perform the following procedure to print on a stack of envelopes.
  1. Open the HP Print Settings dialog box.
    1. Click File, and then click Print.
    2. Click Properties.
    3. If the dialog box does not appear, click Setup or Options.
      -OR-
    1. If a Print option is not in the File menu, click Printer Setup or Print Setup.
    2. Click Setup or Options.
  2. In the HP Print Settings dialog box, click the Setup tab, and then select an envelope size in the Paper Size box.
  3. Slide both of the paper adjusters out. Make sure that the IN tray is empty. Flip up the OUT tray for a better view of the IN tray.
      Figure : Sliding both of the paper adjusters out
    1. OUT tray
    2. IN tray
  4. Put a stack of as many as 15 envelopes (with the flap side up and to the left) in the printer. (If thick envelopes are being used, it might be necessary to reduce the number of envelopes.)
    Figure : Putting a stack of envelopes in the printer
  5. Slide the paper adjusters so that they fit snugly against the edges of the envelope.
    Figure : Sliding the paper adjusters against the edges of the envelope
    note:
    If printing on small envelopes, such as A2 or C6, it is necessary to push the small slider in until it fits snugly against the edge of the envelopes.
  6. Push the IN tray back in and flip down the OUT tray.
  7. Print the envelopes.
After the printing is completed, take the following actions.
  • Change the Paper Size box on the Setup tab of the HP Print Settings dialog box to the paper size that you want to print on next.
  • Remove any remaining envelopes from the IN tray and replace them with the paper that you want to print on next.

What if the printer will not pick up the envelope?

  • If a single envelope is being printed using the single-envelope slot, the envelope might not have been pushed far enough into the printer.
  • If a stack of envelopes is being printed, too many envelopes might have been included in the stack. Reduce the number, and then print again.

Labels

Required materials

Use the HP Deskjet printer to print on sheets of labels. HP recommends the use Avery Inkjet Labels that are designed for the inkjet printer. Use only A4 or U.S. letter-sized sheets of labels. It is particularly important to choose labels that are made especially for HP Inkjet printers. Otherwise, labels can peel off in the printer, or the ink might not dry. Sheets of labels that are folded, curled, wrinkled, or partially used can become stuck in the printer. Old labels or labels that have become very hot might not adhere to envelopes well, because the glue has deteriorated.

Instructions

Printing on labels

Perform the following procedure to print on labels.
  1. Open the HP Print Settings dialog box.
    1. Click File, and then click Print.
    2. Click Properties.
    3. If the dialog box does not appear, click Setup or Options.
      -OR-
    1. If a Print option is not in the File menu, click Printer Setup or Print Setup.
    2. Click Setup or Options.
  2. Click the Setup tab in the HP Print Settings dialog box, select Plain Paper as the paper type, and then select Normal as the print quality.
  3. Remove all paper from the IN tray and insert as many as 20 label sheets (with the labels face-down). Flip up the OUT tray for a better view of the IN tray.
    Figure : Inserting label sheets
  4. Slide the paper adjusters in to fit snugly against the stack.
  5. Push the IN tray back in and flip down the OUT tray.
  6. Print the labels.
After the printing is completed, take the following actions.
  • If plain paper is going to be printed on next, leave the settings as they are.
  • Remove the label sheets from the IN tray, and then replace them with the paper that you want to print on next.

Index cards

Required materials

Use the printer to print index cards, recipe cards, postcards, business cards, or any card size that is included in the Paper Size list on the Setup tab. (It is possible print on other size cards, too.)

Instructions

Printing cards

Perform the following procedure to print cards.
  1. Open the HP Print Settings dialog box.
    1. Click File, and then click Print.
    2. Click Properties.
    3. If the dialog box does not appear, click Setup or Options.
      -OR-
    1. If a Print option is not in the File menu, click Printer Setup or Print Setup.
    2. Click Setup or Options.
  2. In the HP Print Settings dialog box, click the Setup tab, and then select a card size in the Paper Size box.
  3. Select Plain Paper as the paper type, and then select Normal as the print quality. Click OK.
  4. Slide out the IN tray, slide out the paper adjusters, and flip up the OUT tray.
  5. Place a stack of as many as 30 cards (6 mm or 0.25 inch) in the tray. (The HP Deskjet 970c series printers accept as many as 45 cards.) Make sure that the orientation of the cards matches the orientation that has been selected in the software program.
  6. Slide the paper adjusters in so that they fit snugly against the cards. Slide the paper-width adjuster to the right so that it holds the card stack snugly against the right edge of the IN tray.
      Figure : Sliding the paper adjusters
    1. Small slider
    note:
    If the cards are too small to be held securely by the paper-length adjuster, push the small slider until it fits snugly against the edge of the stack.
  7. Push in the IN tray and flip down the OUT tray.
  8. Print the cards.
After the printing is completed, take the following actions.
  • Change the Paper Size on the Setup tab of the HP Print Settings dialog box to the paper size that you want to print next.
  • Remove any remaining cards from the IN tray, and then replace them with the paper that you want to print next.
If the cards must be printed sideways, make sure that the page orientation is set to Landscape in the software program. (The software program User's Guide explains how to set the page orientation.)

Printing nonstandard-sized cards

If the dimensions of your card are not listed in the Paper Size box on the Setup tab of the HP Print Settings dialog box, complete the following steps:
  1. Open the HP Print Settings dialog box.
    1. Click File, and then click Print.
    2. Click Properties.
    3. If the dialog box does not appear, click Setup or Options.
      -OR-
    1. If a Print option is not in the File menu, click Printer Setup or Print Setup.
    2. Click Setup or Options.
  2. In the HP Print Settings dialog box, click the Setup tab, and then select User Defined Paper Size in the Paper Size list.
  3. Type the dimensions of the paper in the User Defined Paper Size box, and then click OK. Click OK in the Properties window.
  4. Load the paper in the printer and print.
    note:
    For small paper sizes, be sure to push the small slider snugly against the paper.
After the printing is completed, change the Paper Size on the Setup tab of the HP Print Settings dialog box to the paper size that you want to print on next.

Greeting cards

Required materials

Use the printer to print greeting cards. Print on any paper size that is included in the Paper Size list on the Setup tab.

Instructions

Printing on greeting card paper

Perform the following procedure to print on greeting card paper.
  1. Open the HP Print Settings dialog box. From your software program:
    1. Click File, and then click Print.
    2. Click Properties.
    3. If the dialog box does not appear, click Setup or Options.
      -OR-
    1. If a Print option is not in the File menu, click Printer Setup or Print Setup.
    2. Click Setup or Options.
  2. Click the Select Paper Type arrow, and then select the appropriate type of greeting card paper.
  3. Remove all paper from the IN tray, and insert as many as 20 sheets of greeting card paper with the side to be printed on facing down. Flip up the OUT tray for a better view of the IN tray.
  4. Slide the paper adjusters to fit snugly against the stack.
  5. Push in the IN tray and flip down the OUT tray.
  6. Print the greeting cards.
    note:
    When selecting greeting card paper in the Printer Properties dialog box, printing in EconoFast print quality is not an option.
After the printing is completed, take the following actions.
  • Change the Paper Size on the Setup tab of the HP Print Settings dialog box to the paper size that you want to print on next.
  • Remove the greeting card paper from the IN tray, and then replace it with the paper that you want to print on next.

Transparencies

Required materials

For best results when printing an overhead presentation, use HP Premium Inkjet Transparency Film (product numberC3834A for 50 sheets, or C3828A for 20 sheets). The film coating on HP Premium Inkjet Rapid-Dry Transparencies has been specially developed to work with HP inks, giving crisp images and text, and the fastest drying times. Also, they will not jam the printer.

Instructions

Printing on transparencies

Perform the following procedure to print on transparencies.
  1. Open the HP Print Settings dialog box.
    1. Click File, and then click Print.
    2. Click Properties.
    3. If the dialog box does not appear, click Setup or Options.
      -OR-
    1. If a Print option is not in the File menu, click Printer Setup or Print Setup.
    2. Click Setup or Options.
  2. In the HP Print Settings dialog box, click the Setup tab. Click the Paper Type arrow, and then select the appropriate type (either HP Premium Transparency Film, or Other Transparency Films). Click Best as the print quality.
    note:
    Transparencies need longer drying times than regular paper. The printer dries them automatically before it releases them. Press the RESUME button on the front of the printer to continue printing. It is not absolutely necessary to use the Best print quality, but it gives the best results. Faster printing can occur by using the Normal print quality.
    If you are in a hurry, use EconoFast print quality. When selecting HP Premium Inkjet Transparency on the Setup tab in the printer's Properties dialog box, EconoFast print quality is not an option.
  3. If the user will make notes on the transparencies during the presentation, in the HP Print Settings dialog box, click the Features tab. Select Flip Horizontal.
  4. Flip up the OUT tray for a better view of the IN tray.
  5. Put the transparencies in the printer with the rough side down and the adhesive strip forward. (Peel off the adhesive strip after printing.)
      Figure : Sliding the paper adjusters
    1. Adhesive strip
  6. Slide the paper adjusters. Push in the IN tray, and then flip down the OUT tray.
  7. Print the transparency.
    note:
    Be patient when printing on HP Premium Inkjet Transparency Film or if printing in Best mode. Transparencies take a longer period of time to print because the printer uses more ink, lays the colors down more slowly, and allows for a longer drying time between sheets.
After the printing is completed, take the following actions.
  • Change the Paper Type on the Setup tab of the HP Print Settings dialog box to what you want to print next.
  • In the Features tab of the HP Print Settings dialog box, clear the Flip Horizontal checkbox.
  • Remove any remaining transparencies from the IN tray, and then replace them with the paper that you want to print next.
If the ink never dries or if cracks appear in solid blocks of color, complete the following procedure.
  • The wrong side of the transparency might have been printed on. Make sure to put the transparency into the printer with the rough side facing down.
  • A transparency that was not meant for an HP Inkjet printer might have been used.
If the quality is not what was expected, the correct paper type and print quality might not have been chosen. Follow the steps in the procedures above, and print the document again.

Posters

Required materials

Use normal-sized letter or A4 paper to print posters. For best results, use paper that is specifically designed for the HP Inkjet printers.

Instructions

Printing posters

Perform the following procedure to print posters.
  1. Load normal-sized Letter or A4 paper into the IN tray.
  2. Open the HP Print Settings dialog box.
    1. Click File, and then Print.
    2. Click Properties.
    3. If the dialog box does not appear, click Setup or Options.
      -OR-
    1. If a Print option is not in the File menu, click Printer Setup or Print Setup.
    2. Click Setup or Options.
  3. In the HP Print Settings dialog box, click the Features tab.
  4. In the Poster Printer area, click the selection for the number of sheets of paper to be used in creating the poster. The choices are 2 x 2, 3 x 3, or 4 x 4.
  5. Print the document. The text and pictures of each page of the document are magnified and printed across the selected sheets of paper.
    Figure : The appearance of poster-style printing
  6. After the document has printed and the pages have dried, trim the white edges on each sheet. Tape the sheets together to form a poster.
After the printing is completed, take the following actions.
  • Click the None box in the Poster Printing area of the Features tab of the HP Print Settings dialog box.
  • If heavyweight paper was used, remove it from the IN tray, and then replace it with the type of paper that you want to print on next.

Banners

Required materials

For best results, use HP Banner Paper. When using HP Banner Paper, the banners print with brighter color and denser blacks than when other banner paper is used. However, 75-g/m2 or 20-pound computer or z-fold paper can also be used for the banners.
Always fan the paper before loading it.

Instructions

Printing banners

Perform the following procedure to print banners.
note:
The software program that is used might require special settings before it prints banners correctly on the printer. Check the HP Deskjet 930, 950, 960, 970, 980, or 990c series printer Release Notes (which were installed on the computer with the printer software) for information regarding the specific software program.
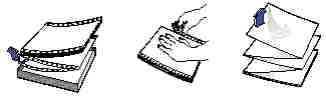
  1. Open the HP Print Settings dialog box.
    1. Click File, and then Print.
    2. Click Properties.
    3. If the dialog box does not appear, click Setup or Options.
      -OR-
    1. If a Print option is not in the File menu, click Printer Setup or Print Setup.
    2. Click Setup or Options.
  2. In the HP Print Settings dialog box, click the Setup tab, and then click Banner Printing. The Paper Size box automatically defaults to Banner [Letter (8.5 x 11 in)]. If appropriate, change it to Banner [A4 (210 x 297 mm)]. The Paper Typebox automatically defaults to HP Banner Paper.
  3. Flip up the OUT tray (the correct position for banners).
    note:
    The following figure shows the OUT tray flipped up on an HP Deskjet 930c series printer. The OUT tray looks slightly different on the HP Deskjet 950c, 960c, 970c, 680c, and 990c series printers.
      Figure : Flip up the OUT tray
    1. OUT tray flap up
  4. Remove all paper from the IN tray.
    note:
    Select the Banner setting on the Setup tab of the HP Print Settings dialog box, and flip the OUT tray up whenever printing on banner paper.
  5. Get the banner paper ready for the printer:
    1. From the stack of banner paper, tear off the number of sheets that are required to print the banner. (The stack must contain at least five sheets.)
    2. Tear off and discard any perforated strips.
    3. Fan the stack so that the pages do not stick together in the printer.
      Figure : Fanning the stack
  6. Put the paper into the IN tray so that the unattached edge is at the top of the stack. Insert the stack edge first into the IN tray until it stops.
      Figure : Putting the paper into the IN tray
    1. Unattached edge
  7. Slide the paper adjusters so that they fit snugly against the edges of the paper stack.
  8. Push in the IN tray.
  9. Print the banner. The printer goes through some start-up movements before it starts printing. Also, banner printing takes a longer period of time; so it might be several minutes before any results are seen.
  10. After the banner is printed, if the Resume light is blinking, press the RESUME button as many times as needed until all of the banner paper is out of the printer.
After the printing is completed, take the following actions.
  • Clear Banner Printing on the Setup tab of the HP Print Settings dialog box.
  • Flip down the OUT tray.
  • Remove the banner paper from the IN tray, and then replace it with the type of paper that you want to print on next.
If the banner has a big gap or a crease where it is not expected, take the following actions.
  • The printer might be picking up more than one sheet of paper at a time. Take the paper out, and then fan the stack. Also, make sure that the top and bottom margins are set to zero in the banner program. Print the banner again.
  • The software program that was printed from might need to be set to print on a continuous sheet instead of on individual pages. See the manual that was provided with the software program.
If the banner paper jams in the printer, take the following actions.
  • In the HP Print Settings dialog box, make sure that Banner Printing on the Setup tab is selected.
  • Put in more than five, but fewer than 20, sheets of paper.
  • Make sure that the OUT tray has been flipped up on the printer.
  • See the online HP Deskjet 930, 950, 960, 970, 980c, or 990c series printer Release Notes for the appropriate settings for specific software programs.
  • Make sure that all regular paper is removed before loading the banner paper.
If a message appears indicating that the printer is out of paper, but it is not, take the following action.
  • The paper-length adjuster might not have been pushed in completely. Make sure that it is snug against the paper, and then print again.
If the text is fuzzy after printing a banner, take the following action.
  • If the print quality seems especially poor after switching from banner printing, make sure that the printer was reset for normal printing.

Iron-on transfers

Required materials

Transfer paper can be used to get images from the computer document onto cloth. The following materials are needed:
  • The T-shirt or other cloth that you want to transfer an image onto
  • The document that containing the picture or text that you want to print
  • The iron-on transfer paper, which you can buy at a computer or office supply store
HP Iron-on T-shirt Transfers are designed to work with the printer and HP ink to give a professional, silk-screened look.

Instructions

Printing iron-on transfers

Perform the following procedure to print on iron-on transfers.
  1. On the computer, open the document that contains the text or picture that will be transferred to the fabric.
  2. Open the HP Print Settings dialog box.
    1. Click File, and then Print.
    2. Click Properties.
    3. If the dialog box does not appear, click Setup or Options.
      -OR-
    1. If a Print option is not in the File menu, click Printer Setup or Print Setup.
    2. Click Setup or Options.
  3. In the HP Print Settings dialog box, click the Setup tab. Click the Paper Type arrow, and then select HP Iron-on T-shirt Transfers.
  4. If you want the text or picture to appear on the fabric as it appears on the screen, flip the document by clicking Mirror Image on the Features tab.
  5. Load the transfer paper in the printer with the transparent side down.
  6. Print the transfer.
  7. Follow the instructions that are included with the iron-on transfer paper to transfer the image onto the fabric.
    Figure : Transferring the image to the cloth
After the printing is completed, take the following actions.
  • Clear the Mirror Image box on the Features tab of the HP Print settings.
  • Remove the transfer paper from the IN tray, and then replace it with the type of paper that you want to print on next.