solution Contentsolution Content

HP PageWide 300, 400, 500 series - How to store print jobs on the printer to print later or print privately using HP PCL 6 printer software for Windows

Introduction

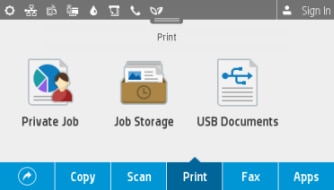
This document contains information on how to use the job storage features for the HP PageWide Pro Printer Series. You can create stored jobs in the HP PCL6 printer software for Windows, and then you can print the stored jobs from the printer control panel at a later time.
nota:
The job storage features are dependent on hardware support found in the HP PageWide Pro 400 MFP series, 500 SFP series, and the 500 MFP series.

Enable Job Storage in the printer properties

Before you can use the job storage features, you must first make sure that the job storage option is enabled in the printer properties. By default, the job storage option is enabled, but if you are unsure, it is a good idea to check. Use the following steps to make sure that Job Storage is enabled in the printer properties:
nota:
If the job storage option is disabled in the printer properties, the job storage features will not be available to use. System administrators can also configure job storage features from the HP Embedded Web Server (EWS). For details on configuring job storage features in the EWS, refer to the IT Administrators Embedded Web Services Guide.
  1. Depending on your operating system, click the Windows icon () in the Windows taskbar, and then use one of the following methods to open the window that contains the list of installed printers:
    • Windows 10: Click Settings, click Devices, and then click Printers and Scanners.
    • Windows 8 and 8.1: Click Control Panel, click Hardware and Sound, and then click Devices and Printers.
    • Windows 7: Click Devices and Printers.
  2. Right-click on the printer name, and then click Properties or Printer properties.
    Figura : Example of the Printer properties option selected after right-clicking on the printer name
  3. In the Printer Properties window, click the Device Settings tab.
  4. On the Device Settings tab, make sure that Job Storage is set to Automatic. If Job Storage is set to Disable, you will not be able to create stored jobs.
    Figura : Device Settings tab with Job Storage set to Automatic
  5. Click Apply, and then click OK to close the Properties window.

Create a stored job (Windows)

The following sections contain information on how to create stored jobs in Windows. You can create a single stored job from an application (such as MS Word, MS Excel, or Adobe Acrobat), or you can set up the job storage feature so that it applies to all print jobs.
To set up the job storage feature, choose from the following options and then click the link to skip to the steps:

Print a stored job

Use the following steps to print a stored job from the printer control panel:
  1. From the Home screen on the printer control panel, touch Print. The Print screen will display.
    nota:
    The Home screen will differ slightly depending on whether your printer is a single-function or multi-function, and the icons might differ depending on what shortcuts the user or admin has preset. However, the steps are the same.
    Single Function Printer
    Multifunction Printer
    Figura : Example of Home screen
    Figura : Example of Home screen
  2. On the Print menu, touch Job Storage. The Print Stored Jobs screen will display.
    Single Function Printer
    Multifunction Printer
    Figura : Example of the Print menu
    Figura : Example of Print menu
  3. On the Print Stored Jobs screen, touch the folder that corresponds with your stored job. A list of stored jobs will display on the screen.
    Figura : Example of Print Stored Jobs screen
  4. From the list of stored jobs, touch the name of the stored job that you would like to print.
    nota:
    If a padlock (
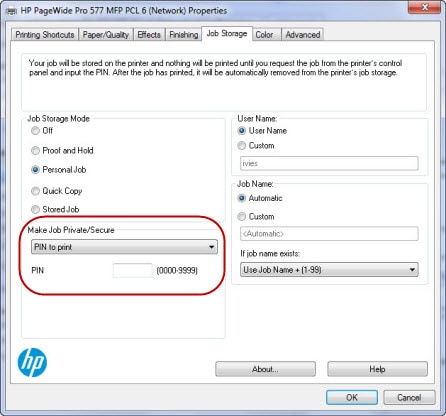
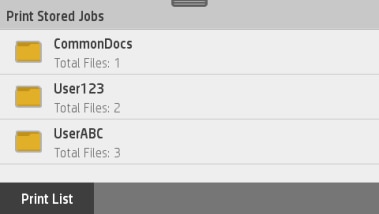
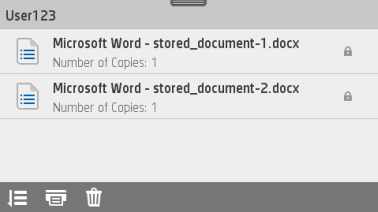
) displays next to the name of the stored job, it indicates that the job requires a PIN or password, and a touch keypad will display on the screen. If a padlock does not display next to the job, then a PIN or password is not required.
    Figura : Example of a list of stored jobs
  5. Enter the PIN or password on the touch keypad, and then touch Done. The Number of Copies screen will display.
    Figura : Example of touch keypad
  6. On the Number of Copies screen, select the number of copies that you would like to print, and then touch Print. The job will print.
    Figura : Example of Number of Copies screen
    After the job has printed, the job list will display again. An unlocked padlock (
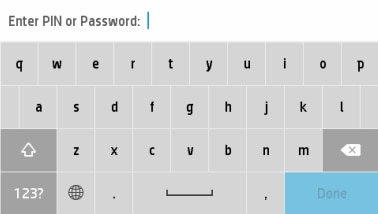
) will display next to the job that printed to indicate that the job was unlocked.
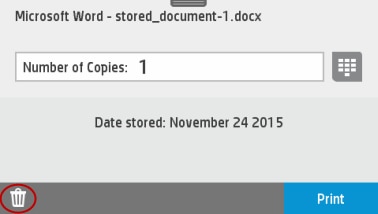
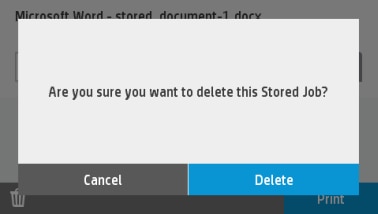
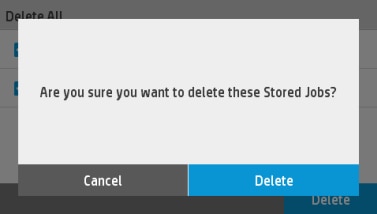
    nota:
    This only applies to jobs that required a PIN or password.
    Figura : Example of the job list showing the printed job that is unlocked

Delete a stored job

The following sections contain information on how to delete stored jobs. You can delete stored jobs one at a time, or you can delete multiple jobs at the same time.
Choose from the following two options and then click the link to skip to the steps on how to delete the stored job(s):