Before unpacking the printer, consider where the assembled printer will be located. Allow necessary space on all sides of the printer box. To assemble the printer you will need at least 1 x 2 meters (40 x 80 inches) of empty floor space.

Perform the following steps to assemble the stand:
-
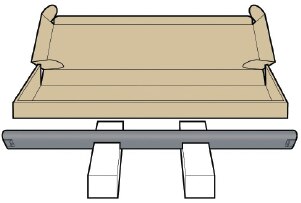
Open the box.
Uwaga:
Whenever you see this icon, you can find
an animation illustrating the procedure on
the HP Start-Up Kit DVD supplied with your
printer.
icon, you can find
an animation illustrating the procedure on
the HP Start-Up Kit DVD supplied with your
printer.

-
Place the two pieces of packaging material on the floor, spaced 40 cm apart, and place the cross-brace on top of them.
-
A screwdriver and 22 screws are provided in the stand box: 16 screws to assemble the stand, 4 to attach it to the printer, and 2 are spare. Do not try to remove the washers from the screws.
Uwaga:
All the screws are for the stand. The basket does not need screws.
-
Attach each leg of the stand to the cross-brace, using two screws on the outside of the leg and then two on the inside. First fit all four screws loosely, then tighten up the screws on the outside of the leg, followed by the screws on the inside.

-
Make sure you have used 4 screws in each leg.

-
Attach a foot to each leg, using four screws in each foot. First fit all four screws loosely, then tighten them up.

-
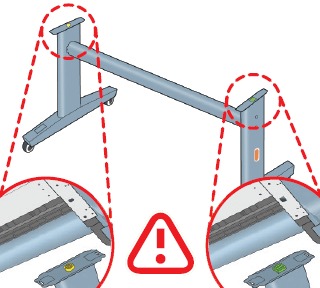
Turn the stand upright.
Uwaga:
You may need two people to perform this step.
-
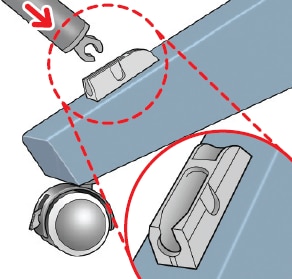
There is a round yellow button protruding from the top of one stand leg, and a square green button protruding from the top of the other leg. Each button fits into a hole in the printer.
-
Put the printer on top of the stand slowly and carefully.
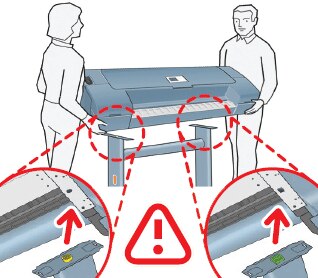
Przestroga:
You may need two people to perform this step. -
Attach the printer to the stand using two screws on each leg.

-
Now that the printer is attached to the stand, you can proceed to attach the basket.

-
Lay out the components of the basket.

-
Fit the basket supports to the stand legs, one to each leg.

-
Fit the two short tubes to the printer’s feet, one on the front of each foot. Each tube should click into place.
-
Attach the basket’s front tube to the two short tubes on each foot.

-
Rest the basket’s rear tube on the supports that you have just fitted to each leg of the stand.

-
The basket is now complete.

