To view a video demonstrating the procedure for removing the part click here to access the Services Media Library (www.hp.com/go/sml). Select Printers and Multifunction under the Product category, select HP Color LaserJet Printers under the Product family, and then select the printer model under the product series category.
Tray 2 pick roller replacement
caution:When handling the rollers, avoid touching the roller surfaces. Skin oils and fingerprints on a roller surface can cause print-quality problems.
-
Pull the tray out of the product to remove it.

-
Place the tray on a level work surface. Locate and open the spring-loaded cover that is next to the roller in Tray 2.
caution:
When you install this roller, make sure that it locks into place. Verify that the roller is correctly oriented, and that the torque limiter next to the roller is correctly positioned against the locking pin on the shaft.
-
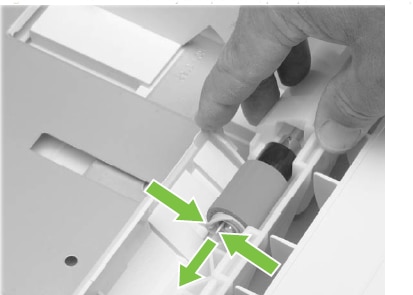
Pinch the blue latch that is on the left side of the roller. Slide the roller off of the shaft.
-
Move the front of the product to the edge of the work surface for better access to the remaining pickup and feed rollers. To find the rollers, look up into the inside of the opening that was created when you removed Tray 2.
warning:
Do not allow the front of the product to extend beyond the edge of the work surface. The product can become unbalanced and fall, which can cause damage to the product or personal injury to the service technician.
-
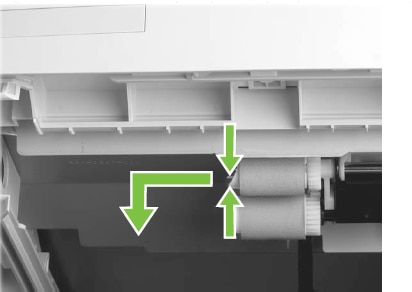
Pinch the locking lever on the left side of the feed roller (the front top roller below). Slide the roller off of the shaft. Repeat this step for the pickup roller (the bottom roller below).
-
Discard the rollers.
-
Remove the new pickup roller from its package and slide it onto the spool. Repeat this step for the feed roller.
note:
You might have to rotate the roller to gain access to the locking leverMake sure that the rollers lock into place on the tabs that are on the drive gears. -
Slide the tray into the product.
