solution Contentsolution Content

HP LaserJet Pro MFP - Set up the Scan to Network Folder feature

Introduction

This document applies to some HP LaserJet Pro Multifunction printers (MFPs). For a newer HP LaserJet Pro MFP M329, M428, M429, or M479, go to Set up Scan to Network Folder.
The printer has a feature that enables it to scan a document and save it to a network folder. To use this scan feature, the printer must be connected to a network; however, the feature is not available until it has been configured. There are two methods for configuring Scan to network folder, the Scan to Network Folder Wizard (Windows), which is installed in the HP program group for the printer as part of the full software installation in Windows 7, and the Network Folder Setup through the HP Embedded Web Server (EWS). Use the following information to set up the Scan to Network Folder feature.
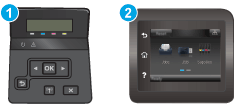
Before you begin

To set up the Scan to Network Folder feature, the printer must have an active network connection to the same network as the computer that will run the setup process.
Administrators need the following information before beginning the configuration process.
  • Administrative access to the printer
  • The network path of the destination folder (e.g., \\servername.us.companyname.net\scans)
    note:
    The network folder must be set up as a shared folder for the Scan to Network Folder feature to work. For more information about setting up a shared folder, see Set up a shared folder.
Some HP printers include a HP Scan to Network Folder Software Wizard in Windows after installing the driver from a software CD. At the end of this installation is an option to Setup Scan to Folder and Email. The setup wizards include the options for basic configuration.

Next steps

After you have set up and configured the HP Scan to Network Folder feature, see the following topic to learn more and get started:
Scan to a network folder- Learn how to use the printer control panel to scan a document and save it to a folder on the network.