solution Contentsolution Content

HP Officejet Enterprise Color MFP X585 - Setting up the printer (hardware)

note:
This document is for the HP Officejet Enterprise Color MFP X585dn, X585f, and X585z models.
This document explains how to set up the physical parts of the printer. Complete these steps before installing the printer software on the computer.
If the printer hardware is already set up, see the Links to software installation instructions section at the end of this document for help with software installation.
This document includes the following steps to set up the printer:
Unpack the printer

  1. Select a site to place the printer that meets the following specifications:
    • A sturdy work surface, well-ventilated area, and away from direct sunlight
    • Temperature range: 15° - 32.5° C
    • Humidity range: 10% - 80%
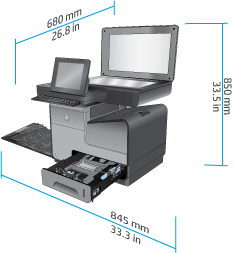
    Allow enough space around the printer to open all doors and trays.
    Figure : Space requirements
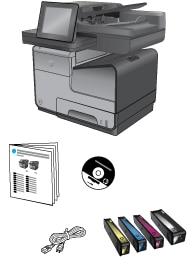
  2. Take the HP printer out of the box, and then remove the packaging material. Verify that the contents match this illustration.
      caution:
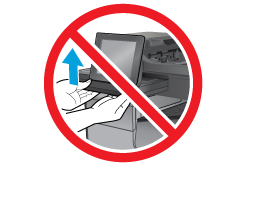
    Do not lift the printer by holding the control panel.
    Figure : Do not lift the printer by the control panel
      caution:
    The printer weighs 54.9 kg. HP recommends that three people move the printer.
    Figure : Contents of the box
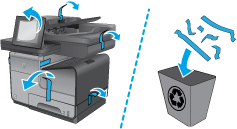
  3. Remove the tape from the outside of the printer.
    Figure : Remove the tape
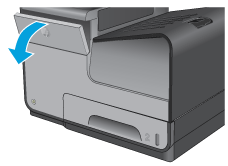
  4. Open the ink-cartridge door.
    Figure : Open the door
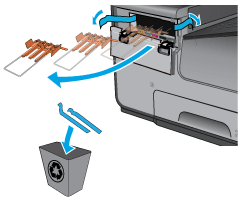
  5. Remove the packing material from inside the door.
    Figure : Remove the shipping material

Insert the ink cartridges

The following video demonstrates how to insert the ink cartridges into the printer:
Officejet Enterprise Color X585 Multifunction Printer - Installing Ink Cartridges
See title for description. This video does not contain any audio.
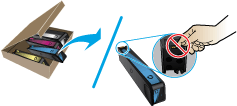
  1. Remove the ink cartridges from the package. Do not touch the gold-colored metal contacts of the ink cartridge. Fingerprints on the contacts can cause print-quality problems.
    Figure : Unpack the ink cartridges
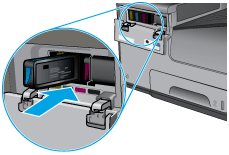
  2. Insert each cartridge into the color-coded slots inside the printer.
    Figure : Insert the ink cartridges
  3. Push each ink cartridge in until it clicks into place.
    Figure : Push each cartridge
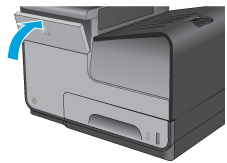
  4. Close the ink-cartridge door.
    Figure : Close the door

Load Tray 2

The following video demonstrates how to load paper in Tray 1 and Tray 2:
Officejet Enterprise Color X585 Multifunction Printer -Loading Paper Tray
See title for description. This video does not contain any audio.
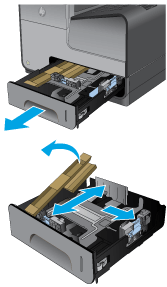
  1. Open Tray 2. Remove the cardboard packing material.
    Figure : Remove the packing material from the tray
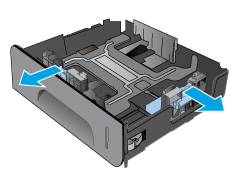
  2. Slide open the paper length and width guides.
    Figure : Adjust the paper guides
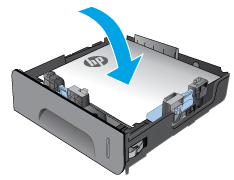
  3. Place the paper in the tray and make sure that it is flat at all four corners.
    note:
    Place the paper into the tray with the side to be printed on face-up.
    Figure : Load paper in the tray
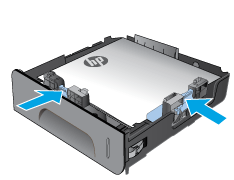
  4. Slide the side paper width guides so that they align with the paper-size marking in the bottom of the tray. Slide the front paper length guide so that it pushes the stack of paper against the back of the tray.
    Figure : Adjust the guides
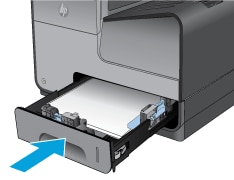
  5. Slide the tray into the printer.
    Figure : Close the tray

Connect the network cable (optional)

If the printer is to be connected to a network, connect the network cable now. If not, skip this step and go to the Connect the power cable and turn on the printer section in this document.
  caution:
Do not connect a USB cable now. To use a USB cable to connect the printer to the computer, connect it when prompted during software installation.
Figure : Connect the network cable

X585f and X585z: Connect the phone cable for fax (optional)

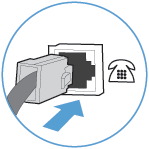
To use the fax function, connect the supplied phone cable between the fax port on the printer and a phone jack.
note:
A specific adapter for the RJ11 phone cable might be required to connect to the phone jack.
Figure : Connect the phone cable for fax

Connect the power cable and turn on the printer

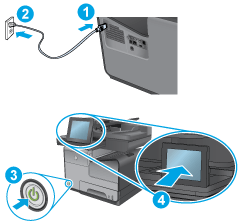
Figure : Connect the power cable and turn on the printer
  1. Connect the power cable to the printer. To prevent damage to the printer, use only the power cable that is provided with the printer.
  2. Connect the power cable to a grounded AC outlet.
      caution:
    Make sure the power source is adequate for the printer voltage rating. The voltage rating is on the printer label. The printer uses either 100-127 Vac or 220-240 Vac and 50/60 Hz.
  3. Turn on the printer.
    Wait for 60 seconds before continuing. During this time, if the printer is connected to a network, the network recognizes the printer and assigns an IP address or host name for the printer.
  4. On the control panel, set the language, the date/time format, and the time zone. When the Home screen appears, touch Initial Setup, and enable basic printer functions.
    For advanced setup for network-connected printers, enter the printer IP address in the address bar of a Web browser after software installation is complete. To find the IP address, do one of the following:
    note:
    The steps to find the printer IP address vary depending on the control-panel type. Refer to the table in step 5 to determine your control-panel type.
    • FutureSmart 3: On the printer control panel, touch the Network button.
    • FutureSmart 4: On the printer control panel, touch the Information icon, and then touch the Network button.
  5. If the printer will be connected with a USB cable, the software installation process requires that the printer is turned on and in the Ready state. Follow the steps below to configure the Wake/Auto On setting so the printer wakes from Sleep mode during the software installation process:
    note:
    Do not connect a USB cable now.
    note:
    The steps vary according to the type of control panel.
    FutureSmart 3
    FutureSmart 4
    FutureSmart 3
    1. From the Home screen on the printer control panel, scroll to and touch the Administration button.
    2. Select the General Settings menu.
    3. Touch the Energy Settings item.
    4. Touch the Sleep Timer Settings item.
    5. Touch the All events item, and then touch Save.
    FutureSmart 4
    1. From the Home screen on the printer control panel, select Settings.
    2. Select the following menus:
      • General
      • Energy Settings
      • Sleep Settings
    3. Select the HP Auto Off/Auto On (Wake on most events) item, and then touch Done.

Verify that the printer functions

To verify that the printer functions, follow the steps below.
note:
The steps vary according to the control panel.
FutureSmart 3
FutureSmart 4
FutureSmart 3
  1. To verify that your printer prints, do the following:
    1. From the Home screen on the printer control panel, scroll to and touch the Administration button.
    2. Open the following menus:
      • Reports
      • Configuration/Status Pages
    3. Touch the Configuration Page item to select it.
    4. Touch the Print button to print the configuration and Jetdirect pages.
      note:
      If you plan to use the printer on a network, save these pages. The Jetdirect page contains the printer IP address.
    5. If you connected the printer to a network, find the IP address on the Jetdirect page.
      • IPv4: If the IP address is 0.0.0.0, or 192.0.0.192, or 169.254.x.x, you must manually configure the IP address. Otherwise, the network configuration was successful.
      • IPv6: If the IP address begins with "fe80:", the printer should be able to print. If not, you must manually configure the IP address.
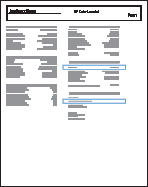
      Figure : Jetdirect page
  2. To test the document feeder and the copy function, do the following:
    1. Place the printed configuration page face-up in the document feeder.
    2. From the Home screen on the printer control panel, touch the Start button. The printer copies, and then prints a page.
  3. To test the scanner glass and the copy function, do the following:
    1. Place the printed configuration page face-down on the scanner glass.
    2. From the Home screen on the printer control panel, touch the Start button. The printer copies, and then prints a page.
FutureSmart 4
  1. To verify that the printer prints, do the following:
    1. From the Home screen on the printer control panel, scroll to and select Reports.
    2. Select Configuration/Status Pages.
    3. Select Configuration Page, and then touch Print to print the configuration and Jetdirect pages.
    4. If the printer is connected to a network, find the IP address on the Jetdirect page.
      • IPv4: If the IP address is 0.0.0.0, or 192.0.0.192, or 169.254.x.x, manually configure the IP address. Otherwise, the network configuration was successful.
      • IPv6: If the IP address begins with "fe80:", the printer should be able to print. If not, manually configure the IP address.
      Figure : Jetdirect page
  2. To test the document feeder and the copy function, do the following:
    1. Place the printed configuration page face-up in the document feeder.
    2. From the Home screen on the printer control panel, touch Copy. The printer copies, and then prints a page.
  3. To test the scanner glass and the copy function, do the following:
    1. Place the printed configuration page face-down on the scanner glass.
    2. From the Home screen on the printer control panel, touch Copy. The printer copies, and then prints a page.

Update the firmware (optional but recommended)

HP regularly updates features that are available in the printer firmware. Update the printer firmware to take advantage of the most current features.
note:
Check with the network administrator before updating the printer firmware.
Click here for information on updating the printer firmware using a USB flash drive or the Embedded Web Server (EWS).

Links to software installation instructions

After completing the previous setup steps, install the printer software.
Windows: Install the printer software from the CD.
Mac: Mac installer software is not included on the CD. The steps to download the Mac installer software are as follows:
  1. Select Support Options.
  2. Under Download Options, select Drivers, Software & Firmware.
  3. Select the operating system version, and then click DOWNLOAD.
  caution:
Do not connect a USB cable now. To use a USB cable to connect the printer to the computer, connect it during the software installation.
For software installation instructions, click the link for the computer operating system and type of connection.
Windows
Mac OS X