solution Contentsolution Content

HP LaserJet - Install an HP Universal Print Driver (UPD) through a network to enable print-only function in Windows 7

Introduction

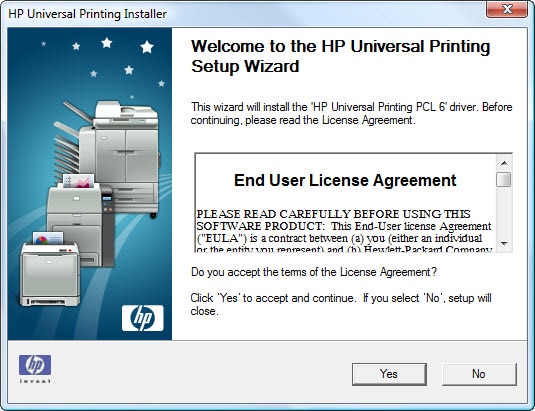
This document provides download and installation instructions through a network using Universal Print Drivers (UPDs) provided by HP for most LaserJet products that will be installed in Windows 7. This document also contains information about UPDs to help guide you in selecting the correct UPD type or in determining whether or not a UPD is the best choice for your product.
note:
Do NOT install a universal print driver (UPD) unless you have a print-only product and know that reinstalling using a UPD is the correct solution. If you are trying to resolve a particular issue or error message, reinstalling a driver might not resolve the issue.
If you are not sure, go to How to Select the Correct Print Driver (c00751649) (in English) or search for help documents that pertain to your specific issue or error message.

About universal print drivers (UPDs)

Even if a Universal Printer Driver option(s) is listed, this may not be the best driver choice for your product.
Universal print drivers (UPDs) are print-only drivers and are not recommended for use with multifunction or all-in-one products where scanning and faxing software and drivers are needed.
UPDs are 'one-size-fits-all' drivers (not product-specific) created to facilitate product installations typically in a commercial or business environment where there are multiple printer or product types and a series of drivers might be needed. UPDs are often used by business administrators / IT Help desks that want to share or distribute a small driver that enables basic software functionality.
note:
Not all products support driver installation through a network. Go to Install a Universal Print Driver (UPD) using a USB to enable print-only function in Windows 7 (32-bit and 64-bit) (c02536202) (in English) for instructions on how to install the driver using a USB cable or parallel port connection.

When to use a UPD

Normally, the full solution or product-specific driver is recommended for most products when available for download at www.hp.com/go/support.
If the full solution or a product-specific driver is not available, you might use a UPD in one or more of the following conditions:
  • When you have a print-only product
  • When there is no other Windows 7 driver available for your product (e.g. Full solution, PCL 6 (non-UPD), Basic Print/Scan, Plug and Play, etc.)
  • When installing Windows Vista drivers in compatibility mode is not an option for your product
  • When you are not already using a basic driver or do not have an In-OS driver included in your Windows 7 operating system
  • When printing in an enterprise or managed print server, static, or mobile print environment (administrators or IT Help desks)
Universal Print Drivers (UPDs) are a good driver choice for print-only products because these drivers ONLY provide print capability.
If you are using a multifunction or all-in-one product, and there is no other driver option available, the In-OS driver included in the Windows 7 operating system is considered a better choice than UPD. While some of the advanced software features might not be available, customers can use this driver with either the product control panel or the Scan and Fax feature in Windows. For more information, go to Use the software in Windows to scan (c03501661) (in English).
If a UPD is not right for you or you are not sure, go to How to Select the Correct Print Driver (c00751649) (in English) or search for driver installation instructions specific to your product before trying a UPD.

UPD types

The type of UPD driver you use may depend on your environment and printing needs. In some cases, only one UPD driver is available for a printer. In this case, use the available driver.
If two or more UPD drivers are available, use the following information as a guide to select the driver most appropriate for your environment:
note:
UPD drivers can be found under the Driver - Universal Print Driver section on the individual printer support pages or directly at www.hp.com/go/upd. The UPD type can be identified by the name appended to the end of the file name (e.g. PCL 5, PCL 6, Postscript, etc.).
If you know that you need a UPD driver but are not sure which driver to select, use the following information as a guide.
Driver
When to use
1 - HP Universal Print Driver for Windows PCL6
The HP Universal Print Driver for Windows PCL6 is recommended for most printing options.
  • When printing from general office applications such as word processing, spreadsheet applications, or other general office applications. This is the most commonly selected UPD driver.
2 - HP Universal Print Driver for Windows PostScript
  • When you know that you have a postscript printer
  • When printing from graphics intensive applications such as Adobe
  • When printing documents containing a significant number of graphics, high resolution images, or macros
  • When printing in a mixed environment, for example, printing from both Windows and Macintosh applications
note:
The product must have postscript (PS) printing capability to use this driver. If you are not sure, use the PCL6 driver.
3 - HP Universal Print Driver for Windows PCL5
  • When you need to achieve backward compatibility with previous PCL versions or older LaserJet printers
  • When printing in a mixed environment, for example, printing from both Windows and Macintosh applications
  • When printing in an environment which requires the language to be set to PCL 5, for example: UNIX, Linux, or mainframe
  • When printing in an enterprise or managed print server environment (administrators or IT Help desks)
  • When printing to multiple printer models in a static or mobile print environment (administrators or IT Help desks)
For more information, go to www.hp.com/go/upd.
After you determine the correct UPD driver for your environment and printing needs, see section Download the driver.

Supported products

Drivers and Universal Print Drivers (UPDs) are available for most products. If none of the drivers mentioned above are available, your product may not be supported. For more information, go to Products Not Supported in Windows 7 (32-bit and 64-bit versions) (c02535920) (in English).

Step one: Download the driver

This section provides information on how to download and save a Universal Print Driver (UPD) from www.hp.com/go/upd. The Universal Print Driver (UPD) is also available for download on the individual product pages from Support & Drivers.
Follow these steps to download the UPD and save it to your computer:
  1. Disconnect the USB cable from both the product and the computer (if you already connected it).
  2. Open a new browser window and go to www.hp.com/go/upd.
  3. Under the green header Free Download, click Download Software.
  4. Select your language from the drop-down list and then select your operating system (Windows 7).
  5. Under the Driver - Universal Print Driver section, locate the driver option you want to download, click Download, and then click Save.
    note:
    The HP Universal Print Driver for Windows PCL6 is recommended for most printing options.
  6. Select the location where you want to save the file, click Save, and when the .exe file download completes, click Close.
    note:
    You might want to save to a location where can easily find the file such as your Desktop.

Step two: Extract the driver files and launch the installer

After downloading the UPD, follow these steps to extract the files to your computer and launch the installation.
note:
If you receive a Windows security alert(s), allow the driver to launch the installation.
  1. Locate the .exe file and doubleclick it to extract the files.
    note:
    If you did not close the Download Complete dialog box, you can also click Open Folder to go directly to the location where you saved the file.
  2. Clear the When done unzipping open: autorun.exe check box and then click Unzip or Next, and then wait while the installer extracts the files.
    note:
    Do not change the default location to which the installer saves the files.
    Figure : WinZIP Self-Extractor
    The HP Universal Printing Installer launches.
    note:
    If you receive a notification that the files unzipped successfully, click OK.
  3. Click Yes to accept the terms of the license agreement.
    UPD Installer window, End User License Agreement
    note:
    You may need to select I accept the terms in the license agreement and then click Next.
  4. Select the installation mode you want to use. Use Traditional mode to make this the default printer.
    UPD Installer, select installation mode either Traditional or Dynamic
    note:
    If you have more than one printer and do not want this printer to be your default, or if you are installing an optional print driver for an existing printer, select Dynamic mode.
  5. Click Install. The installer will preinstall the driver files to the Windows 7 operating system and automatically launch the Add Printer wizard in Windows (from Devices and Printers).

Step three: Install the driver through a network

The steps you follow depend on whether you are using a new or existing product, and the product and driver type. Click the appropriate link below and then follow the steps in the corresponding section.
note:
Before you can add a network printer on your PC using the UPD, you will need the Printer IP address or the Printer hostname (including the full domain information). To obtain the IP address, print a configuration page or locate it using the product control panel display. For instructions, see the user guide that came with your product.

Install the driver through a network on a new printer

After downloading a Universal Print Driver (UPD) option and extracting the files, the installer will prompt you to add or create a new port, or select an existing port. For new product installations, add or create a new port. Use these instructions to complete the driver installation through a network on a new printer.
note:
The screen shots are intended to provide an example of the installation. There may be slight variances between products. Follow the on-screen prompts during the installation process to complete the installation for your product.
  1. If you haven't done so already, make sure that the network cable is connected to the product and that the printer is in a Ready state.
    note:
    Make sure to download the driver and extract the installation files as described in the above sections before proceeding with the steps in this section.
  2. Select Add a local printer, click Next, and then wait while Windows searches for available printers.
    note:
    If you are using the UPD installer, this wizard automatically launches in Windows. You can also access this screen from the Windows desktop. To do this, click Start, click Devices and Printers or Printers, and then click Add a printer.
    UPD Installer, select Add a local printer
    note:
    The Add a network, wireless or Bluetooth printer option is best for wireless or Bluetooth connections.
  3. Click Create a new port, select HP Standard TCP/IP Port, and then click Next.
    note:
    New ports are created for new product installations. If you are installing an optional print driver for an existing printer, select Use an existing port.
  4. In the port wizard window, click Next.
  5. Type the product IP address in the Printer Name or IP Address: field, click Next, and then click Finish to finish creating the port.
  6. Select the printer driver you want to install and then click Next.
    note:
    If Windows detects another driver version for the printer, select Replace the current driver if you are installing a new printer and want this to be your default, or select Use the driver that is currently installed (recommended) if you are installing an optional driver for an existing product.
  7. Select Set as the default printer if you want to make this your default printer, click Next, and then wait while the print driver installs.
  8. Select Do not share this printer and then click Next.
  9. Click Print a test page, click Finish to close the Add Printer wizard, and then click Finish to close the UPD installer wizard.

Install the driver through a network on an existing printer

After downloading a Universal Print Driver (UPD) option and extracting the files, the installer will prompt you to add or create a new port, or select an existing port. For existing product installations, select an existing port. Use these instructions to complete the driver installation through a network on an existing printer.
note:
Before you can add a network printer on your PC using the UPD, you will need the Printer IP address or the Printer hostname (including the full domain information).
  1. Click Start, click Devices and Printers or Printers, and then click Add a printer.
  2. Select Use an existing port, click Next, and then wait while Windows searches for available printers.
  3. Select the driver you want to install and from the list of search results and then click Next.
    note:
    If you have previously installed this printer model, you may be prompted to use the driver already installed. If so, select the driver already installed.
    note:
    If for some reason the driver you want is not listed, click Windows Update and then wait for the update process to complete (this may take some time so please don't interrupt the process).
    If there is an In-OS driver included in the Windows 7 OS for your product, the Windows update will locate it?
    If Windows did not find the printer that you want, click The printer that I want wasn't listed, select Add a printer using a TCP/IP address or hostname, click Next.
    Type the Hostname or IP address, select the Query the printer and automatically select the driver to use check box, and then click Next.
  4. Type a name for the printer, select the Default Printer check box if you want to make this your default printer, and then click Next.
  5. When prompted, select Do not share this printer and then click Next.
  6. Click Print a test page and then click Finish to close the Add Printer wizard.

More information for MFPs and AiOs

Universal print drivers are recommended primarily for printers and not for multifunction or all-in-one products because these 'print' drivers do not have scan or fax drivers included. If you are using a Multifunction or All-in-One product, first try a full solution or other non-UPD driver.
In some cases, a separate driver download may be available to enable scan and fax software functionality. These options should be used INSTEAD of a UPD. Examples of fax and/or scan drivers include the following:
  • Plug and Play Print/Scan (USB install)
  • HP PC Send Fax Driver
  • HP MFP Digital Sending Software
  • HP LaserJet MFP Wizard Console
These are typically located on the individual product pages under the Software, Driver, or Utility sections.
If there are no fax or scan drivers available for your product or when full software functionality is not available through the product driver, you might be able to fax and scan using the Scan and Fax feature in Windows. For more information, go to Use the software in Windows to scan (c03501661) (in English).
You can also fax and copy manually using the buttons on the product control panel.
note:
This applies only to multifunction products (MFPs) and All-in-Ones.