Color documents print in grayscale or in colors different from the original when using the HP Universal Print Driver (UPD). This anomaly has been seen in Microsoft Office, and in Adobe .pdf files.
HP PageWide 300, 400, and 500 Series - Color documents print in grayscale or in colors different from the original
Issue
Solution
To resolve this issue, update the HP UPD driver to version 6.2.0 or later. Once you have installed the latest version of the print driver, you will be able to print color documents.
note:You must uninstall the previous version of the HP Universal Print Driver before installing the latest version.
Follow the steps below to uninstall the previous version of the HP UPD, and then install the new version.
Step one: Uninstall the previous version of the HP Universal Print Driver
HP recommends using Microsoft operating system utilities to remove the HP Universal Print Driver from the Microsoft Windows operating system. This is the safest method to uninstall a print driver. HP does not recommend manually editing the Windows Registry or manually deleting driver files. This can destabilize the printing environment and is not supported.
There are two methods available for removing the HP UPD.
note:HP recommends using Method one to remove the UPD, however, if Method one does not work, try Method two.
Method one: Remove the UPD driver from the Devices and Printers list
Use the following steps to uninstall the HP UPD from the Devices and Printers list:
note:This is the preferred/recommended method for removing the HP UPD driver.
-
Depending on your operating system, use one of the following methods to open the Devices and Printers window:
-
Windows 7: Click the Windows icon (
 ), then click Devices and Printers.
-
Windows 8 and 8.1: Right-click the lower-left corner of the computer screen, click Control Panel, and then click View devices and printers.
-
Windows 10: Click the Windows icon (
 ), click Settings, click Devices, click Printers and Scanners, and then scroll down to and click Devices and Printers.
The Devices and Printers window opens. -
-
At the top of the window, click Print Server Properties.
note:
If you do not see the Print Server Properties option at the top of the window, click on one of the printers in the window to highlight it. Once a printer is highlighted, the Print Server Properties option will display at the top of the window.Figure : Example of the Print Server properties option in the Devices and Printers window The Print Server Properties window opens.
 -
In the Print Server Properties window, click the Drivers tab, click the HP UPD driver that you would like to uninstall, and then click Remove.Figure : Example of the Drivers tab in the Print Server Properties window

-
Click OK to confirm your selection.
-
If you were able to remove the UPD driver successfully, skip to Step two: Install the latest UPD version in this document for the steps on installing the latest UPD version.
-
If Windows displays an error message that the driver is in use, continue to the next step.
-
-
Stop and restart the print spooler using one of the following methods:
-
Stop and restart the print spooler using a command prompt:From a command prompt, type "net stop spooler" and then press Enter to stop the print spooler. Type "net start spooler" and then press Enter to restart the print spooler.Once the print spooler has been restarted, repeat the steps above to remove the print driver.
note:
If you are still not able to remove the print driver after repeating the steps, skip to Method two: Remove the UPD driver and any UPD print jobs in the queue. -
Restart the print spooler in the Services window:
-
Open the Run dialog box:
-
Windows 7: Click the Windows icon (), then click Run. The Run dialog box opens.
-
Windows 8 and 8.1: On the keyboard, press the Windows key + R. The Run dialog box opens.
-
Windows 10: On the keyboard, press the Windows key + R. The Run dialog box opens.
-
-
Type "services.msc" and then press Enter.The Services window opens.
-
In the Services window, scroll down and click Print Spooler, and then click Restart.Once the print spooler has been restarted, repeat the steps above to remove the print driver.
note:
If you are still not able to remove the print driver after repeating the steps, skip to Method two: Remove the UPD driver and any UPD print jobs in the queue.
-
-
Method two: Remove the UPD driver and any UPD print jobs in the queue
If you were not able to uninstall the HP UPD using Method one (above), try the following steps:
-
Open the Run dialog box:
-
Windows 7: Click the Windows icon (), then click Run. The Run dialog box opens.
-
Windows 8 and 8.1: On the keyboard, press the Windows key + R. The Run dialog box opens.
-
Windows 10: On the keyboard, press the Windows key + R. The Run dialog box opens.
-
-
In the Run dialog box, type "services.msc" to open the Services window.
-
In the Services window, scroll down to and then right-click Print Spooler, and then click Restart.
-
Click the "x" in the top right-hand corner of the window to close it.
-
Depending on your operating system, use one of the following methods to open the Devices and Printers window:
-
Windows 7: Click the Windows icon (), then click Devices and Printers.
-
Windows 8 and 8.1: Right-click the lower-left corner of the computer screen, click Control Panel, and then click View devices and printers.
-
Windows 10: Click the Windows icon (), click Settings, click Devices, click Printers and Scanners, and then scroll down to and click Devices and Printers.
The Devices and Printers window opens. -
-
At the top of the window, click Print Server Properties. The Print Server Properties window opens.
note:
If you do not see the Print Server Properties option at the top of the window, click on one of the printers in the window to highlight it. Once a printer is highlighted, the Print Server Properties option will display at the top of the window. -
In the Print Server Properties window, click the Drivers tab, click the HP UPD driver that you would like to uninstall, and then click Remove.If jobs are in the UPD queue, the message "The following package(s) cannot be deleted" will display in the Remove Driver Package dialog box.Figure : Example of "The following package(s) cannot be deleted" message
 If you see this message, continue to the next step.
 -
Depending on your operating system, use one of the following methods to open the Print Management window:
-
Windows 7: Click the Windows icon (), click Control Panel, click System and Security, click Administrative Tools, and then double-click Print Management.
-
Windows 8 and 8.1: Right-click the lower-left corner of the computer screen, click Control Panel, click System and Security, click Administrative Tools, and then double-click Print Management.
-
Windows 10: Right-click the Windows icon (), click Control Panel, click System and Security, click Administrative Tools, and then double-click Print Management.
The Print Management window opens. -
-
In the Print Management window, click All Printers, and then look for any UPD print jobs in the queue.Figure : Example of the Print Management window with UPD print jobs displayed in the queue

-
Right-click on the UPD print job in the queue, and then click Cancel All Jobs.Figure : Example of right-clicking on a UPD print job in the queue and clicking Cancel All Jobs

note:
Complete this step for each UPD print job in the queue until 0 jobs show in the queue.Figure : Example of zero UPD jobs in the queue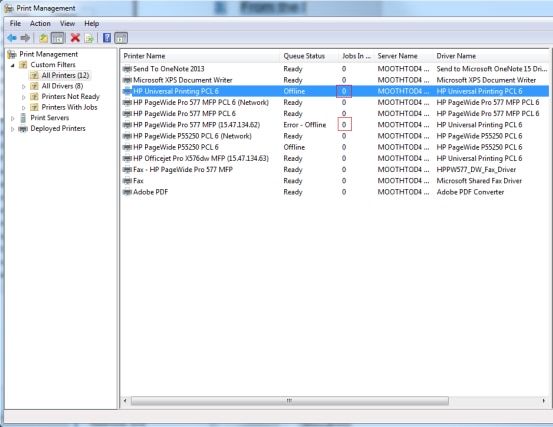
-
Depending on your operating system, use one of the following methods to return to the Devices and Printers window:
-
Windows 7: Click the Windows icon (), then click Devices and Printers.
-
Windows 8 and 8.1: Right-click the lower-left corner of the computer screen, click Control Panel, and then click View devices and printers.
-
Windows 10: Click the Windows icon (), click Settings, click Devices, click Printers and Scanners, and then scroll down to and click Devices and Printers.
The Devices and Printers window opens. -
-
In the Devices and Printers window, right-click on the UPD printer, and then click Remove device.Figure : Example of right-clicking on UPD printer and clicking Remove device

-
Click Yes to confirm that you would like to remove the printer.
Step two: Install the latest HP UPD version
Use the following steps to install the latest UPD version:
-
In your web browser, go to www.hp.com/go/upd, and then click Download Now.
-
Select your language and operating system from the drop-down menus.
-
Scroll down and click the (+) next to Driver - Universal Print Driver to expand the list of available drivers, and then click Download next to the driver that you would like to install.
-
Click Run, and then click Unzip to download the software.Once the download is complete, the HP Universal Printing Installer window opens.
-
Click Yes to start the installation.The Installation Mode dialog box will display.
-
Select the mode that you would like to install, and then click Next.Figure : Example of the Installation Mode options
 Refer to the table below for information on installation modes.Installation ModeDescriptionTraditional Mode (most common)Creates a regular printer object (icon) in your Printers folder. With this mode, you can dynamically select your destination printer now, and it remains fixed.Dynamic ModeCreates a special "Universal Printer" object (icon) in your Printers folder. With this mode, you can dynamically select your destination printer each time you print.USB ModeCreates a Plug and Play event over USB.
 -
On the Add Printer window, choose the type of printer you wish to install (local or network), and then click Next.
-
Click Finish to complete the installation.
Enter a topic to search our knowledge library
What can we help you with?

Need Help?