This document provides the procedure to install the optional 550-sheet tray.
Figure : 550-sheet tray

-
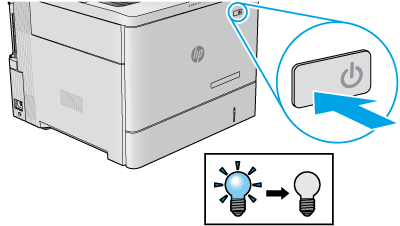
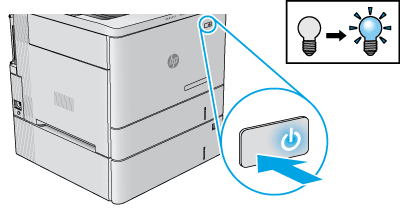
Press the Power button to turn off the printer.Figure : Turn off the printer
-
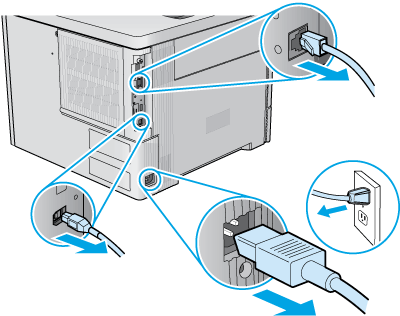
Disconnect the power cord and the USB or network cable.Figure : Disconnect the power cord and the USB or network cable
-
Place the tray on a stable surface, and then place the printer on the tray. Use the alignment pins on top of the tray to position the printer.
caution:
M552, M553, M554, and M555 models: HP recommends that two people move the printer.M577 and M578 models: HP recommends that three people move the printer.Figure : Place the printer on the tray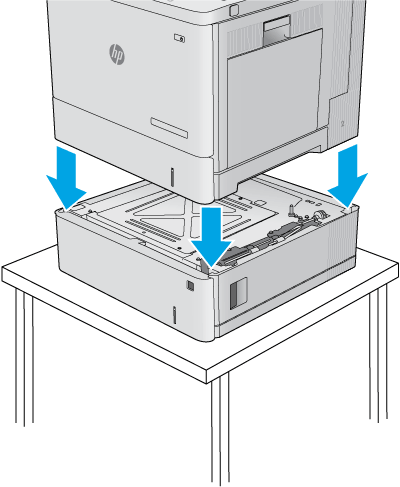
-
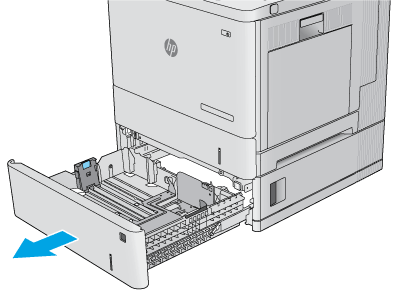
Open the tray.Figure : Open the tray
-
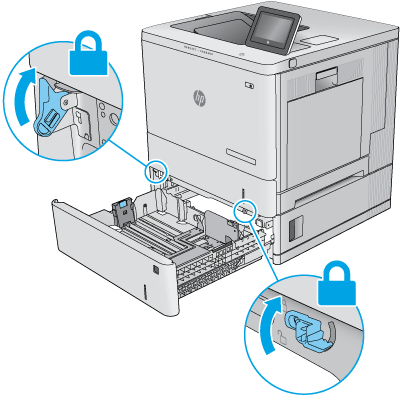
Lock the tray.Figure : Lock the tray
-
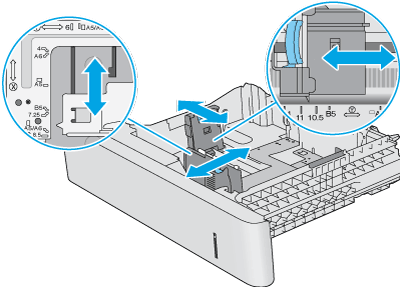
Adjust the paper guides by squeezing the adjustment latches and sliding the guides to the size of the paper being used.Figure : Adjust the guides
-
Load paper into the tray. Check the paper to verify the guides lightly touch the stack, but do not bend it.
note:
To prevent jams, do not overfill the tray. Be sure that the top of the stack is below the tray full indicator.Figure : Load paper in the tray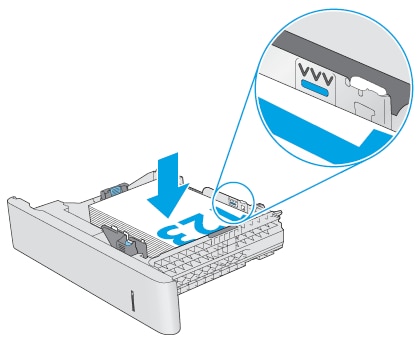
-
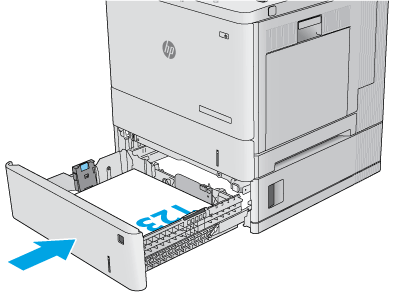
Close the tray.Figure : Close the tray
-
Reconnect the power cable and the USB or network cable.Figure : Reconnect the cables

-
Press the Power button to turn on the printer.Figure : Turn on the printer
-
If you are attaching the accessory before installing the printer software, this step is not necessary. If you are attaching the accessory after installing the printer software, find your operating system in the options below and follow the steps to configure the optional tray:macOS: The list of installed options should automatically update during the first print job after installing the accessory. If not, perform the following steps:
-
From the Apple menu, click System Preferences.
-
Select Print & Scan (or Printers & Scanners).
-
Select the printer, select Options & Supplies, and then select Driver.
-
Manually configure the accessory.
Windows 10, 8.1, and 8.0:-
Right-click on the bottom-left corner of the screen, or left-click the Start button for newer versions of Windows 10.
-
Select Control Panel. Under Hardware and Sound, select View devices and printers.
-
Right-click the name of the printer, and then select Printer Properties.
-
Click the Device Settings tab.
-
Click the Installable Options section and then proceed with one of the following actions:
-
If the Automatic Configuration option is present, select Update Now.
-
If the Automatic Configuration option is not present, manually install the accessory by opening the appropriate category and selecting the accessory.
-
Windows 7:-
Make sure the printer is turned on and connected to the computer or network.
-
Open the Windows Start menu, and then click Devices and Printers.
-
Right-click the name of the printer, and select Printer Properties.
-
Click the Device Settings tab.
-
Click the Installable Options section.
-
In the drop-down box next to Automatic Configuration, select Update Now.
-
