note:To see a short video demonstrating this procedure, click here.
This document provides the procedure to replace the Tray 1 pickup roller (HP kit CC493-67906). The kit includes a replacement Tray 1 pickup roller and printed instructions.
note:This document applies to several HP LaserJet products. Some products might have a different appearance than the product in these images, but the procedure is the same.
Figure : Tray 1 pickup roller

-
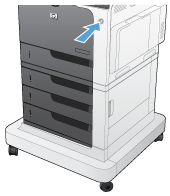
Press the power button to turn the product off.Figure : Turn off the product
-
Open Tray 1.Figure : Open Tray 1

-
Push firmly on the top edge of the roller cover to release the tabs.Figure : Release the roller cover

-
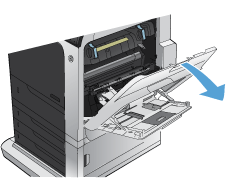
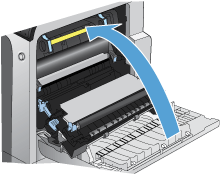
Open the right door.Figure : Open the right door
-
Remove the roller cover.Figure : Remove the roller cover

-
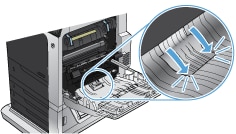
Spread apart the blue tabs on each side of the roller.Figure : Release the roller

-
Rotate the roller out of the product.Figure : Remove the roller

-
Remove the new roller from the packaging.
caution:
Do not touch the surface of the roller.Figure : Unpack the new roller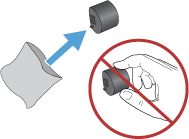
-
Align the tabs on the roller with the slots in the product.Figure : Insert the roller

-
Push down on the roller to snap it into place.Figure : Push down on the roller

-
Insert the roller cover.Figure : Insert the roller cover

-
Push down on the roller cover until it snaps into place.Figure : Push down on the roller cover
-
Close the right door.Figure : Close the right door.
-
Close Tray 1.Figure : Close Tray 1

-
Press the power button to turn the product on.Figure : Turn on the product
