This document explains how to set up the physical parts of the product. Complete these steps before you install the product software on your computer.
HP Deskjet 6940 Printer Series - Setting Up the Product (Hardware)
Introduction
Setup the product
Follow these steps in order.
Step one: Check the contents of the box
The contents might vary by country/region. See the packaging for a list of items shipped in the box.
Figure : Contents of the shipping box

|
1
|
HP Deskjet 6940 series product
|
|
2
|
Optional: Automatic Two-Sided Printing Accessory
|
|
3
|
Optional: 250-Sheet Plain Paper Tray
|
|
4
|
Power Supply
|
|
5
|
Power cord
|
|
6
|
Ethernet cable
|
|
7
|
Tri-color cartridge
|
|
8
|
Black cartridge
|
|
9
|
Reference Guide
|
|
10
|
Network guide
|
|
11
|
Setup guide
|
|
12
|
Product software CD
|
Step two: Remove packing material
Remove all tape and protective film from the lid and from the front and back of the product.
Step three: Install the optional accessories
-
If the product shipped with the Two-Sided Printing Accessory (duplexer) or the optional 250-Sheet Plain Paper Tray, continue with the following steps.
-
If the product did not ship with the duplexer or the optional 250-Sheet Plain Paper Tray, skip to the 'Plug in the power cord' section in this document.
note:If these accessories did not ship with the product, you can buy them from an authorized HP dealer. The accessories are not available in all countries/regions.
Install the Automatic Two-Sided Printing Accessory (duplexer)
Follow these steps to install the optional duplexer.
-
On the rear access door, push the two latch handles toward each other, and then remove the door.Figure : Remove the rear door
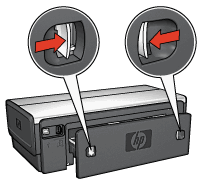
note:
Do not discard the rear access door. The product cannot print unless the access door is in place. -
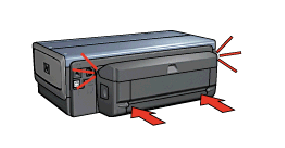
Insert the duplexer in the back of the product until both sides snap into place.Figure : Insert the optional duplexer
Install the 250-Sheet Plain Paper Tray
Follow these steps to install the optional 250-Sheet Plain Paper Tray.
-
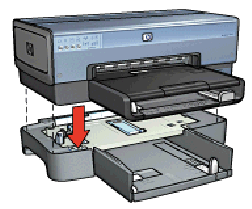
Select a location for the product, and then place the lower tray in this location.
-
Carefully lift the product and align it above the paper tray. Gently place the product on top of the paper tray.
Figure : Install the optional 250-sheet plain paper tray
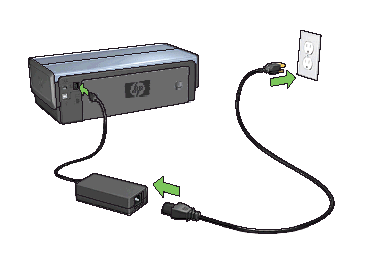
Step four: Connect the supplied power cord and adapter
-
Plug the power supply into the back of the product.
-
Plug the power cord into the power supply.
-
Plug the remaining end of the power cord into a grounded wall outlet.
Figure : Connect the power cord and adapter
Step five: Turn on power
Press the Power button ( ). The Power button glows green when the product is on.
). The Power button glows green when the product is on.
Figure : On button location

Step six: Load plain paper in the main tray
-
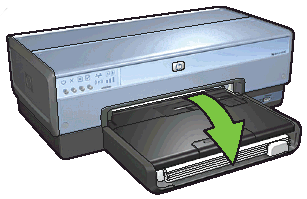
Raise the tray.Figure : Raise the tray

-
Slide the paper guide all the way to the left.
-
Place the paper in the tray, pushing the paper into the product until it stops.
-
Slide the paper guide firmly against the edge of the paper stack.
-
Lower the tray.Figure : Lower the tray
Step seven: Install the cartridges
-
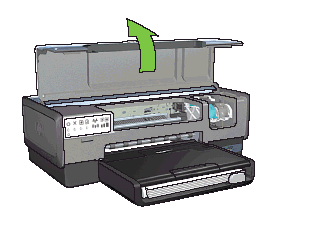
Open the cover.Figure : Open the cover
-
Wait until the cartridge cradle moves to the right side of the product and is idle and silent. Then, lift the cartridge latch to the open position.
-
Remove the cartridge from its packaging and carefully remove the pink plastic tape. Hold the cartridge so that the copper strips are on the bottom and facing toward the product.
caution:
Do not touch the cartridge ink nozzles or copper contacts. Touching these parts can result in clogs, ink failure, and bad electrical connections. Do not remove the copper strips. The strips are required electrical contacts.Figure : Remove the pink tape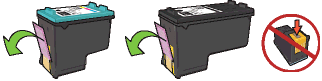
-
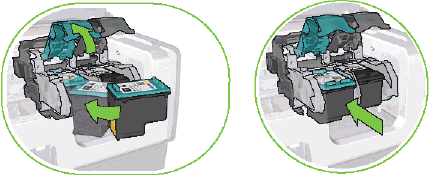
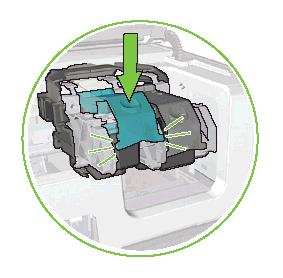
Hold the cartridge so that the copper strips are on the bottom and facing the product, and then slide the cartridge into the cradle as shown.Figure : Insert the cartridge
-
Push down on the cartridge latch until it snaps closed.Figure : Close the cartridge latch
-
Repeat steps 3, 4, and 5 for the remaining cartridges.
-
After installing both cartridges, close the cover. The product automatically aligns the new cartridges.
Enter a topic to search our knowledge library
What can we help you with?

Need Help?