solution Contentsolution Content

HP Inkjet Supplies - Ink Smears or Streaks

Issue

The printer is working, but the printed output shows smears or streaks of ink.
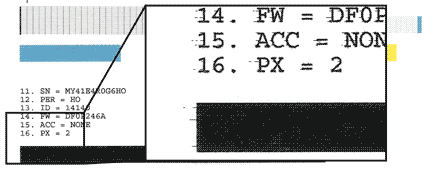
Figure : Diagnostic page showing ink smears

Step one: Check your paper

Make sure you printed on fresh, unwrinkled paper. If you are sure you did, go to the next step.

Step two: Run the clean print cartridges utility

  1. Press the Setup button.
  2. Use the arrow keys to select Tools and then press the OK button.
  3. Select Clean Print Cartridge and then press OK. The device prints a test page.
  4. Examine the test page. If the print quality of the page is good, stop here. If the print quality is bad, go on to the next step for further cleaning.
  5. Open the Printer Toolbox. There are two ways to do this:
    • Open HP Director, select the Settings menu, then the Print Settings submenu, and finally the Printer Toolbox.
    • If the HP Director method does not work, open Printers and Faxes in the Windows Control Panel, then right-click your printer icon and choose Properties. Click on Printing Preferences. Click the Services tab, then the Service This Device icon.
  6. The Printer Toolbox opens. On the Device Services tab, click Clean the Print Cartridges, then follow the on-screen instructions. Up to three levels of cleaning are available. Discard or recycle the page that prints.

Step three: Clean the area around the cartridge nozzles

note:
Follow the procedure below to clean the area around the cartridge's nozzles ONLY if you have streaks or smudges in your printed output and you have already performed all three cleaning levels in the Clean Print Cartridges utility.
note:
Do not leave the print cartridges outside the printer for longer than 30 minutes. If a cartridge is left outside of the printer for too long, the ink will dry out and the cartridge will become unusable. Also, be careful not to get any ink on your hands or clothes.
  1. Gather cleaning supplies:
    • Clean distilled, filtered, or bottled water. Tap water may contain contaminants which could damage the cartridge.
    • Clean cotton swabs or any soft, lint-free material that will not stick to the cartridges (coffee filters work well).
    • Sheets of paper or paper towel to rest the cartridges on during cleaning.
  2. Remove one of the cartridges and place it on a piece of paper with the nozzle plate facing up.
  3. Examine the area around the nozzle plate. If you see any debris or ink buildup, clean the cartridge as follows:
    note:
    If you do not see debris or ink buildup on the print cartridge, do not clean it.
    1. Lightly moisten the lint-free cleaning material with clean water.
    2. Use the swab to wipe clean the faces and edges around the nozzle plate. The area to be cleaned is cross-hatched in the picture below. Replace the cleaning material if it gets dirty.
        caution:
      Do not touch either the nozzle place (in the center of the cross-hatched area below), or the copper-colored contacts. Touching these parts can cause clogs, ink failure, and bad electrical connections.
        Figure : Cleaning the cartridge
      1. Clean in the cross-hatched area only
      2. Do NOT touch the nozzle plate
      3. Do NOT touch the copper-colored contacts
  4. Repeat the steps above for the other cartridge. Make sure to examine both cartridges, even if the streaks are only one color (streaks in black ink are commonly caused by fibers and debris stuck to the bottom of the tri-color print cartridge). Only clean the cartridge if you see debris or buildup, however. If you do clean the other cartridge, use fresh cleaning material.
  5. Either let the cartridge sit for five minutes or use a new swab to dry the cleaned areas before you reinsert the cartridges.

Step four: Replace the problem cartridge

If a cartridge replacement was not tried previously to solve this problem, replace the problem cartridge now. Go to Ink Cartridge and Printhead Limited Warrantyto see if the cartridge is covered under warranty.
Purchase replacement cartridges and other supplies from the HP Store or local retailers.