This document provides the procedure to install the optional 550-sheet paper feeder for the following printers:
-
HP LaserJet Pro M304
-
HP LaserJet Pro M305
-
HP LaserJet Pro M402
-
HP LaserJet Pro M403
-
HP LaserJet Pro M404
-
HP LaserJet Pro M405
-
HP LaserJet Pro MFP M329
-
HP LaserJet Pro MFP M426
-
HP LaserJet Pro MFP M427
-
HP LaserJet Pro MFP M428
-
HP LaserJet Pro MFP M429
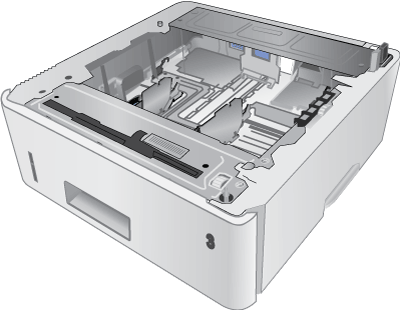
Afbeelding : 550-sheet paper feeder
-
Press the Power button to turn off the printer.Afbeelding : Turn off the printer

-
Disconnect the power cord from the outlet.Afbeelding : Disconnect the power cord

-
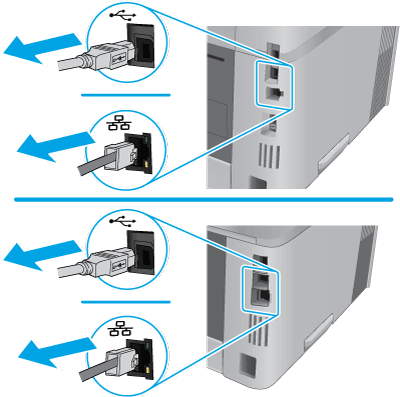
Disconnect the USB or network cable.Afbeelding : Disconnect the cables
-
Remove the shipping tape from the 550-sheet paper feeder.Afbeelding : Remove the shipping tape

-
Place the 550-sheet paper feeder on a sturdy surface, and then place the printer on top of the tray. Use the alignment pins on top of the tray to position the printer.
opmerking:
HP recommends that one person moves the printer.Afbeelding : Position the printer on the tray using the alignment pins
-
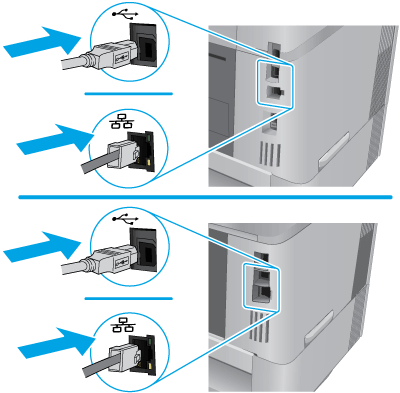
Connect the USB or network cable.Afbeelding : Connect the cables
-
Reconnect the power cord to the outlet and then press the Power button to turn on the printer.Afbeelding : Connect the power cord and turn on the printer

-
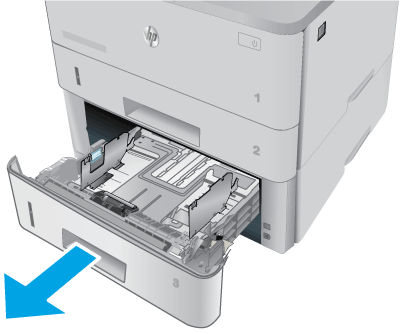
Open the tray.Afbeelding : Open the tray
-
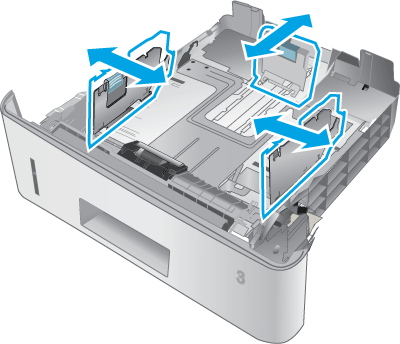
Adjust the paper guides by squeezing the adjustment latches and sliding the guides to the size of the paper being used.Afbeelding : Adjust the guides
-
Load paper into the tray. Check the paper to verify the guides lightly touch the stack, but do not bend it.
opmerking:
To prevent jams, do not overfill the tray. Be sure that the top of the stack is below the tray full indicator.Afbeelding : Load paper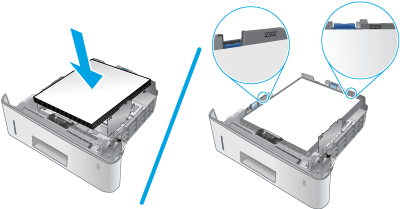
-
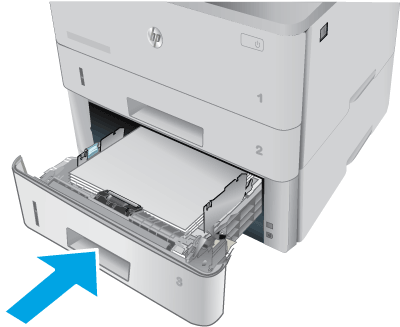
Close the tray.Afbeelding : Close the tray
-
To configure the accessory in the software print driver, find your operating system in the options below and then follow the steps provided.
-
macOS: The list of installed options should automatically update during the first print job after installing the accessory. If not, perform the following steps:
-
From the Apple menu, click System Preferences.
-
Select Print & Scan (or Printers & Scanners).
-
Select the printer, click Options & Supplies, and then click the Options tab.
-
Manually configure the accessory.
-
-
Windows® 10, 8.1, 8, and 7: The print driver should automatically detect the added accessory when a print job is sent to the printer. If the accessory is not detected by the print driver after a print job has been sent, perform the following steps to manually configure the accessory:
-
Open the Control Panel:
-
In Windows 10, click the search box on the bottom left taskbar and type control panel, and then click Control Panel from the list of results.
-
In Windows 8 and 8.1, scroll to the bottom left corner of the screen, right-click the Windows icon that displays, and then select Control Panel.
-
In Windows 7, click the Start icon, and then click Control Panel.
-
-
Under Hardware and Sound, select View devices and printers.
-
Right-click the name of the printer, and then select Printer Properties.
-
Click the Device Settings tab.
-
In the Installable Options section, manually install the accessory by opening the appropriate category and selecting the accessory.
-
-
Windows XP and Vista:
-
Make sure the printer is turned on and connected to the computer or network.
-
Open the Windows Start menu, and then click Devices and Printers (or Printers and Faxes for XP).
-
Right-click the name of the printer, and select Printer Properties (or Properties for XP).
-
Click the Device Settings tab.
-
Click the Installable Options section.
-
In the drop-down menu next to Automatic Configuration, select Update Now.
opmerking:
If using a USB connection, manually configure the accessory by opening the appropriate category and selecting the accessory.
-
-
