solution Contentsolution Content

Blinking Lights on the HP LaserJet P1005, P1006, P1007, P1008, and P1009 Printer Series

Introduction

The lights on the front panel of the product indicate the product status. These lights can be on, off, or flashing, depending on the product status. The following sections describe the most common combinations of flashing lights, what they mean, and how to fix the issue.

Blinking lights

Figure : All lights are off
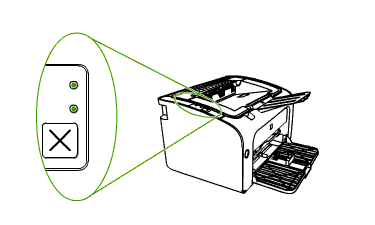
Illustration: All lights are off.
Issue
All lights on the product are off.
Solution
Follow these steps to turn on the product:
  1. Plug the power cord into an electrical outlet.
  2. Connect the power cord to the back of the product.
  3. Press the Power button () to turn on the product.
Figure : Attention and Ready lights blink
Illustration: Attention and Ready lights blinking
Issue
The Ready and Attention lights blink.
Solution
The product is canceling a print job or initializing. You do not need to do anything.
Figure : Ready light is on
Illustration: The Ready light is on
Issue
The Ready light is on and does not blink.
Solution
The product is ready to print. You do not need to do anything.
Figure : Ready light blinks
Illustration: The Ready light blinks
Issue
The Ready light blinks.
Solution
The device is processing or receiving data. To cancel the current job, press the Cancel button.
Figure : Attention light blinks and Ready light is on
Illustration: Attention light blinks and Ready light is on
Issue
The Attention light blinks and the Ready light is on.
Solution
A general error or a manual feed error occurred. Follow these steps to recover from the error:
  1. Remove all loose paper from the main tray, the priority feed slot, and the output bin.
      caution:
    Do not try to remove jammed paper at this stage.
  2. Lift the print cartridge door, and then remove the print cartridge from the product.
    Figure : Remove the print cartridge
    Illustration: Lifting the print cartridge door and removing the print cartridge
  3. With both hands, grasp the paper where it is most visible, including the middle, and then carefully pull the paper out of the product.
    Figure : Remove jammed paper
    Illustration: Remove the jammed paper
  4. Look inside the product for any torn pieces of paper or labels, and then remove them.
  5. If any jammed paper remains in the input trays or the output tray, grasp it with both hands and gently remove it.
  6. Reinsert the print cartridge, and then close the print cartridge door.
    Figure : Reinsert the print cartridge
    Illustration: Reinstalling the print cartridge and closing the print cartridge door.
  7. Press the Power button () to turn off the product.
  8. Wait 30 seconds, and then press the Power button () to turn on the product.
Figure : Attention light blinks
Illustration: The Attention light blinks
Issue one
The print cartridge door is not completely closed.
Solution
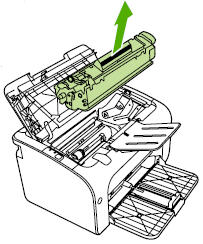
If the print cartridge door is open, close the print cartridge door.
Issue two
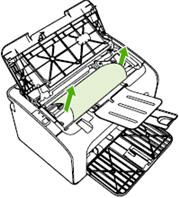
Paper is jammed in the product.
Solution
Follow these steps to clear the paper jam:
  1. Remove all loose paper from the main tray, the priority feed slot, and the output bin.
      caution:
    Do not try to remove jammed paper at this stage.
  2. Lift the print cartridge door, and then remove the print cartridge from the product.
    Figure : Remove the print cartridge
    Illustration: Lifting the print cartridge door and removing the print cartridge
  3. With both hands, grasp the paper where it is most visible, including the middle, and then carefully pull the paper out of the product.
    Figure : Remove jammed paper
    Illustration: Remove the jammed paper
  4. Look inside the product for any torn pieces of paper or labels, and then remove them.
  5. If any jammed paper remains in the input trays or the output tray, grasp it with both hands and gently remove it.
  6. Reinsert the print cartridge, and then close the print cartridge door.
    Figure : Reinsert the print cartridge
    Illustration: Reinstalling the print cartridge and closing the print cartridge door.
Issue three
The product is out of paper.
Solution
Follow these steps to load paper in the product:
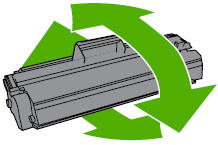
  1. Make sure that the stack of paper contains no more than 150 sheets of paper.
  2. Tap the stack of paper on a table or other flat surface to align the edges.
  3. Slide the paper into the main tray with the short edge toward the product and the print side up.
  4. Slide the paper width and paper length guides toward the stack of paper until they rest against the edges of the stack.
Issue four
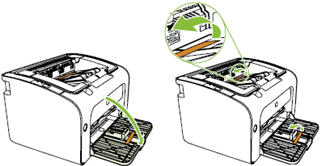
Packing material is inside the product.
Solution
  1. Remove any orange shipping tape and packing material from the paper tray and the output tray.
    Figure : Remove any tape and packing material
    Illustration:  Remove any tape and packing material from the paper tray and the output tray.
  2. Lift the print cartridge door.
    Figure : Lift the print cartridge door
    Image: Lift the print cartridge door.
  3. Remove any packing material from inside the product.
  4. Close the print cartridge door.
Issue five
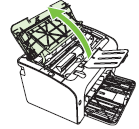
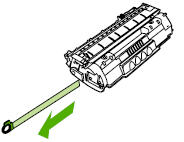
The print cartridge is not installed.
Solution
  1. Lift the print cartridge door.
    Figure : Lift the print cartridge door
    Image: Lift the print cartridge door.
  2. If you need to install a new print cartridge, remove the new print cartridge from the packaging. Otherwise, continue to the next step.
      caution:
    To prevent damage to the print cartridge, hold the print cartridge at each end.
  3. If you are installing a new print cartridge, pull the tab to remove all the sealing tape from the print cartridge. If your are reinstalling an existing print cartridge, make sure that there is no sealing tape on the print cartridge.
    Figure : Remove the sealing tape
    Illustration: Remove the sealing tape
  4. Gently rock the print cartridge back and forth to distribute the toner evenly.
    Figure : Rock the print cartridge
    Illustration: Rock the print cartridge.
  5. Insert the print cartridge, and then close the print cartridge door.
    Figure : Insert the print cartridge
    Illustration: Insert the print cartridge.
Figure : Attention and Ready lights on
Illustration: Attention and Ready lights on
Issue
The product experienced a fatal error.
Solution
  1. Press the Power button () to turn off the product.
  2. Wait 30 seconds, and then press the Power button () to turn on the product.
  3. If you have completed all the steps listed above and are still experiencing a problem, service the product.