solution Contentsolution Content

HP DeskJet 2540 Printers - Attention Light Blinks (Paper Jam)

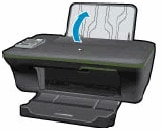
This document is for HP Deskjet 2546B, 2540, 2541, 2542, 2543, 2544, 2547, 2548, 2549, Deskjet Ink Advantage 2545, 2546, and 2548 All-in-One printers.
During printing, the printer stops, and the Attention light blinks. A blinking Attention light indicates that paper might be jammed inside the printer.
note:
Paper jams can be real or false. The printer might report a paper jam even when there is no jammed paper. The following steps apply to both real and false paper jams.
Figure : The Attention light blinks
Image: The Attention light blinks

Video overview

The following video demonstrates how to clear a paper jam.
note:
This video shows the HP DeskJet 2540 printer, but the steps are the same for your printer.
Fixing a Paper Jam for the HP Deskjet 1510, 2540, Deskjet Ink Advantage 1510, and 2540 All-in-One Printer Series
Learn to fix a Paper Jam for the HP Deskjet 1510, 2540, Deskjet Ink Advantage 1510, and 2540 All-in-One Printer Series.

Step 1: Clear jammed paper from the printer

Paper jams can occur in multiple areas of the printer. If you cannot find the paper jam in one area, continue to the next area until the jam is located.
You need a flashlight to complete some of these steps.
Figure : Flashlight
Image: Flashlight
Try to print, if the issue persists, check for jammed paper in another area of the printer.
If you have checked and removed any jammed paper from each printer area and the error persists, continue to the next step.

Step 2: Make sure the carriage can move freely

Make sure the carriage moves freely across the width of the printer.
  1. Turn on the printer, if it is not already on.
  2. Open the ink cartridge access door.
    Image: Opening the ink cartridge access door
  3. Wait until the carriage is idle and silent before you continue.
  4. With the printer turned on, disconnect the power cord from the rear of the printer.
      warning:
    You must unplug the power cord to move the carriage by hand and reset the paper feed mechanism without the risk of electrical shock.
  5. Check for any paper or objects that might be restricting the carriage, and then remove any paper or objects that you find.
      caution:
    If the paper tears when you remove it from the rollers, check the rollers and wheels for torn pieces of paper that might remain inside the printer. If pieces of paper remain in the printer, more paper jams can occur.
  6. Reach inside the printer through the ink cartridge access door, and then manually move the carriage.
    • If the carriage is stuck on the right side of the printer, move the carriage to the left side of the printer.
    • If the carriage is stuck on the left side of the printer, move the carriage to the right side of the printer.
    • If the carriage is stuck in the middle of the printer, move the carriage to the right side of the printer.
  7. Remove any loose paper or obstructions found.
  8. Make sure the carriage can move freely across the width of the printer. Firmly push the carriage to the left side of the printer, and then to the right side.
  9. Open the ink cartridge access door.
    Image: Opening the ink cartridge access door
  10. Reconnect the power cord to the rear of the printer, and then turn on the printer.
Try to print. If the error persists, continue to the next step.

Step 3: Clean ink smears

Cleaning ink smears can help clear paper jams and optimize print quality.
  1. Load paper into the input tray.
  2. Press and hold the Power button, press the Cancel button three times, press the Start Copy Color button eight times, and then release the Power button.
    The printer feeds one page slowly. The printer might make some noise for approximately one minute. Wait until the page is out of the printer before you remove it.
Try to print. If the error persists, continue to the next step.

Step 4: Clean the rollers

Cleaning the printer's paper feed rollers with an automated utility can help clear paper jams.
  1. Remove paper from the input tray.
  2. Press and hold the Power button, press the Cancel button three times, press the Start Copy Color button seven times, and then release the Power button.
    The printer makes noise for approximately one minute. Wait until the printer stops making noises before you proceed.
  3. Load paper into the input tray.
Try to print. If the error persists, continue to the next step.

Step 5: Manually clean the paper feed rollers

Dust, paper fiber, and other debris might accumulate on the paper feed rollers and cause paper jams and paper feed issues. Clean the rollers inside the printer, and then try to print again.
  1. Turn off the printer, and then disconnect the power cord.
      warning:
    Disconnect the power cord before reaching inside the printer to avoid risk of injuries or electric shock.
  2. Raise the input tray.
    Raising the input tray
  3. Look down through the open input tray and find the gray paper pick rollers. You might need a flashlight to illuminate the area.
    Location of the paper pick rollers
  4. Lightly dampen a lint-free cloth with distilled water, and then squeeze any excess liquid from the cloth.
  5. Press the cloth against the rollers and rotate them upward with your fingers. Apply a moderate amount of pressure to remove dust or dirt buildup.
  6. Allow the rollers to dry completely (approximately 10 minutes).
  7. Reconnect the power cord and any cables to the rear of the printer, and then turn on the printer.
Try to print. If the issue persists, continue to the next step.

Step 6: Reset the printer

Sometimes, the printer can display an error message even after the issue has been resolved. Reset the printer to clear the error.
  1. With the printer turned on, disconnect the power cord from the printer.
  2. Unplug the power cord from the power source.
  3. Wait 60 seconds.
  4. Reconnect the power cord to a wall outlet and to the printer.
    note:
    HP recommends plugging the printer directly into a wall outlet.
Try to print. If the error persists, continue to the next step.

Step 7: Service the printer

Service or replace your HP product if the issue persists after completing all the preceding steps.
Go to Contact HP Customer Support to schedule a product repair or replacement. If you are in Asia Pacific, you will be directed to a local service center in your area.
To confirm your warranty status, go to HP Product Warranty Check. Repair fees might apply for out-of-warranty products.