HP PCs - Change display settings, background image, icons, and screen saver (Windows 10)
Learn how to change text size, desktop background, icon size, screen saver, and other desktop or display settings in Windows.
Change the text size, display brightness, and screen resolution using display settings
You can modify the size of text and windows on the desktop to fit your personal preferences. You can also adjust the screen resolution, in addition to other display settings.
Note:
During a normal Windows installation, the program tests the graphics card and displays the optimal size and resolution for that card.
-
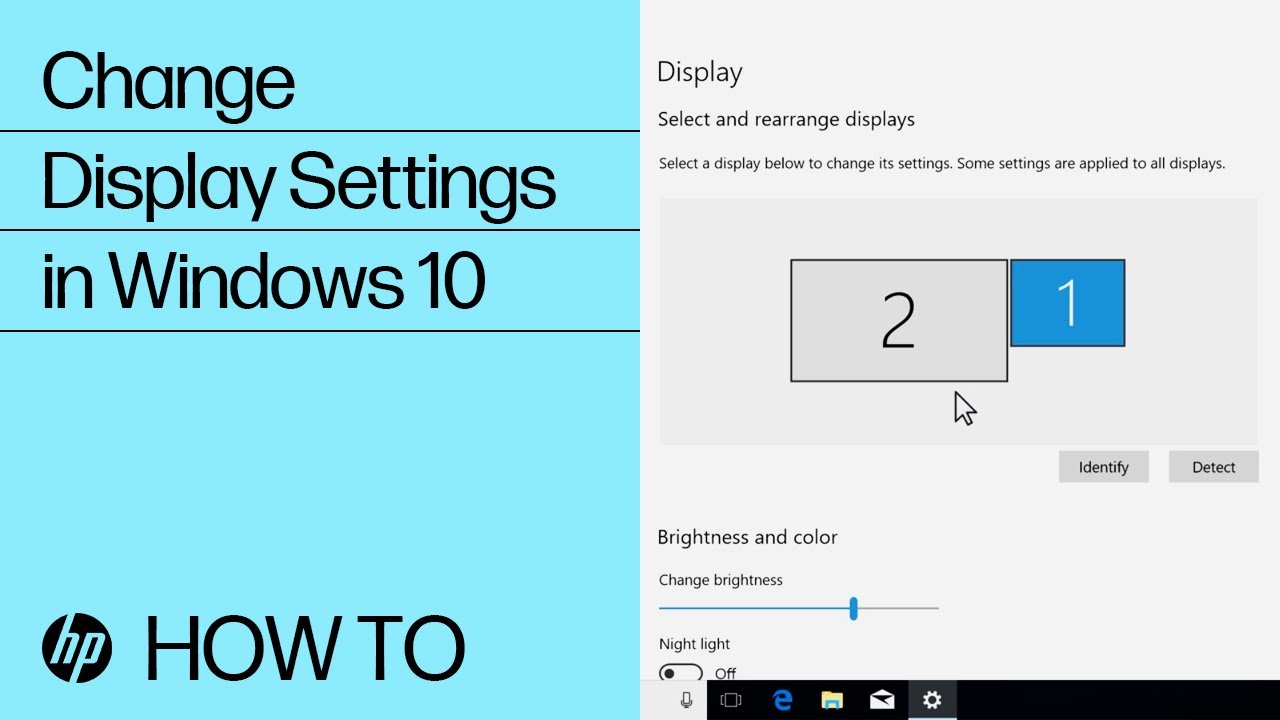
To change the Display orientation between Landscape and Portrait or to flip the orientation, select an option from the drop-down menu and then click Keep Changes or Revert.
-
To change the size of text and app windows, select the size you want from the drop-down menu. Changes take effect immediately.
-
To adjust the brightness, click and drag the slider bar under Brightness and color. Changes take effect immediately.
-
To reduce the amount of blue light coming from the display, turn on Night light. To schedule the night light and change the hue, click Night light settings.
-
To change the Display resolution, select a resolution from the drop-down menu and then click Keep Changes or Revert.
Note:We recommend in most circumstances to use the native resolution of the monitor, which is marked as Recommended.
If you have more than one monitor, select the monitor that you want to adjust and then repeat these steps to change the resolution. A confirmation window is displayed.
Additional methods to change text or object size
Learn to make objects in Windows, such as desktop icons or text, larger or smaller. Also, zoom in or out in applications and webpages to make objects and text display larger or smaller.
Zoom using the scroll wheel on the mouse
If you have a mouse with a scroll wheel, you can use it to make objects (such as desktop icons or a webpage) larger or smaller.
-
Click anywhere on the Windows desktop or open the webpage that you want to view.
-
Press and hold the ctrl key on your keyboard.
-
Roll the scroll wheel on the mouse to shrink or enlarge the objects on the screen.
Zoom using the keyboard
You can use your keyboard to zoom in or out. This method works in many applications and web browsers.
-
Click anywhere on the Windows desktop or open the webpage that you want to view.
-
Press and hold the ctrl key, and then simultaneously press either the + (plus sign) or - (minus sign) key to make objects on the screen larger or smaller.
-
To restore normal view, press and hold the ctrl key, and then press 0.
Adjust the text size in Windows Ease of Access settings
Open accessibility settings to adjust the size settings for text and other items.
-
Move the slider bar under Make text bigger to enlarge or shrink the size of text, and then click Apply.
-
Under Make everything bigger, use the dropdown menu to select the size of apps and text on the main display.
Note:If you have more than one monitor, click Change the size of apps and text on other displays to select another display to configure.
Zoom using the TouchPad (Notebook PCs only)
If you have a notebook computer with a TouchPad, use the pinch gesture on the TouchPad to shrink or enlarge objects on the screen.
-
Zoom in (make larger): Move 2 fingers apart
-
Zoom out (make smaller): Move 2 fingers together
To ensure that the pinch gesture is enabled:
-
Under Scroll and zoom, select Pinch to zoom.
Adjust zoom in Microsoft Edge
Adjust the zoom in Microsoft Edge using keyboard shortcuts or the Microsoft Edge menu.
-
Zoom using the keyboard: Press and hold ctrl, and then simultaneously press either the + (plus sign) or - (minus sign) key to make objects on the screen larger or smaller.
-
Zoom using Microsoft Edge: With Microsoft Edge open, click the three dots
on the top right-hand side of the screen, and then click either + (plus sign) or - (minus sign) next to the Zoom option to make objects on the screen larger or smaller.
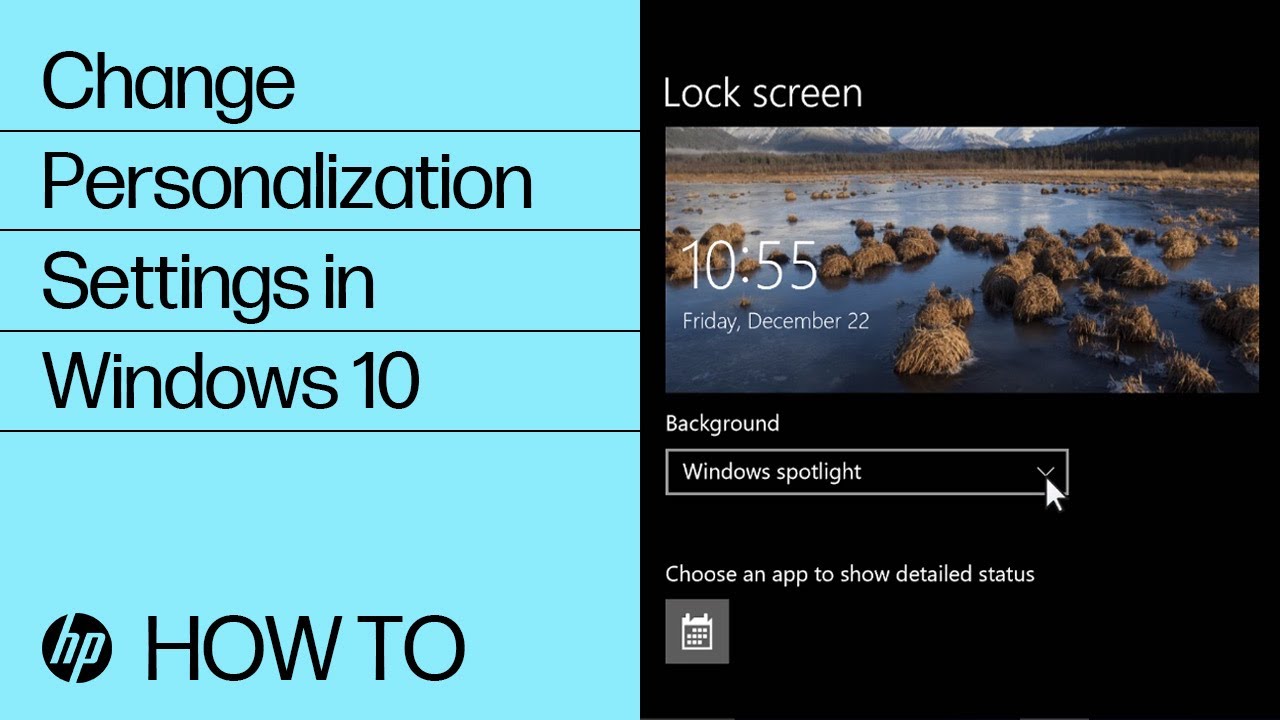
Change the Windows desktop background
You can personalize the pattern or image on the Start screen background.
-
To change the image or color that displays in the background, select Picture, Solid color, or Slideshow from the drop-down menu.
-
To change the way the picture displays on the background, select Fill, Fit, Stretch, Tile, Center, or Span from the drop-down menu. Changes take effect immediately.
Adjust the desktop icons
Change settings to adjust the appearance of icons, display missing desktop icons, and add new folders or shortcuts to the desktop.
Adjust the size of desktop icons
You can change the size of the icons on a Windows desktop.
To change the size of desktop icons, right-click an open area of the desktop, select View and then click Large icons, Medium icons, or Small icons.
Note:
To quickly adjust the size of all icons at once, click an open area of the desktop, and then press and hold the ctrl key and use the scroll wheel on the mouse.
Rename a desktop icon
You can rename a desktop icon.
-
Type the new name, and then press enter.
Display missing desktop icons
If all desktop icons are missing, you can restore them using this step.
If all desktop icons are missing, right-click an open area of the desktop, select View, and then make sure that Show desktop icons is selected.
Create a new folder
To create a new folder that is displayed on the desktop, use the following procedure.
-
Type a name for the folder, and then press enter.
Create a new shortcut on the desktop
To create a new shortcut on the desktop, drag and drop apps from the Start menu to the desktop.
You can also right-click an open area of the desktop, select New, and then select Shortcut. Follow the on-screen instructions to create the shortcut.
Change the appearance of windows and text for Windows features
You can personalize the appearance of Windows by choosing text colors, text background, window borders, and many other elements. You can also choose the font and size of text for different Windows features, such as menu items.
-
Adjust the settings. Changes take effect immediately.
Additional display settings
Open the advanced display settings or display adapter properties to view the modes, set the refresh rate, or manage the color and other advanced settings.
-
Open the advanced display settings by searching for and opening Display settings in Windows. You can also right-click the desktop and open Display settings. Scroll down and click Advanced display settings.
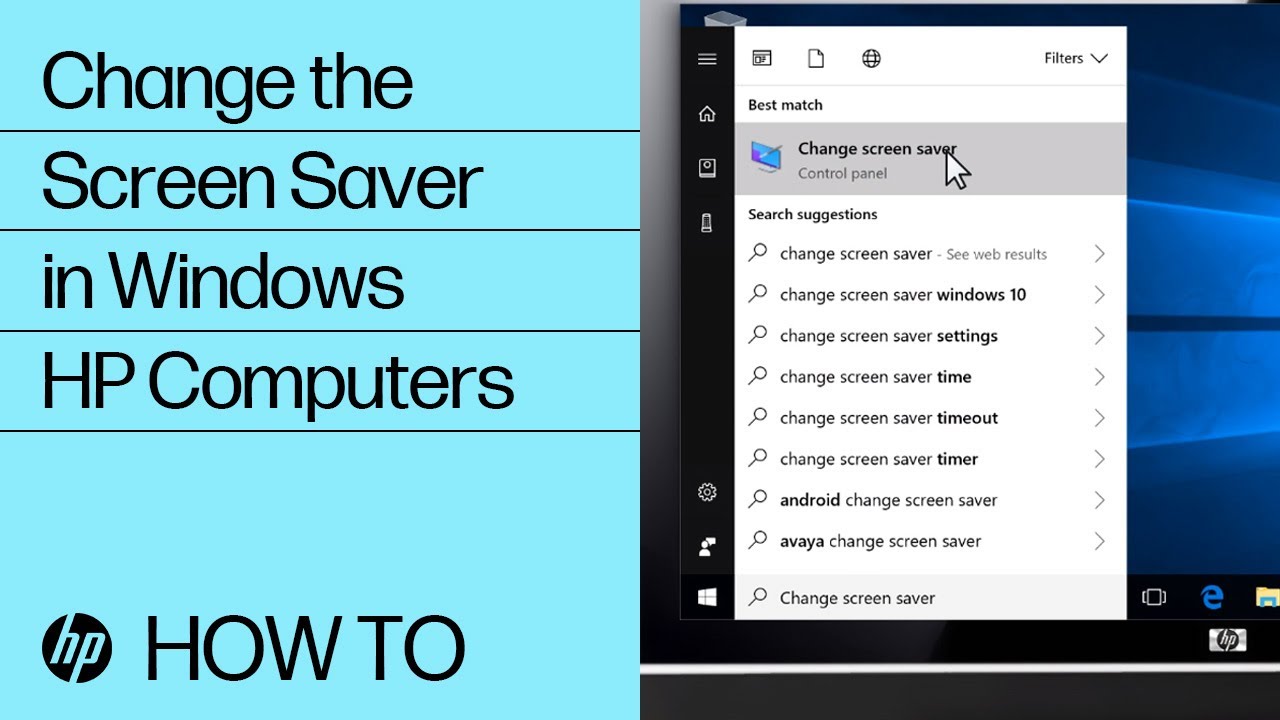
Change the screen saver
Windows is preloaded with a number of screen savers that you can choose from.
-
Select a screen saver from the menu.
Troubleshoot the screen saver
If the screen saver does not open after the selected time has elapsed, the issue might be due to activity from certain hardware devices. Use Device Manager settings to prevent these hardware devices from interfering with the screen saver.
-
Click the Power Management tab, and then remove the selection from Allow this device to wake the computer.
Note:If you prevent the mouse from waking the computer, you can wake the computer using the spacebar on the keyboard.
Enter a topic to search our knowledge library
What can we help you with?

Need Help?