This information applies to the HP 3D Capture Stage accessory for the Sprout by HP
Sprout by HP - Using the HP 3D Capture Stage with your Sprout by HP
The HP 3D Capture Stage makes 3D scanning with Sprout easy. Place an object on the stage, tap Scan, and it automatically works with the scanning process.
The HP 3D Capture Stage automates a full 360-degree scan, rotating and capturing the object. An automatic 15-degree tilt ensures all aspects of the project are captured.
Before you begin
Use this information to learn how to capture the best possible 3D scan.
-
Sprout scans certain types of objects better than others. Models made from objects that are matte, solid, non-transparent, and not too thin are more successful than models made from shiny, furry, flat, or transparent objects.
-
Objects larger than 8x8x8 inches (20x20x20 cm), or weighing more than 4 pounds (1.81 kg) cannot be scanned.
-
The lighting around your Sprout should be even and direct sunlight should be avoided.
-
Use non-permanent adhesive putty to help position your object during the scan.
-
To view a video showing best practices for 3D scanning, tap the Question mark
 icon on the right side of the Choose capture type screen. Then tap the 3D Capture tutorial video. When you have finished viewing the video, tap the arrow
  button to close the help screen.
Use the following steps to create a 3D image model using the HP 3D Capture Stage.
-
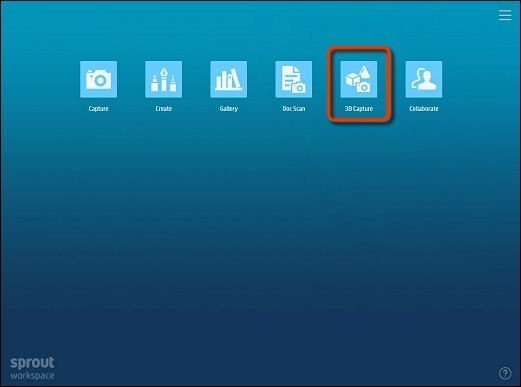
To create a new 3D model, touch 3D Capture on the Sprout Home screen.Figure : 3D Capture on Sprout Home Screen
-
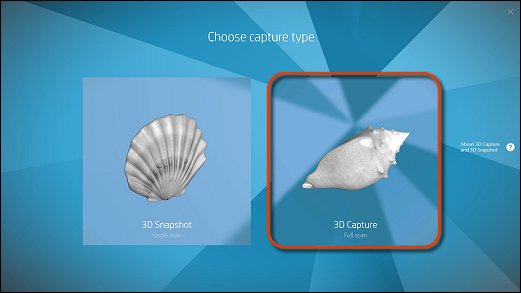
Touch the 3D Capture option in the selection window that opens.Figure : 3D Capture selection in the 3D Capture menu
-
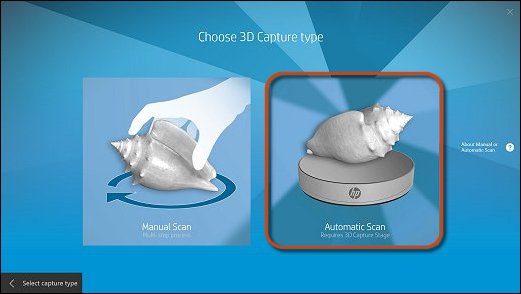
Touch the Automatic Scan option on the screen.Figure : The Automatic Scan option
-
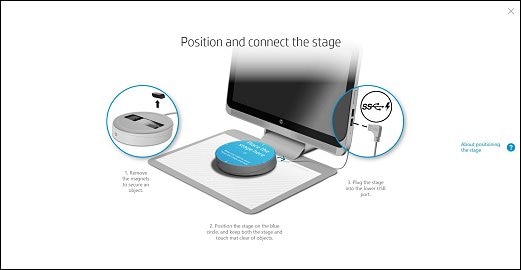
Position the stage and connect it to the bottom USB port of Sprout.Figure : Position and connect the stage
-
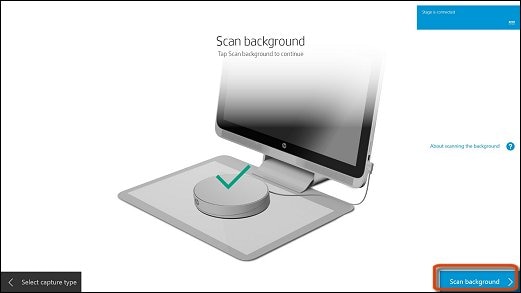
When the stage is connected, you will be prompted to scan the background.To scan the background, touch the Scan background button on the screen.Make sure the stage and mat are clear during the background scan.Do not move the stage during or after the background scan process.Figure : Scan background
-
When the background scan is complete, place the object securely on the stage. Adhesive putty may be needed to keep the object in place. Make sure that putty is not visible. Any visible putty will be scanned as part of the object.
note:
From this point on, if you navigate away from the app, your scan will be lost and must be started over. -
Before the first scan cycle, Sprout analyzes the object.Figure : Sprout analyzing the object

-
Once the object has been analyzed, Sprout builds a rough projection of what the object looks like.To begin the first scan cycle, touch the Start scan button on the screen to begin the scan.Sprout performs eight separate scans to complete one scan cycle. During this process the stage will automatically rotate until it has completed the eight steps in the scan cycle. You can tap Quit cycle to stop the scan and start over.Figure : Finished analysis

-
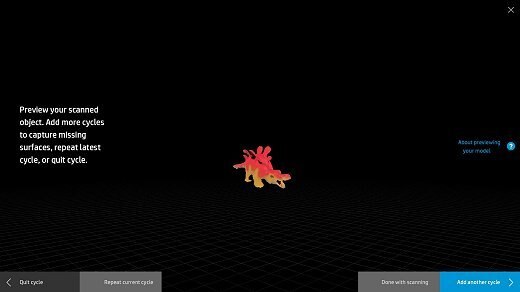
At the end of the scan cycle, Sprout will merge the scanned surfaces of the eight different views. Do not touch or move the object during this process.You have the options of saving your model as it is, quitting the scan process without saving your model, or scanning a different surface of the object in a new scan cycle. Adding another scan cycle will give a more complete picture of the object and will result in a better, more detailed model.Figure : Scan cycle complete
-
To add another scan cycle, touch the Add another cycle button on the screen.If the object moves at all during the scan, quit the cycle and try again.To redo the scan, touch the Repeat current cycle button on the screen.To quit the current scan cycle or full scan, touch the Quit cycle button on the screen.When you are ready to finalize your model, touch the Done with scanning button on the screen to save your model and exit scanning.
-
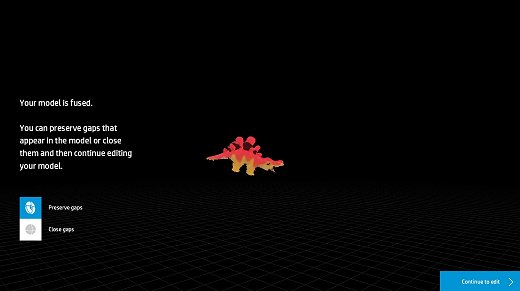
When you are done scanning, Sprout asks if you want to fill or preserve the gaps in the model.To preserve the gaps, touch the Preserve gaps button on the screen. If your object has an opening, a keyhole, or lacy cutouts, use Preserve gaps to maintain the holes.To fill the gaps, touch the Fill gaps button on the screen. If your object has no natural holes or openings, use Fill gaps to smooth your model out.Figure : Close or preserve gaps
-
3D Viewer opens your model for editing.
Enter a topic to search our knowledge library
What can we help you with?

Need Help?