This document is for the Officejet Pro 8600, 8610, 8615, 8620, 8630, 8640, and 8660 e-All-in-One printer series and the optional second paper input tray.
Installing the Optional Paper Tray 2 on the HP Officejet Pro 8600, 8610, 8615, 8620, 8630, 8640, and 8660 e-All-in-One Printer Series
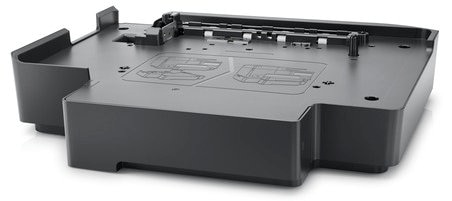
Some printers have the option of adding a second paper input tray (also known as Tray 2) which is a useful accessory that allows for larger printing jobs. Follow these steps to install Tray 2 onto the base of the printer.
Figure : Example of Tray 2
Video of installing Tray 2
The following video demonstrates how to install Tray 2.
note:This video shows the HP Officejet Pro 8630 e-All-in-One Printer series, but the steps are the same for your printer.

Installing the 2nd tray on the HP Officejet Pro Printers
Learn how to install the 2nd paper input tray on the HP Officejet Pro 8600, 8610, 8615, 8620, 8630, 8640, and 8660.
If you have trouble viewing the video or to view the video in a different size, click here to play the video on YouTube.
Step 1: Turn off the printer
To avoid damaging your printer, turn it off before attempting to install Tray 2.
-
Press the Power button to turn off the printer.
-
Unplug the power cord from the electrical outlet.
Step 2: Install Tray 2
Follow these steps to connect Tray 2 to your printer.
-
Place Tray 2 on a flat level surface next to your printer.
-
Carefully lift and then place your printer on top of Tray 2.
warning:
The printer is heavy, and might require a second person to help safely lift and place the printer on top of Tray 2.Figure : Example of installing Tray 2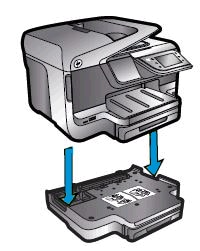
caution:
Keep your fingers and hands clear of the bottom of the printer. -
Make sure that the printer is even with the left and rear edges of the tray.
Step 3: Turn on the printer
Follow these steps to turn on the printer.
-
Plug the power cord into an electrical outlet.
-
Press the Power button to turn on the printer.
Step 4: Set Tray 2 as the default tray (optional)
Follow these steps to set Tray 2 as the default paper tray using the printer control panel.
note:By default, the printer pulls paper from Tray 1. If Tray 1 is empty and Tray 2 is installed and has paper loaded, the printer pulls paper from Tray 2.
-
From the printer control panel, swipe your finger across the screen or touch the down arrow, and then touch Setup.
-
Touch Tray Setup, touch Default Tray, and then touch Tray 2.
Enter a topic to search our knowledge library
What can we help you with?

Need Help?