solution Contentsolution Content

HP ENVY, DeskJet Printers - The Resume Light and Ink Alert Lights Blink

This document is for the following printers:
Printer Model
HP ENVY 5530 e-All-in-One Printer
HP ENVY 5536 e-All-in-One Printer
HP ENVY 5531 e-All-in-One Printer
HP ENVY 5539 e-All-in-One Printer
HP ENVY 5532 e-All-in-One Printer
HP Deskjet Ink Advantage 4515 e-All-in-One Printer
HP ENVY 5534 e-All-in-One Printer
HP Deskjet Ink Advantage 4518 e-All-in-One Printer
HP ENVY 5535 e-All-in-One Printer
A 'Carriage Jam: Clear carriage jam' message displays on the printer control panel. The carriage, which holds the cartridges, stalls in the printer. The printer might have had a paper jam previously.
You might also experience the following symptoms:
  • The printer does not print.
  • The print job stops unexpectedly.
Important: You must follow these solutions in the order presented to resolve the issue.
Solution one: Make sure that the carriage can move freely

Follow these steps to make sure that the carriage moves freely across the width of the printer.

Step one: Check the carriage path for obstructions

  1. Press the Power button to turn on the printer, if it is not already on.
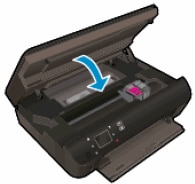
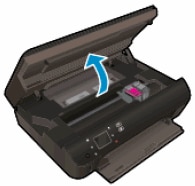
  2. Open the cartridge access door.
    note:
    The carriage might try to move into the access area. If it does, allow it to move to that position.
    Figure : Open the cartridge access door
    Image: Open the cartridge access door.
  3. With the printer turned on, disconnect the power cord from the rear of the printer.
      warning:
    To avoid the risk of electrical shock, you must unplug the power cord before moving the carriage by hand and resetting the paper feed mechanism.
  4. Check for, and then remove, any loose paper or objects that might be restricting the carriage.
    note:
    Use a flashlight to thoroughly check for torn pieces of paper that might remain inside the printer. If any torn pieces of paper remain inside the printer, more jams might occur.
  5. Reach into the cartridge access area, and then manually move the carriage.
    • If the carriage is stuck on the right side of the printer, move the carriage to the left side of the printer.
    • If the carriage is stuck on the left side of the printer, move the carriage to the right side of the printer.
    • If the carriage is stuck in the middle of the printer, move the carriage to the right side of the printer.
  6. Remove any additional loose paper or objects.
  7. Make sure that the carriage can move freely across the width of the printer by gently pushing the carriage to the left, and then to the right.
  8. Close the cartridge access door.
    Figure : Close the cartridge access door
    Image: Close the cartridge access door.
  9. Reconnect the power cord to the rear of the printer.
  10. Press the Power button to turn on the printer.
  11. Touch OK to clear any messages on the printer control panel.

Step two: Print a Printer Status Report

Print a test page to make sure that the hardware functions correctly.
  1. Load plain white paper in the input tray, if it is not already loaded.
    note:
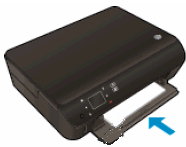
    Make sure that the input tray door remains open while you are printing.
    Figure : An example of the printer with the input tray door open
    Image: An example of the printer with the input tray door open
  2. On the printer control panel, touch the Settings icon (), and then touch Tools.
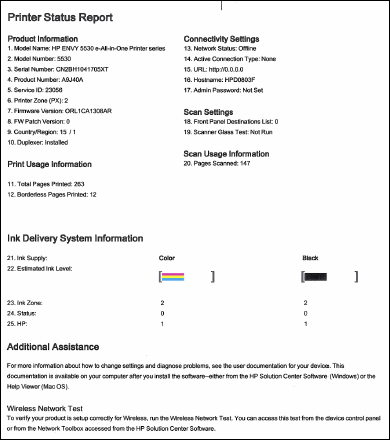
  3. Touch Printer Status Report. The printer prints the test page.
    Figure : Example of a Printer Status Report
    Image: Example of a Printer Status Report
  • If these steps resolved the issue and the test page prints, you can stop troubleshooting.
  • If these steps did not resolve the issue or the test page did not print, continue to the next solution.

Solution two: Remove and reinsert the cartridges

Improper placement or installation of the cartridges can cause the printer to indicate a carriage jam error. Follow these steps to remove, and then reinsert the cartridges.

Step one: Remove and reinsert the cartridges

  1. Press the Power button to turn the printer on, if it is not already on.
  2. Open the cartridge access door. The carriage moves to the cartridge access area. Wait until the carriage is idle and silent before continuing.
    Figure : Open the cartridge access door
    Image: Open the cartridge access door.
  3. To release the cartridge, lift the lid on the cartridge slot, and then gently push the lid back until it stops.
  4. Pull up on the cartridge to remove it from the slot.
      Figure : Remove the cartridge
      Image: Remove the cartridge.
    1. Lift the lid
    2. Gently push the lid back
    3. Pull up on the cartridge
      caution:
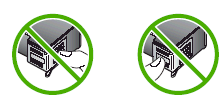
    Do not touch the copper-colored contacts or the ink nozzles. Touching these parts can result in clogs, ink failure, and bad electrical connections.
    Figure : Do not touch the contacts or nozzle
    Image:  Do not touch the contacts or nozzle.
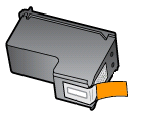
  5. Remove any protective tape that still might be on the nozzles.
    Figure : Remove any protective tape that still might be on the nozzles
    Image:  Remove any protective tape that still might be on the nozzles.
      caution:
    Do not try to remove the copper-colored electrical strip.
  6. Hold the cartridge at a slight upward angle with the cartridge contacts facing the rear of the printer, and then slide the cartridge into the empty slot.
  7. Close the lid on the cartridge slot to secure the cartridge into place.
    note:
    Insert the color cartridge in the slot on the left. Insert the black cartridge in the slot on the right.
      Figure : Insert the cartridge
      Image: Insert the cartridge.
    1. Insert the cartridge
    2. Close the lid
    3. The color cartridge is on the left, and the black cartridge is on the right
  8. Repeat the previous steps to remove, and then reinsert the other cartridge.
  9. Close the cartridge access door.
    Figure : Close the cartridge access door
    Image: Close the cartridge access door.

Step two: Print a Printer Status Report

Print a test page to make sure that the hardware functions correctly.
  • If these steps resolved the issue and the test page prints, you can stop troubleshooting.
  • If these steps did not resolve the issue or the test page did not print, continue to the next solution.

Solution three: Plug the printer directly into a wall outlet

Follow these steps to plug the printer directly into a wall outlet, and then print a test page.

Step one: Plug the printer directly into a wall outlet

  1. Disconnect the power cord from the rear of the printer.
  2. Unplug the power cord from any power strips or surge suppressors.
  3. Plug the power cord directly into an electrical outlet.
  4. Reconnect the power cord to the rear of the printer.
  5. Turn on the printer.

Step two: Print a Printer Status Report

Print a test page to make sure that the hardware functions correctly.
  • If these steps resolved the issue and the test page prints, you can stop troubleshooting.
  • If these steps did not resolve the issue or the test page did not print, continue to the next solution.

Solution four: Service the printer

Service or replace your HP product if the issue persists after completing all the preceding steps.
Go to Contact HP Customer Support to schedule a product repair or replacement. If you are in Asia Pacific, you will be directed to a local service center in your area.
To confirm your warranty status, go to HP Product Warranty Check. Repair fees might apply for out-of-warranty products.