solution Contentsolution Content

HP LaserJet Pro M1212nf, M1213nf, M1217nfw, and M1219nf Multifunction Printers - A 'Supply Memory Error' Message Displays on the Printer Control Panel

The document is for the HP LaserJet Pro M1212, M1213, M1217, and M1219 Multifunction Printers.
The printer performs correctly, but 'Supply Memory Error' displays on the control panel.
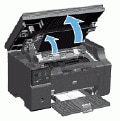
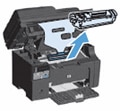
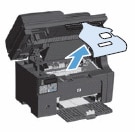
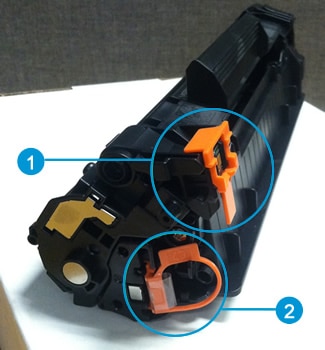
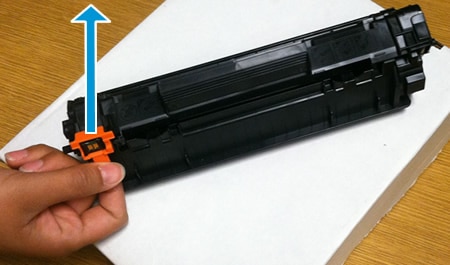
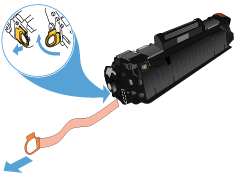
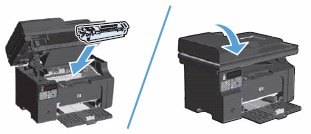
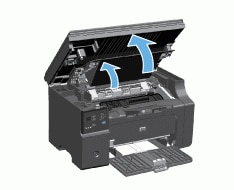
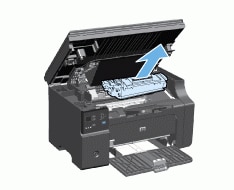
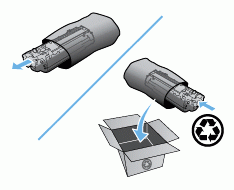
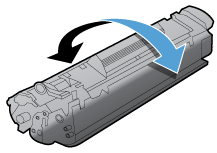
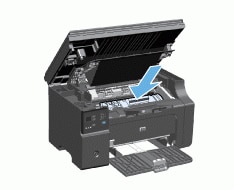
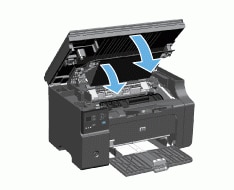
To resolve this error, make sure that there is not any packing material in the printer or on the print cartridge, or replace a defective cartridge.

Solution 1: Make sure that there is no packing material inside the printer

Typically, this error message is caused by packing material left inside the printer. Follow these steps to remove all packing material from inside the printer.
  1. Openthe cartridge access door.
    Figure : Open the cartridge access door
    Image: Open the cartridge access door.
  2. Lift up the paper packing material, but do not remove it.
    Figure : Lift the paper packing material
    Image: Lift the paper packing material.
  3. Remove the print cartridge packing material.
    Figure : Remove the print cartridge packing material
    Image: Remove the print cartridge packing material.
  4. Remove the print cartridge fromthe printer.
      caution:
    To prevent damage to the print cartridge, hold the printcartridge at each end.
    Figure : Remove the print cartridge
    Image: Remove the print cartridge.
  5. Remove the packing material from inside the printer.
    Figure : Remove the packing material from inside the printer
    Image: Remove the packing material from inside the printer
  6. Check the cartridge for any orange tabs.
      Figure : Check the cartridge for any orange tabs
      Image: Check the cartridge for any orange tabs
    1. The orange clip
    2. The orange sealing tape
  7. Remove the orange clip from the end of the print cartridge. Pull up on the orange clip until it breaks off the print cartridge.
    Figure : Remove the orange clip from the print cartridge
    Image: Remove the orange clip from the print cartridge.
  8. Gently rock the print cartridge back and forth to distribute the toner evenly.
    Figure : Rock the print cartridge
    Image: Rock the print cartridge
  9. Bend the tab on the left side of the print cartridge until the tab breaks loose. Pull the tab to remove all the sealing tape from the print cartridge.
    Figure : Remove the sealing tape
    Image: Remove the sealing tape.
      caution:
    If toner gets on your clothes, wipe it off with a dry cloth, and then wash the clothing in cold water. Hot water sets toner into the fabric.
  10. Insert the print cartridge, and then close the print cartridge door.
    Figure : Insert the print cartridge, and then close the door
    Image: Insert the print cartridge, and then close the door.
  11. Check the control panel for any error messages.

Solution 2: Replace the print cartridge

The print cartridge sensors might not be functioning correctly. If your print cartridge is a genuine HP print cartridge, it might be under warranty. HP warranties do not cover non-HP, refilled, or depleted print cartridges.

Step 1: Make sure that you have a genuine HP print cartridge

Purchase replacement cartridges and other supplies from the HP Store or local retailers.

Step 2: Replace the cartridge

If you are not using a genuine HP print cartridge, the print cartridge is empty, or the print cartridge is defective, follow these steps to replace the cartridge.
If you have a defective cartridge or printhead, it might be under warranty. To check the warranty on your ink or toner supplies, go to Printer and Page Yield Overview, and then review the limited warranty information for your supplies.

Video of replacing the print cartridge

The following video demonstrates how to replace a print cartridge.
note:
This video shows an HP LaserJet M1212 Multifunction printer, but the steps are the same for your printer.
Replace the toner cartridge | HP LaserJet Pro M1212nf
If the printer is low or out of toner, follow this video to learn how to replace, change, or install a toner cartridge in your HP printer. The printer shown in this video is the HP LaserJet Pro M1212nf Multifunction Printer, and the steps shown also apply to the M1213, M1214, M1216, M1217, and M1219 printers. Visit https://learn-about-supplies.ext.hp.com/#page-yield to check for compatible toner cartridges and page yields.
If you have trouble viewing the video or to view the video in a different size, click here to play the video on YouTube.
  1. Lift the scanner assembly, and open the print cartridge door.
    Figure : Open the scanner and print cartridge door
    Image: Open the print cartridge access door
  2. Remove the old print cartridge.
    Figure : Remove the print cartridge
    Image: Remove the print cartridge
  3. Remove the new print cartridge from the packaging. Place the used print cartridge in the bag and box for recycling.
    Figure : Recycle the used print cartridge
    Image: Unpack the new cartridge
      caution:
    To prevent damage to the print cartridge, hold the print cartridge at each end. Do not touch the cartridge shutter or the roller surface.
  4. Remove the orange clip from the end of the print cartridge. Pull up on the orange clip until it breaks off the print cartridge.
    Figure : Remove the orange clip from the print cartridge
    Image: Remove the orange clip from the print cartridge.
  5. Pull the sealing tape tab until all the tape is removed from the cartridge, and then place the tab and tape in the print cartridge box to return for recycling.
    Figure : Remove the sealing tape
    Image: Remove the sealing tape.
  6. Grasp both sides of the print cartridge and gently rock the print cartridge to distribute the toner evenly inside the cartridge.
    Figure : Rocking motion
    Image: Rock the cartridge
  7. Install the print cartridge.
    Figure : Install the print cartridge
    Image: Install the print cartridge
  8. Close the print cartridge door and the scanner assembly.
    Figure : Scanner and print cartridge door
    Image: Close the cartridge access door
      caution:
    If toner gets on your clothes, wipe it off with a dry cloth and wash the clothing in cold water. Hot water sets toner into the fabric.

Solution 3: Service the printer

If you have completed the previous steps in this document and the error persists, there might be issues with the sensors in the printer.
Service or replace your HP product if the issue persists after completing all the preceding steps.
Go to Contact HP Customer Support to schedule a product repair or replacement. If you are in Asia Pacific, you will be directed to a local service center in your area.
To confirm your warranty status, go to HP Product Warranty Check. Repair fees might apply for out-of-warranty products.