solution Contentsolution Content

HP Deskjet F300 Series All-in-One - Streaks or Lines in the Printed Image

This document applies to the following all-in-one products:
  • HP Deskjet F310, F325, F335, and F340
  • HP Deskjet F350, F370, F378, F380, F385, F388, F390, and F394

Issue

The printer is working, but printed output shows streaks or lines. The lines are perpendicular to the direction the paper moved through the printer and parallel to the movement of the cartridges during printing.
Figure : Defect, with the direction the paper moved through the printer indicated

Solution

Step one: Check the ink levels

note:
The ink levels in non-HP, refilled, or remanufactured cartridges cannot be accurately read by the product.
  1. Open HP Solution Center using the steps appropriate for the computer operating system.
    • Windows Vista: On the Windows taskbar, click the Windows icon (), point to Programs, point to HP, and then click HP Solution Center.
    • Windows XP: On the Windows taskbar, click Start, point to All Programs, point to HP, and then click HP Solution Center.
  2. In HP Solution Center, click Settings.
  3. Click Print Settings.
  4. Click Printer Toolbox.
    note:
    You can also open the Printer Toolbox from the Print Properties dialog box. In the Print Properties dialog box, click the Services tab, and then click Service this device.
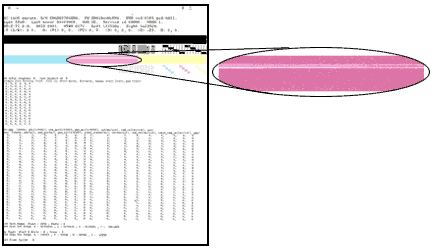
  5. Click the Estimated Ink Levels tab.
    Figure : Estimated ink levels - both cartridges low
    Estimated ink levels
    note:
    A cartridge might be running out of ink even if the graphic shows that there is ink remaining in the cartridge. Lines or streaks always appear in printouts when the cartridges begin to run out of ink.
Replace cartridges that are out of ink or low on ink. If the cartridges are not low or empty, continue to the next step now.

Step two: Check the print settings

  1. In the software application you are trying to print from, click File and then click Print. The Print dialog box opens.
  2. Verify that your printer is selected and then click Properties. The printer Properties dialog box opens.
  3. Click the Printing Shortcuts tab.
  4. In the What do you want to do? menu, select a task.
    The What do you want to do? menu lists most printing needs, but you might need to modify some of the options.
    Options on the Printing Shortcuts tab include:
    • Print quality: If you are unhappy with the quality of your printouts, try increasing the print quality. To print more quickly, try decreasing the print quality.
    • Paper type: If one of the options matches your paper type exactly, choose it rather than Automatic.
    • Paper size: Make sure this matches your paper.
    Additional options: click the Basics tab, then click Advanced Features. The Advanced Features window opens.
    • Ink volume: Adjusts the amount of ink printed on a page. For lighter images (less ink), drag the slider to the left. For darker images (more ink), drag the slider to the right. The lighter the ink volume, the faster the printout will dry.
    • Dry time: Provides extra drying time for slow-drying printouts. Drag the slider to the left for less drying time, or to the right for more drying time. The printer will hold onto the printout until the dry time has elapsed.

Step three: Run the clean print cartridges utility

  1. Make sure that there is plain white paper in the input tray.
  2. Open the Printer Toolbox.
    1. Open HP Solution Center.
    2. Click Settings.
    3. Click Print Settings.
    4. Click Printer Toolbox. The Printer Toolbox dialog box displays.
    note:
    You can also open the Printer Toolbox from the Print Properties dialog box. In the Print Properties dialog box, click the Services tab and then click Service this device.
  3. Click the Device Services tab.
  4. Click Clean the Print Cartridges.
  5. Follow the instructions that display on the screen.
  6. Examine the test page that prints. If the print quality of the page is good, click Done and stop here. If the print quality is bad, proceed to the next step.

Step four: Print a self-test page

If the steps above have not helped, print and evaluate a self-test page to determine if the cartridges or printer is causing the problem.
  1. Load the input tray with unused plain white paper.
  2. Press and hold the Cancel () button and then press the Start Copy Color () button.
  3. Release both buttons. The self-test page prints.
    Figure : HP Deskjet F300 series self-test page

Step five: Note which cartridges printed which areas of the self-test page

You must identify which cartridge printed which part of the self-test page, so that if you find defects on the page, you will know which cartridge is the problem.
However, you can install different combinations of print cartridges in your printer, and different cartridge combinations print different self-test page patterns. Your self-test page may not look exactly like the picture below, but the right and left cartridges will print in the same areas of the page no matter which cartridges are installed.
    Figure : Self-test page layout
  1. Printed by the right cartridge
  2. Printed by the left cartridge

Step six: Look for defects

In general, if the printer and print cartridges are working properly, the patterns (which look like grids of lines) should contain few or no missing lines. None of the colors should be missing and the colors of the blocks at the bottom of the page should match the labels below each block. Also, there should be no streaks of ink on the report.

Missing lines or streaked bars

If a pattern shows more than a few missing lines, or a bar is streaked, that print cartridge is not functioning properly.
Figure : The magenta pattern shows missing lines and the bar is streaked
If the self-test page shows missing lines or streaked bars, click here to continue troubleshooting.

Color mix

If any of the colors of the bars are very different from the color dots on the cartridge label, the cartridge is not functioning properly.
Figure : One of the bar colors is very different from the color dot on the cartridge
If your self-test page shows colors that are very different from the colors on the cartridge label, click here to continue troubleshooting.

Missing colors

If any of the color patterns or bars are entirely missing, the cartridge is not functioning properly.
note:
If you are printing in reserve mode, without all the cartridges installed, the patterns associated with the missing cartridge will also be missing.
    Figure : Missing colors
  1. All colors printed - no missing colors
  2. Yellow missing - the tri-color (left-side) cartridge is not printing properly
If any of the patterns or bars are entirely missing, click here to continue troubleshooting.

Ink smears

If the self-test report shows smeared ink, you might need to clean your cartridges.
Figure : Smeared ink
If the self-test report shows smeared ink, click here to continue troubleshooting.

Step seven: If you saw no defects

If no defects appear on the diagnostic page, the cartridges and product are probably working correctly. Click here to continue troubleshooting (c00635950) (in English).