This document is for the HP Designjet T120 and T520 ePrinters.
This document has troubleshooting steps for unsuccessful loading of media rolls, single sheets of paper, multi-sheets of paper, and paper loading error messages.
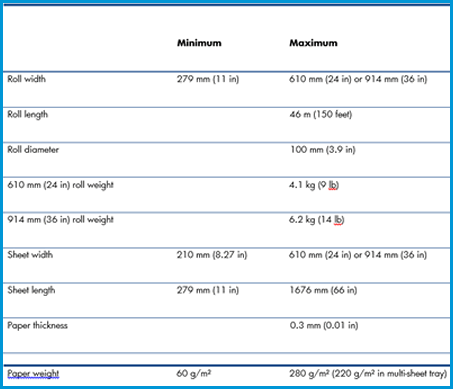


 to stop the load process. See Functional specifications.
